Applies to versions: 3.0, 3.1
Time Edit/Report
The Time Edit/Report interface is designed to be a quick, simple, easy to use yet powerful and flexible tool for viewing employee worked time, benefit time, and holiday time. This support article will walk you through the basics of the interface itself for the most common tasks, and also explore some of the features and options that make the Time Edit/Report a powerful tool for running your business.
NOTE: The IPSPRM Module provides access to the Time Edit/Report Interface which is controlled by the Clock Events permission. Any employee that can view worked time will be able to access the interface itself. The content of the reports are restricted by the Employee's permission to view Clock Events, Benefits, and Holiday Events for other employees. These reports will be restricted by these permissions as well.
Using the left pane Main Menu under Administration, click on: Reports » Time Edit/Report
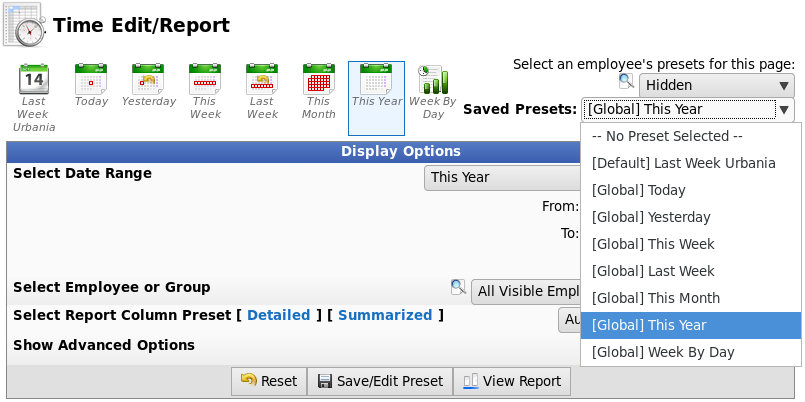
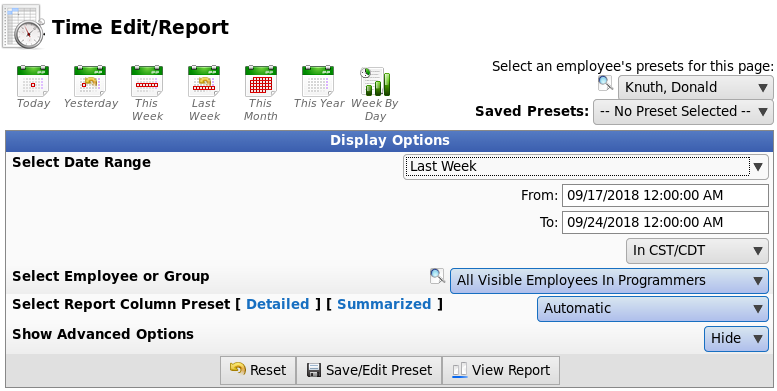
Generate a Report Using Presets
- Choose a Saved Preset from the drop down menu or click on the associated Short Cut icon across the top.
This will populate the Date Range, Employees, and Columns to display, as well as any advanced options you might have included.
- Click on the View Report button to display the report.
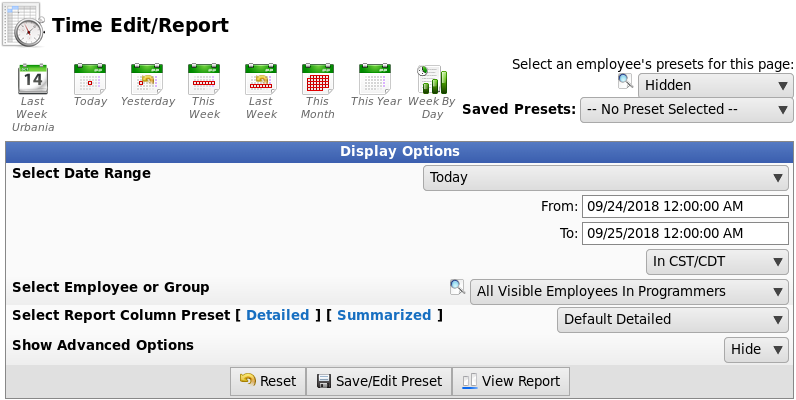
Generate a Report Manually
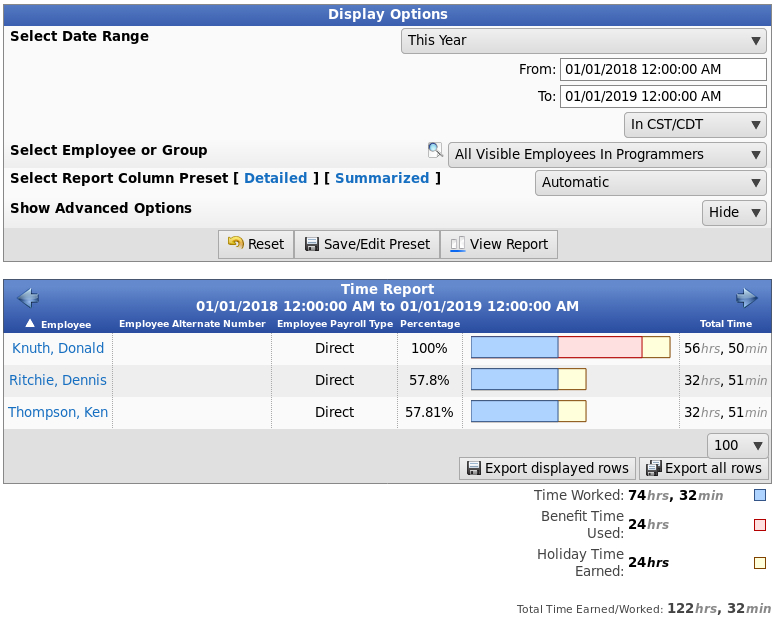
Summarized Time Report
The columns that are visible in this report can be set up using the presets provided in the Control Panel. In the default preset, the Summarized Time Report shows a basic summary of information. Clicking on an Employee's name will generate a Detailed Time Report for that person.
In this example, the report is displaying a summarized view of the worked time for All Visible Employees in Programmers. There are three people with time in this report. One person, Donald Knuth, used 24 hours of benefit time during this time range, while all three received 8 hours of holiday pay.
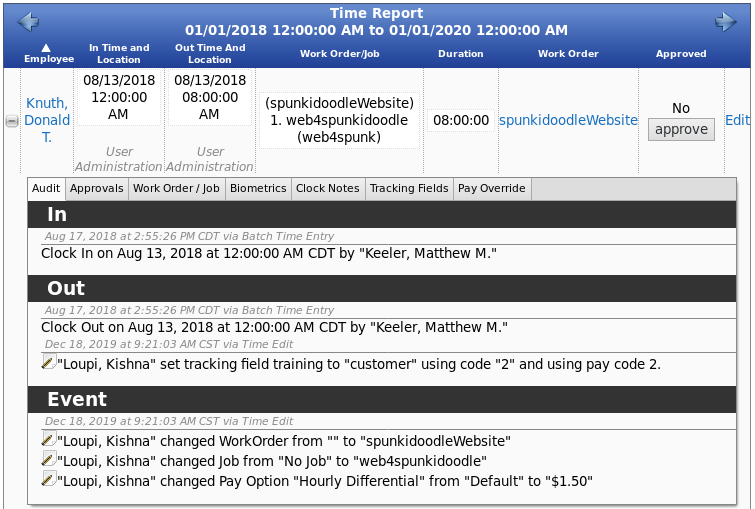
Detailed Time Report
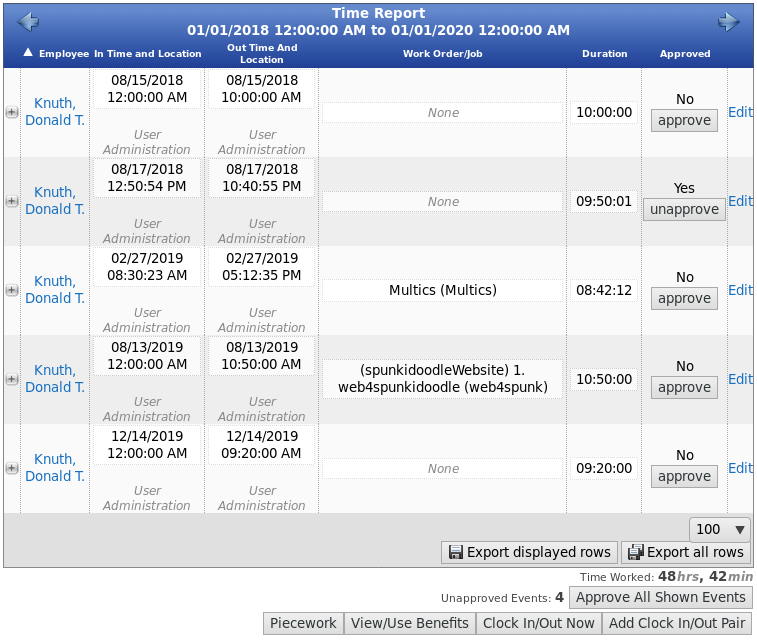
The Detailed Time Report displays all the information about the clocked time, including the Job, Work Order, Clock Location, and Duration of the event. More details are available in different columns (For example, Timesheet Approval for Event is a new column in TimeIPS 3.0+), which can be configured using the Presets for the Detailed Time Report.
By clicking on Donald Knuth's name in the Summarized Time Report, we are able to view his detailed information.
Edit
This report includes many of the edit-in-place columns including In Time and Location, Out Time and Location, Work Order/Job, and Duration. The Approved column also allows administrators to either approve or unapproved each time event, or approve all by clicking the Approve All Shown Events button. Clicking Edit will take you to the Time Edit interface where the clock event can be modified or even deleted.
Audit Details
To view the Auditing information about an event, you can expand the row by clicking the + (plus) sign to the left of the row.
In this audit, we can see that Donald was clocked in and out by Matthew Keeler using "Batch Time Entry". Other clocking audit details are listed under the In and Out sections, and non-clocking audit details are listed under the Event section.
Approvals
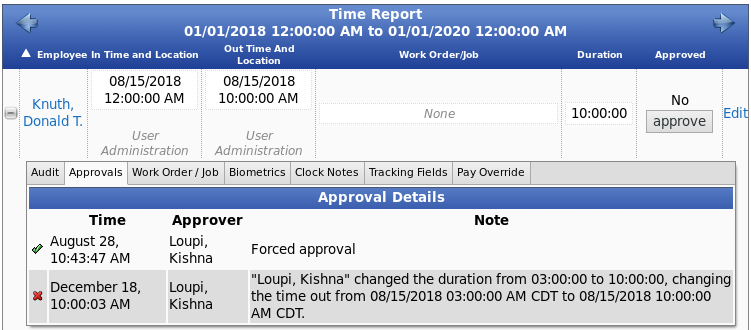
To view the Approvals for an event, expand the row by clicking the + (plus) sign to the left of the row, then click on the Approvals tab.
Here we can see that Donald's time was approved by Kishna Loupi on August 28th, but the event changes on December 18th caused the event to become unapproved once again and will need to be manually approved. Since "Timesheet Approval for Events" was chosen from the Detailed Presets page, this event can easily be approved right here by clicking the approve button.
Work Order/Job Details
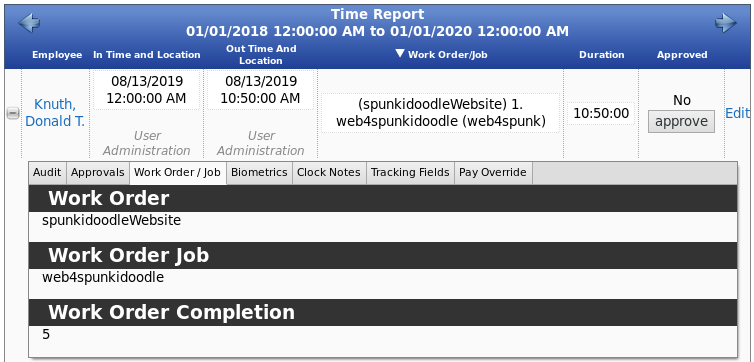
To view the Work Order and Job details for an event, expand the row by clicking the + (plus) sign to the left of the row, then click on the Work Order/Job tab.
Here we can see that Donald's website job is 5% complete.
Biometrics
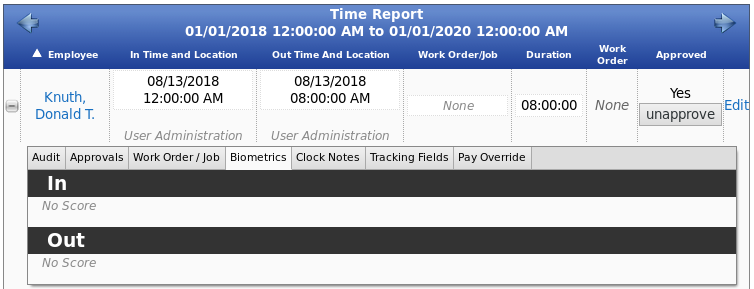
To view the Biometric details for an event, expand the row by clicking the + (plus) sign to the left of the row, then click on the Biometrics tab.
Here we can see that Donald did not receive an optic score, concluding he did not use biometrics to clock.
Clock Notes
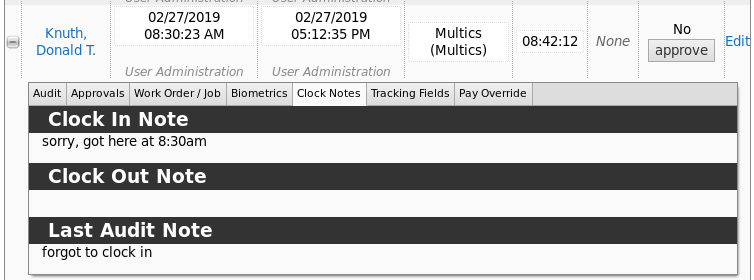
To view the Clock Note details for an event, expand the row by clicking the + (plus) sign to the left of the row, then click on the Clock Notes tab.
Tracking Fields
To view the Tracking Field details for an event, expand the row by clicking the + (plus) sign to the left of the row, then click on the Tracking Fields tab.
Tracking Fields are displayed in bold. If an option for that tracking field was chosen during clock in or clock out, it will be displayed next to the tracking field. For example, Donald selected "Yes" to being off-site, and "customer" to whom he is training. When he clocked out, he chose "Yes" to training complete.
Pay Override Details
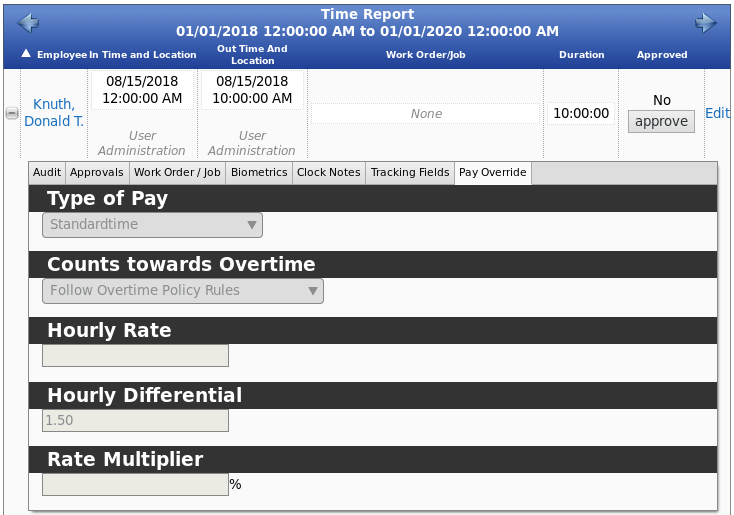
To view the Pay Override details for an event, expand the row by clicking the + (plus) sign to the left of the row, then click on the Pay Override tab.
For this clock event, Donald is receiving a $1.50 per hour differential on top of his standard pay.
Advanced Operation
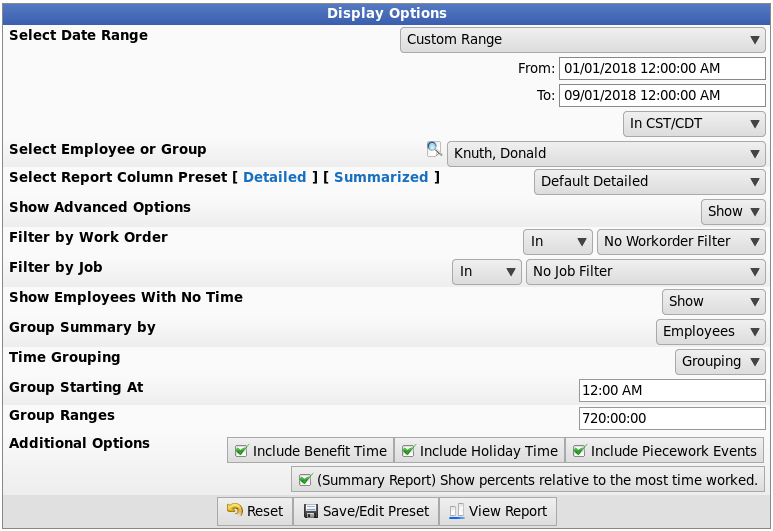
By Showing Advanced Options on the Control Panel, you can enable additional options for advanced operation.

- Selecting "Show" Advanced Options enables advanced options and expands the window to display additional controls.
- Filter by Work Order requires the IPSJWO Module.
- No Workorder Filter will not apply a filter.
- Any Workorder will only show results that have a work order.
- Selecting a specific Work Order from the drop down menu will only show time worked on that specific Work Order and will update the Jobs filter to contain jobs and segments of jobs configured for the selected Work Order.
- You must select a work order in order to view events worked In it or Not In it. The In/Out toggle filter for Work Orders will filter by clock events where employees were either clocked in to the specified work order filter, or not clocked into the specified work order filter.
- Filter by Job offers the option to filter results to show events worked in No Work Order Job, in Any Work Order Job, in a specific Segment, or in a specific Work Order Job.
- When using a Job filter, the In/Out toggle will filter results by clock events either explicitly worked In a selected Job, or Not In a selected Job. You must select a specific job in order to view events worked in it or not in it.
- Choosing "Show" from the Show Employees With No Time's drop down menu, will show all employees regardless of worked time. This option, which only works in summarized view, is helpful to see all employees including the ones not working today.
- Choose to have either a Group Summary by "Employees", "Jobs", or "Work Orders". When viewing a summary report, this selection changes the way the summary is grouped and displayed.
- Grouping by Employees will return a result for each Employee, with a summary of that Employee's Time.
- Grouping by Jobs will return entries for all the jobs worked in the selected time.
- Grouping by Work Orders will group events into Work Order categories.
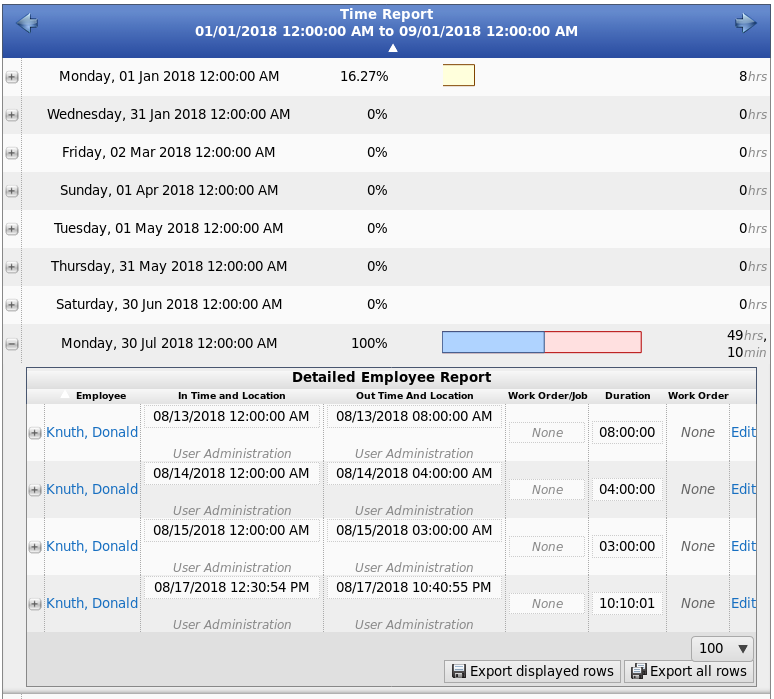
- Time Grouping is a special display mode that ignores most of the advanced options in the control panel. Time Grouping is used to display spans of time across a range. For example, you can split up a selected week into individual days, so that you can see the daily breakdown.
- Under Group Starting At, select the time of a day at which to begin separating ranges into groups. Grouping will occur for the durations starting at the first time this time occurs in the report range.
- Grouping can be done by any arbitrary amount of time by specifying a length of time under Group Ranges. By default, the Time Report is configured to use ranges of a full day (24 hours). The example below is set to 720 for roughly month summaries.

And just like the Detailed Time Report, you can expand the individual rows to see more detailed information about the range you have selected. Click on the + (plus) sign to the left of the clock entry, then click the + (plus) sign to the left of the employees name for more detail.
Create New Preset
- Set the Display Options the way you want them to be in the report.
- Click the Save/Edit Preset button at the bottom of the window.
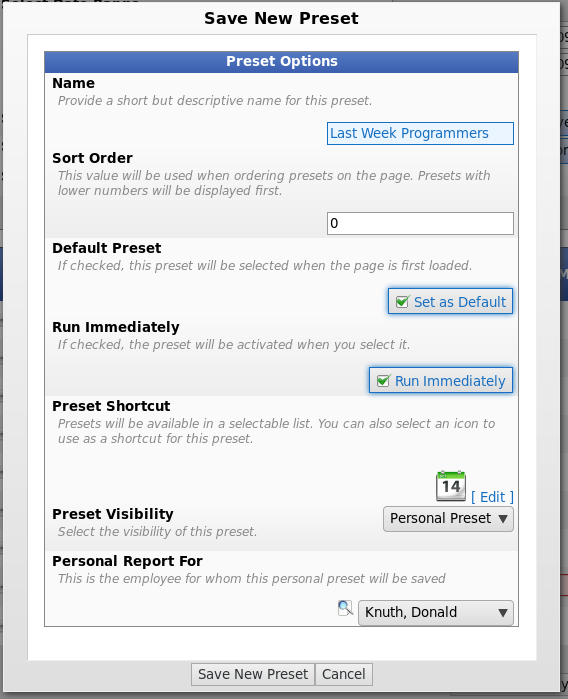
- Provide a short but descriptive Name for this preset.
- Assign a Sort Order. This value will be used when ordering presets on the page. Presets with lower numbers will be displayed first.
- If this should be the Default Preset, check the "Set as Default" box. If checked, this preset will be selected when the page is first loaded.
- Check the Run Immediately box to auto generate the report (using this preset) when the Time Edit/Report link is clicked on from the main menu.
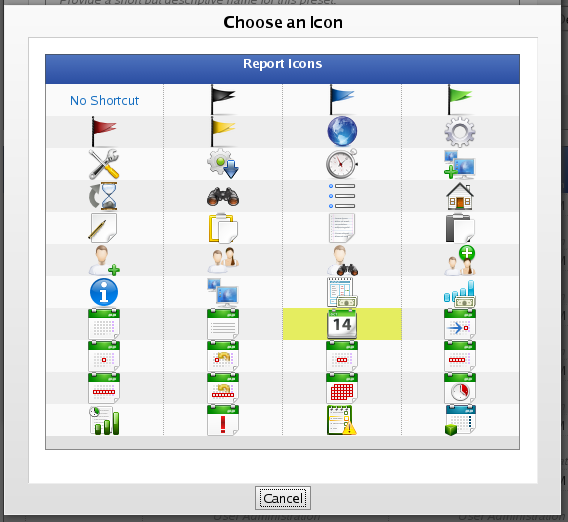
- Pick a unique icon to be used as the Preset Shortcut which will appear at the top of the page with the other shortcuts.
- Set the Preset Visibility based on who should be able to view this preset.
- If you choose "Personal Preset", then pick the employee for whom this is a Personal Report For.
- Click the Save New Preset button to implement the changes.
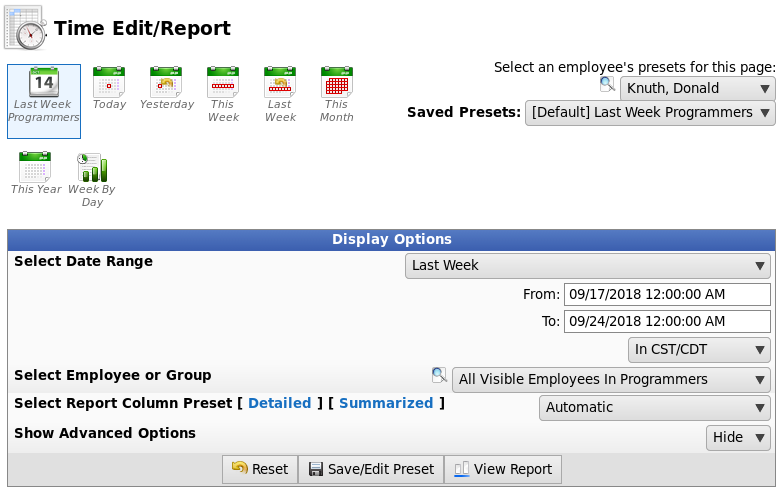
- The new preset icon will then appear at the top of the page with the other shortcuts.
Export to CSV
Like most reports in TimeIPS, the Time Edit/Report can generate a Comma-Separated-Value export file.
Once the report has been ran, you can export it by clicking on either the Export displayed rows or the Export all rows button to save a file that can be loaded as a spreadsheet. Clicking the Export Displayed Rows will generate a CSV file for the page you are currently looking at, while Export All Rows will generate a CSV export for the entire report, including all of its pages.  Information