Applies to versions: 3.1, 3.2
Peachtree Export Settings
TimeIPS Payroll Export can generate a file with your payroll data. Using the IPSEPI Enhanced Payroll Integration module, the file can be imported in your Peachtree payroll application.
Using the left pane Main Menu » Administration, click on: Payroll » Payroll Export
Prepare Payroll for Export
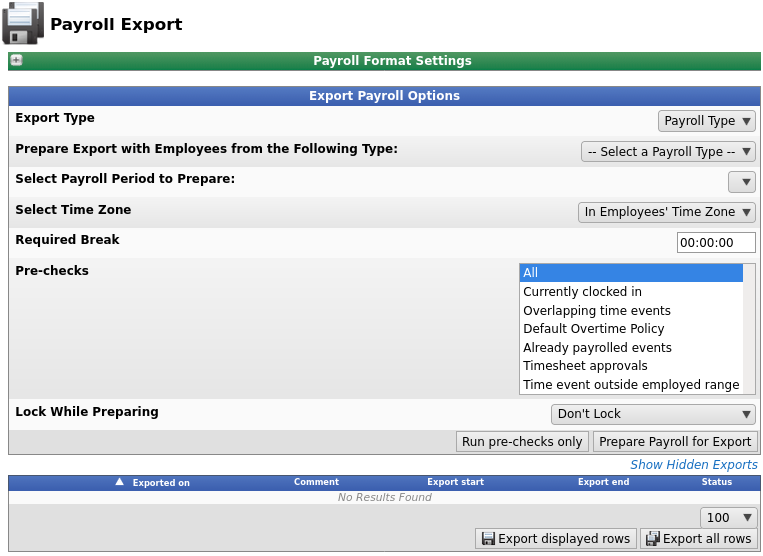
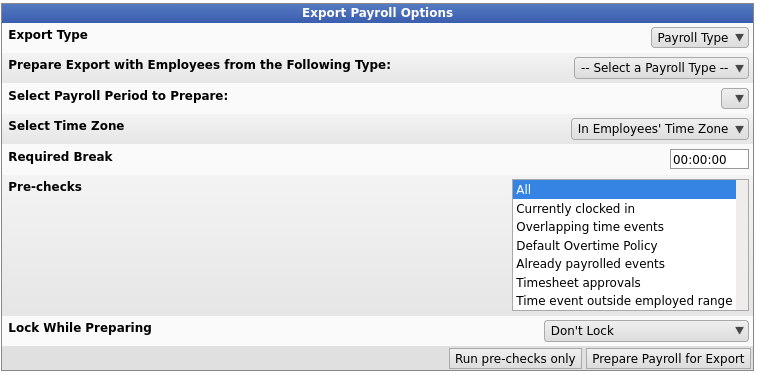
First, choose to generate the report by Payroll Type or Manually select employees and a range of time.
Payroll Type
- Under Export Type, select Payroll Type to generate the report. (See "Manual" below for specifics on that option.)
- Select a Payroll Type. All employees (including released employees) that are currently in the selected Payroll Type will be included in the prepared payroll data.
- Select the Payroll Period from the drop-down boxes.
- Select a Time Zone. The start and end time of the export can be interpreted in the company's timezone or separately for each employee.
- Required Break should generally not be set. When not set, the report runs for the exact time range selected for all employees and will generate accurate and easy-to-confirm results. If it is set, the start and end dates of the report may be moved forward as needed for each employee to the next point where a break in worked/benefit/holiday time exceeds this duration. This allows hours on a "shift" that runs past the normal end of the report range to be included at the end (and excluded from the beginning). In special cases this can be helpful by allowing employees to see all the hours on their shifts, and avoiding have a shift split onto two reports.
- Select Pre-checks to determine what the system will check prior to attempting to prepare a payroll export.
- The following choices are available in the drop-down box: All, Currently clocked in, Overlapping time events, Default Overtime Policy, Already payrolled events, and Timesheet approvals.
- Optionally, select whether or not to Lock While Preparing. In choosing to lock the payroll period while the export is pending, you can also choose to include influence bounds which expands to include the full range of time affected.
- Optionally, click the Run pre-checks only. If you receive the "All chosen checks passed" message, you can choose to do a different check or progress forward to preparing payroll.
- Click the Prepare Payroll for Export button.
Manual
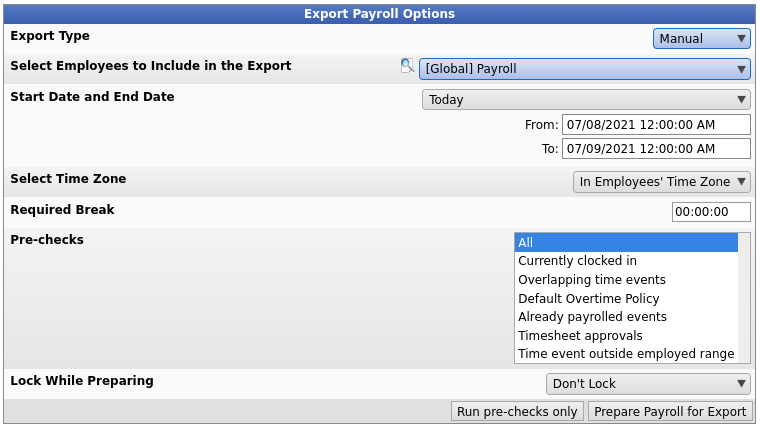
- Under Export Type, select Manual to generate the report. (See "Payroll Type" above for specifics on that option.)
- Select an employee or group of employees to include in the export.
- Manually select a range of time for this report, or use the quick selection drop down box.
- Select a Time Zone. The start and end time of the export can be interpreted in the company's timezone or separately for each employee.
- Required Break should generally not be set. When not set, the report runs for the exact time range selected for all employees and will generate accurate and easy-to-confirm results. If it is set, the start and end dates of the report may be moved forward as needed for each employee to the next point where a break in worked/benefit/holiday time exceeds this duration. This allows hours on a "shift" that runs past the normal end of the report range to be included at the end (and excluded from the beginning). In special cases this can be helpful by allowing employees to see all the hours on their shifts, and avoiding have a shift split onto two reports.
- Select Pre-checks to determine what the system will check prior to attempting to prepare a payroll export.
- The following choices are available in the drop-down box: All, Currently clocked in, Overlapping time events, Default Overtime Policy, Already payrolled events, and Timesheet approvals.
- Optionally, select whether or not to Lock While Preparing. In choosing to lock the payroll period while the export is pending, you can also choose to include influence bounds which expands to include the full range of time affected.
- Optionally, click the Run pre-checks only. If you receive the "All chosen checks passed" message, you can choose to do a different check or progress forward to preparing payroll.
- Click the Prepare Payroll for Export button.
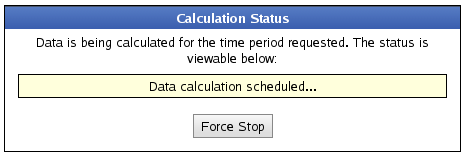
Next you should see the payroll calculation being scheduled.
Export Payroll
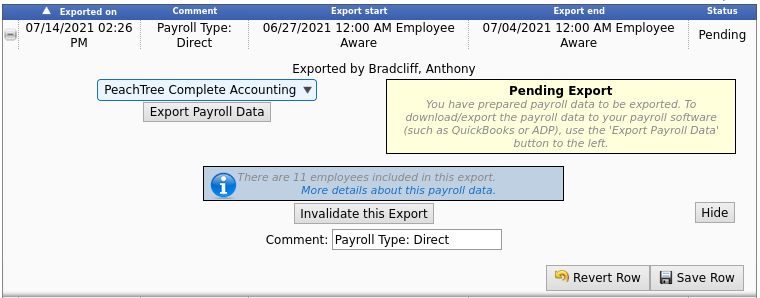
After the payroll data is prepared for export, the Pending Export window will open.
- Select PeachTree Complete Accounting from the drop down menu.
- Next click on the button labelled Export Payroll Data.
NOTE:: Editing of time events is locked during payroll processing to avoid having another user make changes via the Time/Edit Report that would not be reflected properly in the current payroll run.
If you have not already created a PeachTree setting, you will see the following screen. 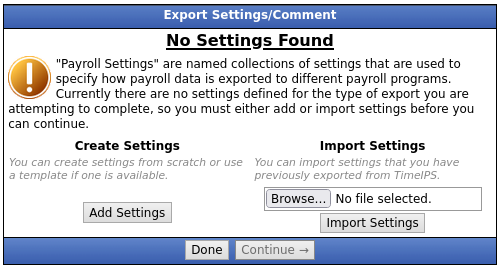
Click the Add Settings button to begin setup.
NOTE: Export Settings are a set of stored settings that are used each time a payroll file is generated. If your preferences change from one group of employees to another, you may create multiple export settings and select the set that applies for the group you are exporting at the time.
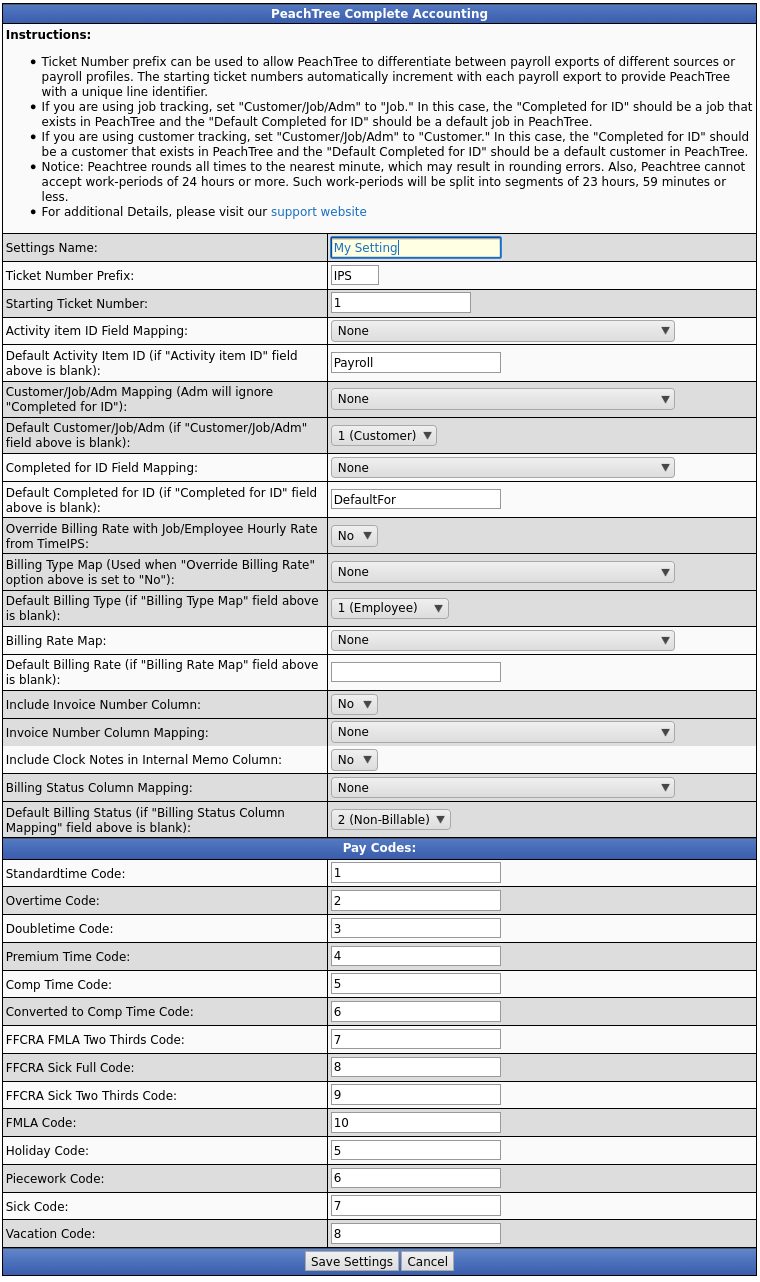
The following export settings should be defined prior to running your Peachtree export:
- Setting Name: Enter the name you wish to assign to the setting.
- Ticket Number Prefix and Starting Ticket Number: Each time ticket transaction in Peachtree has a unique ticket number. You can define the Ticket Number Prefix (such as IPS) and the starting ticket number (such as 1). The first transaction TimeIPS submits will be IPS1 and will increment the ticket number by 1 for each transaction.
- Activity item ID Field Mapping and Default Activity Item (if "Activity item ID" field above is blank):
- If all transactions should be imported into a single Activity Item, set the Activity Item ID Field Mapping to Use default and enter the Peachtree Activity Item ID in the Default Activity Item ID field.
- If you are storing Activity Item IDs for each employee or transaction in a TimeIPS field (such as the Employee's Department or Job Control Number), select that field in the Activity Item ID Field Mapping pull-down. Enter the Default Activity Item ID TimeIPS should use if the mapped field's value is blank for any transaction.
- Customer/Job/Adm (Adm will ignore "Completed for ID"), Completed for ID Field Mapping and Default Completed for ID (if "Completed for ID" field above is blank):
- If all transactions should be imported as Administrative Time Tickets (not per job), set the Customer/Job/Adm to Adm, leave the Completed for ID Field Mapping to Blank, and Default Completed for ID blank.
- If you are storing Job or Customer IDs for each employee or transaction in a TimeIPS field (such as Employee's Department for Job Code), set the Customer/Job/Adm either to Customer (indicating Customer ID) or Job (indicating Job ID), select the TimeIPS field in the Completed for ID Field Mapping pull-down, and enter the Default Completed for ID TimeIPS should use if the mapped field's value is blank for any transaction.
- Override Billing Rate with Job/Employee Hourly Rate from TimeIPS, Billing Type Map (Used when "Override Billing Rate" option above is set to "No") and Default Billing Type (if "Billing Type Map" field above is blank):
- TimeIPS can provide Peachtree with employee's hourly rates as the Peachtree Job/Customer Billing Rate for each transaction. If you want to use this functionality, set the pull-down to Yes.
- If you are storing Billing Types for each employee or transaction in a TimeIPS field (such as the Employee's Department or Job Control Number), select that field in the Billing Type Map pull-down, and enter the Default Billing Type TimeIPS should use if the mapped field's value is blank for any transaction.
- Billing Rate Map and Default Billing Rate (if "Billing Rate Map" field above is blank):
- If you are storing Billing Rates for each employee or transaction in a TimeIPS field (such as the Employee's Department or Job Control Number), select that field in the Billing Rate Map pull-down, and enter the Default Billing Rate TimeIPS should use if the mapped field's value is blank for any transaction.
- Include Invoice Number Column and Invoice Number Column Mapping:
- If you want to include an invoice number column, set the pull-down to Yes.
- If you are storing invoice numbers for each employee or transaction in a TimeIPS field (such as the Employee's Department or Job Control Number), select that field in the Invoice Number Column Mapping pull-down.
- Include Clock Notes in Internal Memo Column: If you want to include clock notes in the internal memo column, set the pull-down to Yes.
- Billing Status Column Mapping and Default Billing Status (if "Billing Status Column Mapping" field above is blank):
- If you are storing Billing Statuses for each employee or transaction in a TimeIPS field (such as the Employee's Department or Job Control Number), select that field in the Billing Status Column Map pull-down, and select the Default Billing Status TimeIPS should use if the mapped field's value is blank for any transaction.
- Standardtime Code: Enter the Code used to define regular hours
- Overtime Code: Enter the Code used to define overtime hours
- Doubletime Code: Enter the Code used to define Doubletime hours
- Premium Time Code: Enter the Code used to identify Premium hours
- Holiday Code: Enter the Code used to identify Holiday hours
- Piecework Code: Enter the Code used to identify Piecework hours
- Sick Code: Enter the Code used to identify Sick hours
- Vacation Code: Enter the Code used to identify Vacation hours
Once your selections have been configured, click on Save Settings to save, or Cancel to exit without saving.
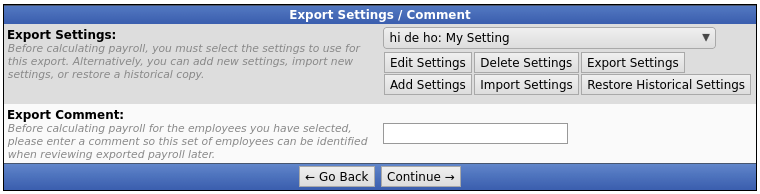
- On the next screen be sure that your new setting name is the one selected in the Export Settings drop down menu.
- Optionally, you can add a comment to the export making it unique and easily identifiable.
- Click Continue.
Next you should see the payroll calculation being scheduled.
Payroll Export Data - Final Step
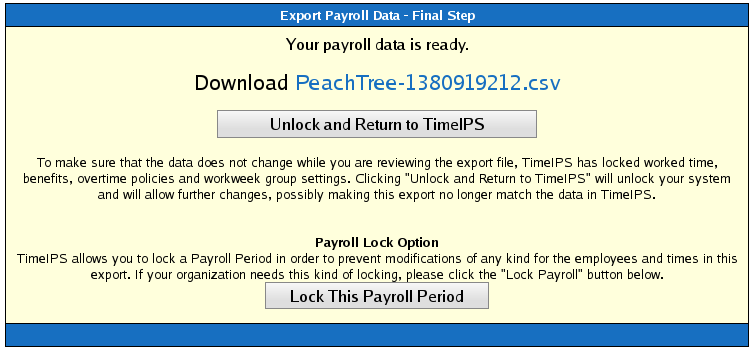
- Click the blue link to Download the data and open it in a spreadsheet program such as Open Office Calc or Microsoft Excel.
- If you have confirmed that the information contained in this export is correct and wish to permanently lock the payroll period, click the button labelled Lock This Payroll Period, otherwise choose Unlock and Return to TimeIPS. Locking the payroll period prevents future modifications of any kind.
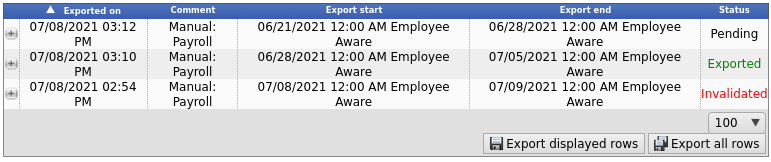
NOTE: If you choose "Unlock and Return to TimeIPS.", the export will be listed as "Pending" and further changes can be made to the data. Pending exports can be exported again to other payroll output formats as often as you like until they have been accepted/locked.
If you choose "Lock This Payroll Period", the payroll status will show "Exported". Exported payroll runs are locked and time can no longer be edited in the system for that period of time.
For immediate assistance with any of the above payroll exports,
call our Customer Support staff at 877-846-3256.
Setting up Peachtree
NOTE: You must have pay rates in Peachtree for each type of pay (example: overtime, standard, vacation). Without them, you will get an error during the import about the pay type. Peachtree only supports 40 hours for salary employees so TimeIPS will only export standard time for employees marked salaried.
Step 1: Setting Employees to use Time Tickets
From the Maintain menu, select Maintain Employees/Sales Reps. Peachtree displays the Maintain Employees Sales Reps window.
Select the Pay Info tab.
Enter or select the employee ID. To display a list of existing employees, type ? in this field, or select the Lookup button.
Select Hourly-Time Ticket Hours from the Pay Method list.
Verify or enter appropriate pay rates for each hourly pay level.
select the Save button.
Step 2: Creating a Default Activity Item for Payroll
NOTE: If you already have an Activity Item for payroll you can skip this step.
Select Inventory Items from the Maintain menu.
Enter a unique item ID for the activity item.
Select either Activity item as the item class.
Enter a short description of the activity item.
Enter the Stocking U/M, Item Type, and Location for the item.
The default G/L income account is displayed. If this is not correct, you can change the account to something more appropriate for this particular item.
Select the Item Tax Type code (this determines whether or not the item is exempt from taxes).
select the Save button.
Step 3: Creating an Import Template
Select Import/Export from the File menu.
On The Fields Tab only have the following marked to Show.
- Employee/Vendor, Recorded by ID, Ticket Number, Ticket Date, Has been used in Sales/Invoicing, Activity Item ID, Customer/Job/Adm, Completed for ID, Pay Level, Has been used in Payroll, Manual/Timed Option, Duration, Billing Type, Billing Rate, Billing Status, Billing Amount
Select the Options Tab.
Put a check mark in the First Row Contains Headings box under Import Options.
Under Import/Export File click on the arrow and choose the location where you plan on saving your Peachtree export file from TimeIPS.
Click on the Save button and name the Settings TimeIPS.  Information