|
|
Applies to versions: 1.4, 1.5, 1.6
Site Management - Add a Site
The TimeIPS Site Management module allows designation of sites, each with specified employees, managers, supervisors, coverage schedules, and disconnection handling.
Security Level Required: Employee Administrator
Using the left pane Main Menu, click on: Administration » Employee Management » Sites
NOTE: Managers can view site data, but cannot edit it. The Site Manager can edit the site data he/she manages, excluding the Site Name and Site Manager.
To Add a New Site:
- Click on the Add New Site icon or the Add New Site button on the Site Administration screen. The "Add New Site" window will open.
- Enter the Site Name and choose the Site Manager from the drop-down list. (Physical address is optional.)
NOTE: Employees with the Manager administrative privilege are listed on the "Manager" pull-down menu.
NOTE: The Site Manager has employee administrator access to all site employee's records. He/She can view and change all data (excluding pay status and rate) and time reports. The Site Manager can also add, edit and remove clock events.
- Click the Create Site button. The information will be added to the Site Administration list with the Information tab open and ready for editing.
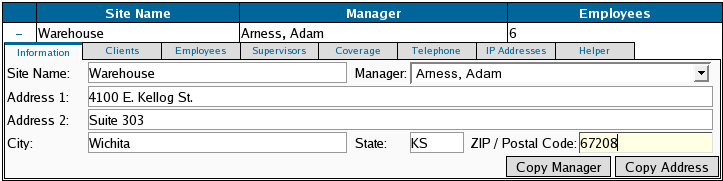
Information Tab:
- The Site Information tab will contain the information you entered when creating the site.
- Use the Copy Manager button to copy the Site Manager to another site.
- Use the Copy Address button to copy the Site Address to another site.
Clients Tab:
You can define which time clock stations ("clients") are located at a specific site. You can also customize the message displayed on the LCD and the recipient of e-mail notifications if that client cannot connect to the master.
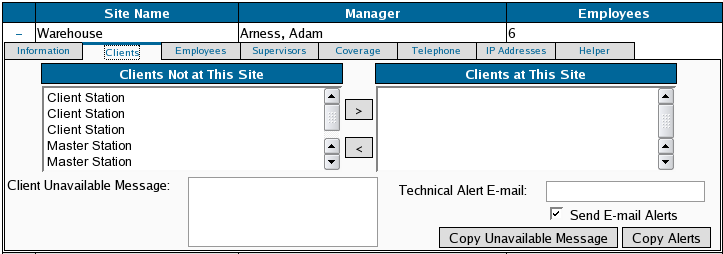
- Move the client name from the Clients Not at This Site window to the Clients at This Site window by clicking on the client name to highlight it, then clicking on the > (greater than) sign.
TIP: You can name the master and each client for easier identification by going to Administration -> System Administration -> Client Configuration and clicking on the station's name link.
- Enter the Client Unavailable Message. This message will display on the TimeIPS small display if the client loses connection with the master.
NOTE: The message can be up to 20 characters per line and up to three lines in length.
TIP: If you are using Telephone Clocking as a backup clocking method, you could enter a message such as:
Call 442-2410
from the break room
to clock in/out
- Enter the Technical Alert E-mail address and check the Send E-Mail Alerts box to send notification to the e-mail address provided in the event that any of the designated Clients at This Site lose connection with the master or are powered down.
You can group employees to a specific site as well as limit which time clock stations ("clients") employees at a site can clock from.
- Move Employees Not at This Site to the Employees at This Site window by clicking on the employee's name to highlight it, then clicking on the > (greater than) sign.
- Use the Allow Clocks for pull-down to designate whether "All Employees" or "Only These Employees" are allowed to clock at this site.
- Use the Copy Employees button to copy the employees at this site to another site.
- Use the Copy Allow Clocks button to copy the clocking permissions from this site to another site.
Supervisors Tab:
You can utilize two additional administrative settings, Site Managers and Site Supervisors. Employees with Manager level security who are assigned to a site will be listed as potential Site Supervisors for the site.
Site Managers: Site Managers have Employee Administration access to all employees at that Site. The Site Manager can therefore add new employees and view and edit employee's records.
Site Supervisors: Site Supervisors have limited access to records for employees at that Site. You can define that access through the Site Supervisors' tab.
NOTE: If, through Employee Administration, an employee is assigned to a manager, that manager will have all privileges (view, clock in and out, and edit clock records) for that employee's time, regardless of their Site Supervisor settings. If you want to limit a Site Supervisor's manager privileges, do not assign employees to that manager through Employee Management and indicate only the privileges you wish the supervisor to have in the Supervisors tab for that site.
- Check the appropriate boxes to indicate the privileges the Supervisor will have for employees at this site.
- Supervisors with the View Clock Records box checked have read-only access to the time reports of employees at this site.
- Supervisors with the Clock In/Out box checked have access to clock employees at this site in or out through the employee's Time Edit/Report or Group Clocking.
- Supervisors with the Edit Clock Records box checked have edit access to the time reports of employees at this site.
- Use the Copy Supervisors button to copy supervisors at this site to another site.
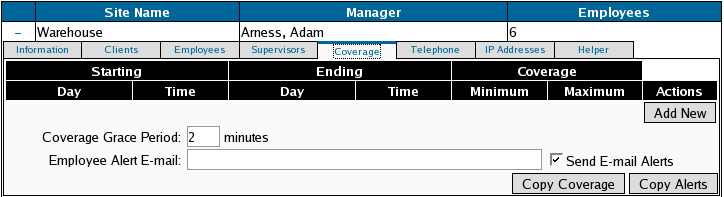
Coverage Tab:
You can receive e-mail alerts if there are too many people clocked in, or not enough people clocked in, at a certain site based on day and time.
To set up a Site's coverage schedule:
- From the Site's Coverage tab, click on the Add New button.
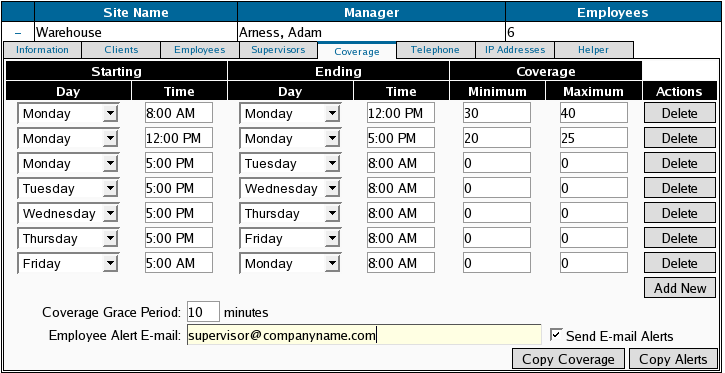
- Enter the Starting and Ending Day and Time range. Enter the Minimum and Maximum number of employees at this site that should be clocked in during that time range.
- Repeat steps 1 and 2 as necessary.
- Identify the Coverage Grace Period which defines the number of minutes after the Starting Time before the coverage notification alert will be sent.
- Enter the Employee Alert E-Mail and check the Send E-Mail Alerts box to send notifications to this e-mail address if not enough or too many people are clocked in based on the coverage rule.
EXAMPLE: Monday's, especially in the morning, are the busiest day at Company XYZ. Thirty to fourty employees are required for adequate coverage between 8:00AM and 12:00PM. Twenty to twenty-five employees are required for afternoon coverage. In addition, the building is closed from 5:00PM to 8:00AM on weekdays and all day on weekends. This site's coverage schedule is set up as follows: TIP: Increase the "Coverage Grace Period" to accommodate shift changes or add an intermediate time frame to handle alerts during these times.
- Use the Copy Coverage button to copy this site's coverage schedule to another site.
- Use the Copy Alerts button to copy this site's coverage alert notification settings to another site.
You can associate specific telephone numbers and IP addresses with your site Coverage settings to provide employees with additional means to clock into a site while simultaneously keeping track of your site coverage.
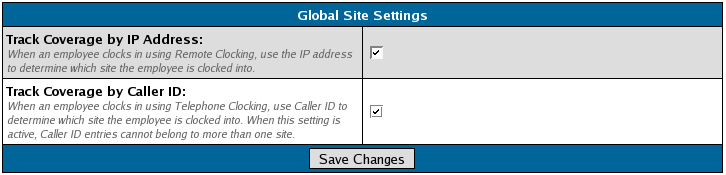
- On the Site Management page, click on the Global Settings icon at the top of the screen.
- Check the box next to Track Coverage by IP Address to enable tracking by IP address. When an employee clocks in using Remote Clocking, the IP address will be used to determine which site the employee is clocked into.
- Check the box next to Track Coverage by Caller ID to enable tracking by phone number. When an employee clocks in using Telephone Clocking, the phone number will be used to determine which site the employee is clocked into.
NOTE: When this setting is active, Caller ID entries cannot belong to more than one site.
Telephone Tab:
You can identify phones that can be used to telephone clock if the client is not able to connect to the master. The  IPSVOIP TimeIPS Telephone Clocking device is required. IPSVOIP TimeIPS Telephone Clocking device is required.
- Click on the Add New button to add a Caller ID name or telephone number to associate with this site.
NOTE: If "Track Coverage by Caller ID" is active in Global Settings, clocks made from these Caller ID names or numbers will be associated with this site for coverage and reporting.
- Use the Copy Phones button to copy this site's Caller ID settings to another site.
NOTE: When "Track Coverage by Caller ID" is active in Global Settings, Caller ID entries cannot belong to more than one site.
If you want employees to be able to clock in and out from a telephone ONLY if this Site's clients are not available:
- In the Telephone Clocking page (Administration -> Clocking -> Telephone Clocking), set the Clock In/Out Restriction to "Only allow the following Caller IDs to clock (whitelist)" but do not identify valid Caller IDs on this screen.
NOTE: Numbers listed here can always call.
- Define your whitelist Caller IDs in the Site's Telephone tab.
- On the Site's Telephone tab, click on the Add New button.
- Enter the authorized Caller ID name or phone number.
TIP: If the client is unable to connect to the master, the Client Unavailable Message (defined in the Site's Client tab) will display on that client's LCD. If you are using Telephone Clocking only when the client is unavailable, you can instruct employees where to phone from using the Client Unavailable Message.
If you want employees to be able to clock in and out at all times:
- Configure the Telephone Clocking options in Administration -> Clocking -> Telephone Clocking
- Do not add Caller IDs in the Site's Telephone Tab.
IP Addresses Tab:
IP addresses can be associated with a site for remote clocking.
- Click on the Add New button to add an IP address to associate with this site.
NOTE: If "Track Coverage by IP Addresses" is active in Global Settings, clocks made from these IP Addresses will be associated with this site for coverage and reporting.
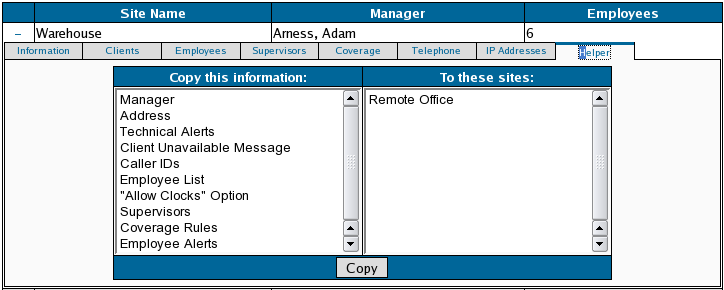
Helper Tab:
Once a site is defined and information is entered for that site, you can copy that information to another site using the site Helper.
- Select the information to copy and select the site to copy the information to, then click on the Copy button.
See Also:
Site Management Display Options (1.3, 1.4, 1.5, 1.6)
|

 Information