316-264-1600 Information Sales Support Information Sales Support |
|
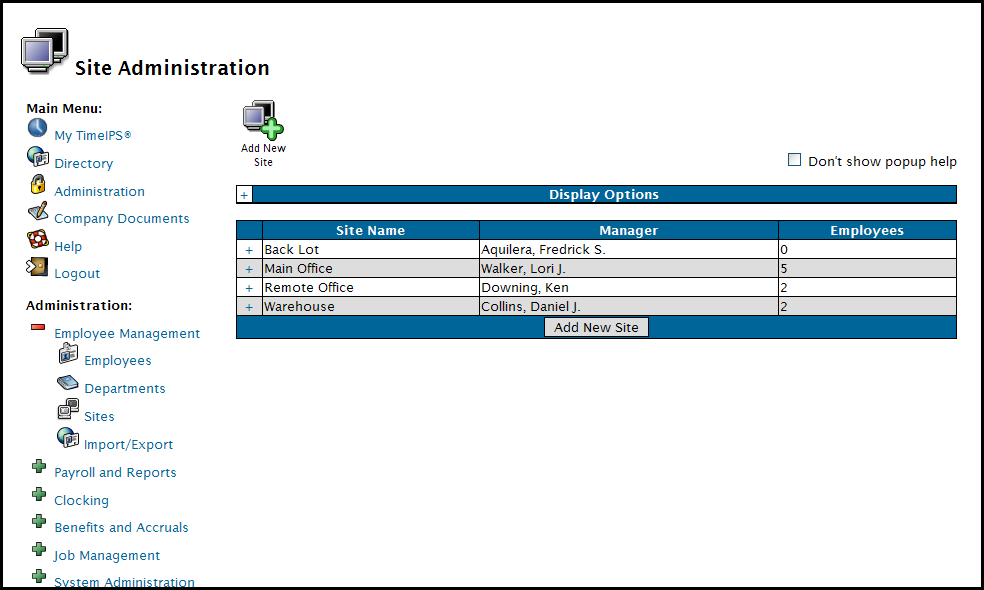
Applies to versions: 1.3, 1.4, 1.5, 1.6Site Management Display OptionsThe TimeIPS Site Management module allows designation of sites, each with specified employees, managers, supervisors, coverage schedules, and disconnection handling.
Security Level Required: Employee Administrator
NOTE: Managers can view site data, but
cannot edit it. The Site Manager can edit the site data he/she manages,
excluding the Site Name and Site Manager.
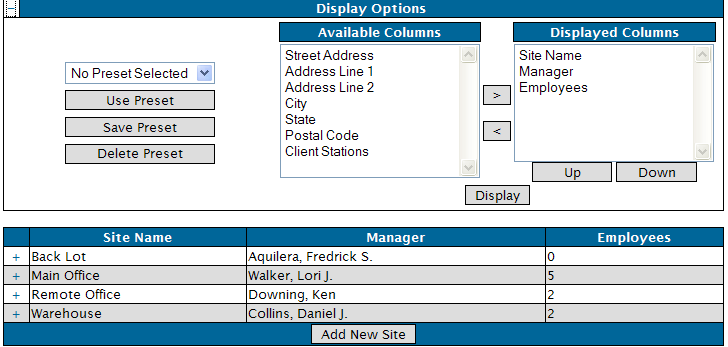
Display Options
 TIP: Some of the fields, such as the site's Name, Address, City, State and Postal Code are "edit-in-place" fields when displayed on the Site Administration table. You can type the information in the field displayed on the Site Administration screen, rather than expanding the site information table and opening the appropriate tab. (For instance, you can click on the words "Back Lot" in the Site Name column above and the field will become editable, allowing you to change the site name.)
NOTE: Clicking on fields that are not "edit-in-place" will cause the table to open to the tab for that field. (For instance, clicking on a name in the Manager column above will expand the table to the Information tab for that manager's site.) Customizing Your Display
TIP: To use a saved Preset display, select the Preset name from the pull-down menu and click on the "Use Preset" button.
See Also: Site Management - Add a Site (1.4, 1.5, 1.6) |