
316-264-1600 Information Sales Support Information Sales Support |
|
TimeIPS StartupStep 1) Connect the power cable and power on TimeIPSPower-on the station by plugging the power cord and pressing the Power Button, if needed. 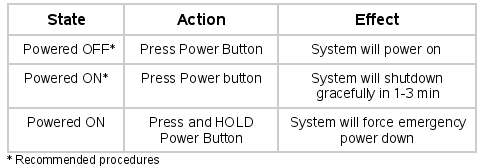 IMPORTANT: Once the TimeIPS system's Administrative Employee is defined (see the "Getting Started" section), you will be able to gracefully shut down and/or restart the TimeIPS system through the Administrative pages by clicking on Administration » System Administration » System Settings.
 The backlight on the LCD Display should light up. If not, adjust the contrast knob. Text will appear in 1-2 minutes. 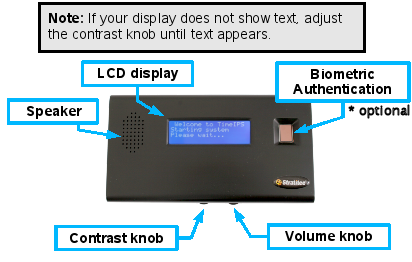
Step 2) Network Connection VerificationFor Master Station:If the network is connected, the following messages will display in 1-2 minutes: 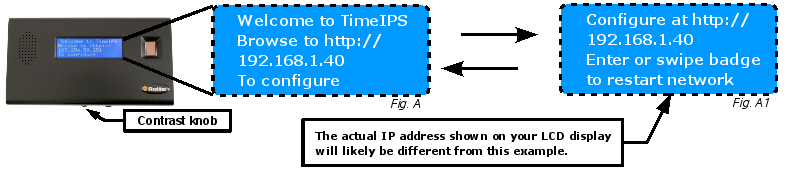
IMPORTANT: If you DO NOT see the message above on your LCD display (Fig. A), proceed to the "Trouble-shooting" section.
|