Applies to versions: 1.6, 1.9
QuickBooks Integration - Setup QuickBooks (QB v7.0)
Before running the QuickBooks® Integration for the first time, you need to setup QuickBooks and TimeIPS. This article discusses the QuickBook settings that need to be adjusted prior to the integration.
NOTE: The instructions provided below are based on the QuickBooks Enterprise Solutions v7.0. These steps and their location within your series and version of QuickBooks may vary slightly. If you are unable to locate the option in your QuickBooks version, please refer to your version's Help guide.
Open your QuickBooks company file.
-
- Verify that employee's First Name, Middle Name/Middle Initial, and Last Name match exactly (letter for letter including punctuation and capitalization) between QuickBooks and TimeIPS.
NOTE: QuickBooks stores up to 5 characters of the middle name. You can set the number of characters TimeIPS should use during the integration. If the employee's middle name in QuickBooks and the shortened middle name in TimeIPS do not match, the integration will fail. Therefore, be sure to enter the middle names identically in both programs and indicate the number of characters TimeIPS should use during the integration when setting up TimeIPS.
EXAMPLE: Johnathon Alexander Smith is an employee. His name is entered as Johnathon Alexa Smith in Quickbooks because QuickBooks will store only the first 5 characters. In TimeIPS, the entire middle name can be entered as long as the QuickBooks export is set to shorten the middle name to 5 characters.
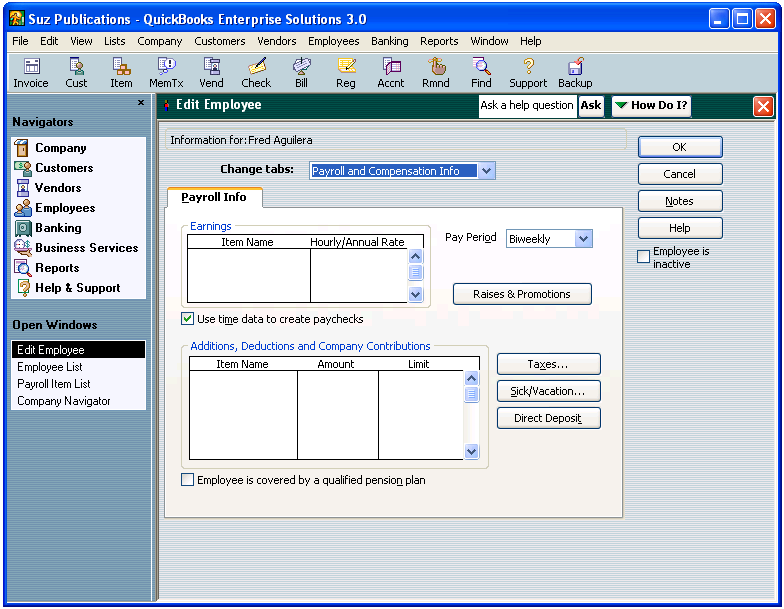
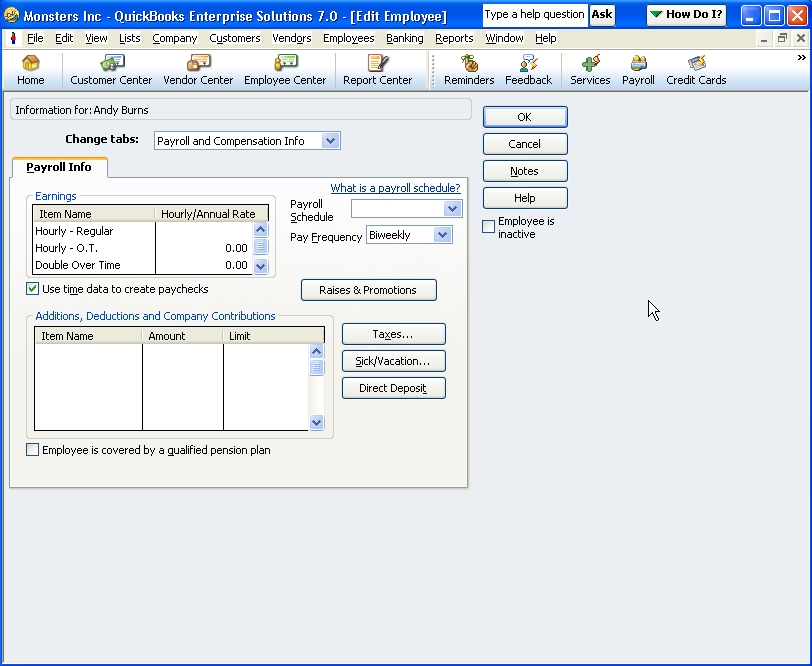
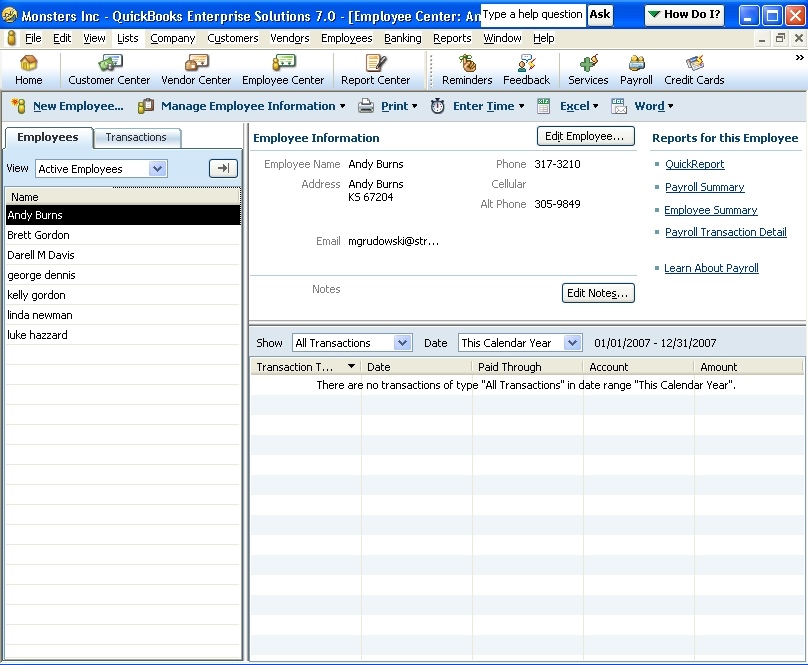
NOTE: To edit an employee's name in QuickBooks, double-click on the name in the Employee List/Center. Select "Personal Info" in the pull-down and click on the "Personal Tab". See the Edit Employee screen shot below.
- Use Time Data to Create Paychecks.
From the Employee List/Center, double-click on the employee's name.
- Note how employee's names are listed in QuickBooks.
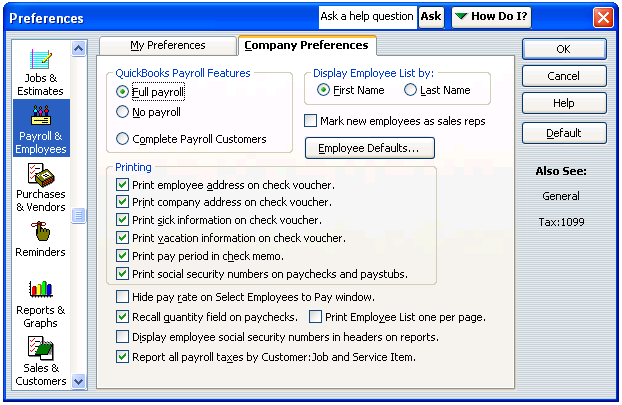
Click on the Payroll & Employees icon.
|
|
| Enterprise Server v3.0 | Enterprise Server v7.0 |
- Note whether the Display Employee List by is set to First Name or Last Name.
NOTE: For TimeIPS versions prior to 1.3, the "Display Employee list by" must be set to "First Name" for a successful integration. Subsequent versions allow users to define the employee name format.
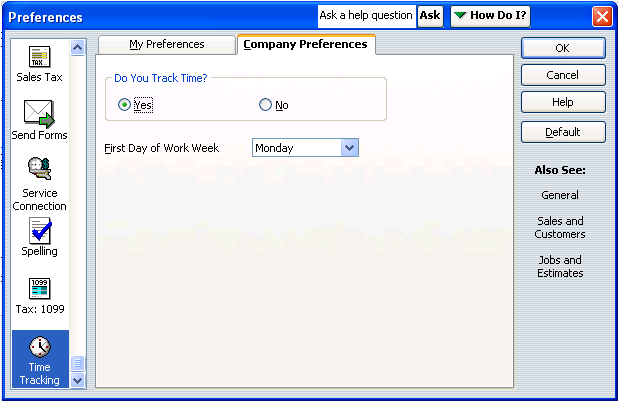
- Turn Time Tracking on.
Click on the Time Tracking icon.
|
|
| Enterprise Server v3.0 | Enterprise Server v7.0 |
- Select Yes in the Do You Track Time radio button.
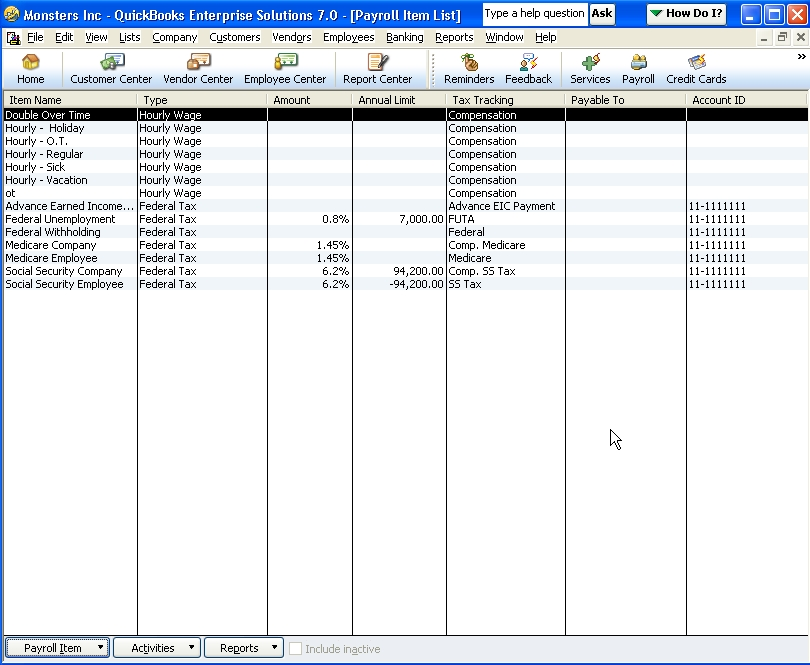
- Setup and write down your Payroll Items.
Go to the Lists menu - Payroll Item List.
- Determine the path of your QuickBook's Company File.
Close down QuickBooks by going to the File menu - Close Company option, then open the Company file again.
Go to the File menu - Open Previous Company option and write down the file path.
- Setup Employee Information.
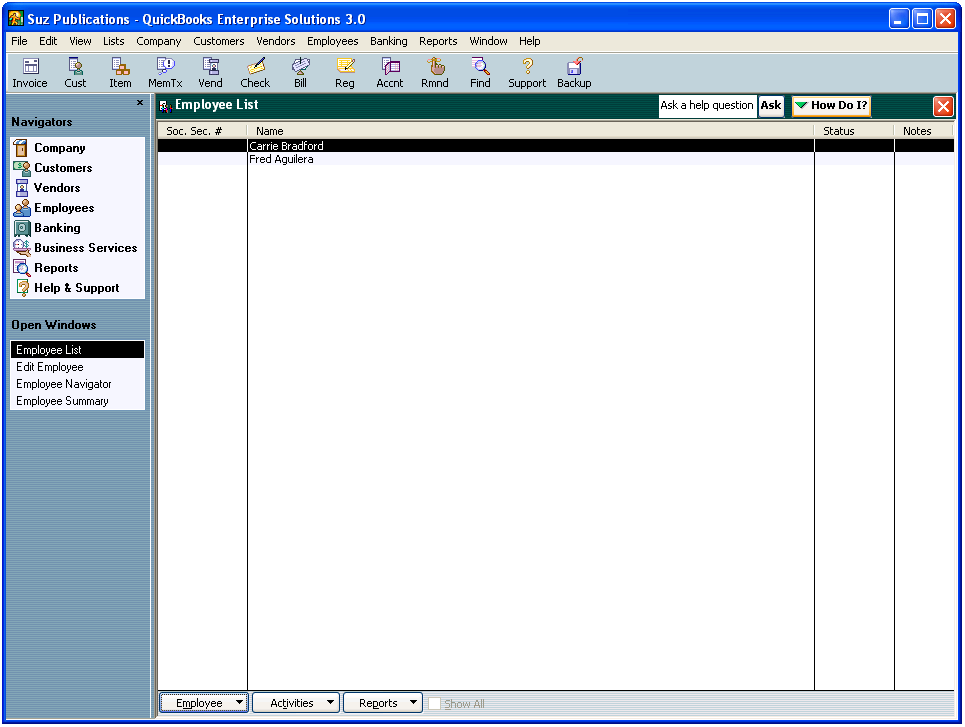
| Enterprise Server v3.0 | Enterprise Server v7.0 |
| Go to the Lists menu - Employee List option |
Go to the Employees menu - Employee Center |
|
|
- Setup QuickBooks Company options.
In QuickBooks, go to the Edit menu - Preferences option. Click on the Company Preferences tab.
You are now ready to Setup TimeIPS. Use the "See Also" links below to learn more.
See Also:QuickBooks Integration - Run Payroll (1.3, 1.4, 1.5, 1.6, 1.8, 1.9, 1.10, 1.11, 2.0, 2.1, 2.2, 2.3)QuickBooks Integration - Setup QuickBooks (1.3, 1.4, 1.5, 1.6)  Information