|
|
Applies to versions: 1.4, 1.5, 1.6, 1.8, 1.9, 1.10, 1.11, 2.0, 2.1, 2.2, 2.3, 2.4, 2.5, 3.0, 3.1, 3.2
Wide Area Network (WAN)
This guide will assist you in setting up a Wide Area Network (WAN) that allows your TimeIPS Clocks to communicate with your TimeIPS Master Server via the Internet.
You will need the following:
- Continuous (always-on) Internet access at each location, such as Cable or DSL modem access.
- A router at each location. The router allows you to connect multiple computers together, forming a LAN (Local Area Network). Your TimeIPS system and any computers you wish will connected to the router.
- A static public facing IP address for the router at the location of your TimeIPS master system. The static IP address will be provided by your ISP (Internet Service Provider). This will allow you to connect to the router from anywhere you have Internet access.
Overview of the steps involved:
- Obtain the needed Internet Services for each of your locations, including a static public facing IP address for the location of your TimeIPS Master Server. Your Master Server needs a public facing static IP address so the Clocks will always know where to send their clocking data; the IP address will not change.
- Install the Router and Configure the Internal Network at the location of your Master Server.
- Install and Configure the TimeIPS Master Server.
- Configure the router at the Master Server's location to forward information it receives from the Internet to the LAN IP address of the Master Server.
- Install and Configure the TimeIPS Clocks. You will configure the Clocks to send clocking information to the public facing static IP address of the router at the Master Server's location.
An Introduction to IP Addressing
If you are unfamiliar with or are new to networking concepts, below are some basics about IP Addressing:
"What is a static vs a dynamic (DHCP) IP address?"
A static IP address is assigned to a computer or network device and never changes. A "dynamic" or DHCP (Dynamic Host Configuration Protocol) address is obtained automatically from a router or server and may change without affecting your computer's performance. Computers, by default, are set to DHCP. Statically assigned IP addresses have been specifically assigned from a network administrator and are stored in a table to prevent two devices from receiving the same address.
"What is an internal (LAN) vs a public (Internet or WAN) address?"
Multiple computers that are connected together to share resources (such as Internet access, printers, and files) are generally on the same "internal" network or LAN (Local Area Network). You cannot access these resources from the Internet or your home computer without additional networking devices and/or configuration. A public network refers to the Internet. The Internet is a series of computers and servers that host information and can be accessed with any Internet connection provided by an Internet Service Provider (ISP).
- Obtaining the needed Internet Services.
- To use TimeIPS at multiple locations over the Internet, you must provide each location with a continuous connection to the Internet.
- The Master Server's location must have a Static IP address provided by your ISP (Internet Service Provider).
- Clock locations will work with either Dynamic (DHCP) or Static IP addresses.
NOTE: Upgrading to a Static IP Address may require an additional fee each month and/or may require your Internet service to be upgraded to business level.
NOTE: If you do not want to upgrade to a Static IP Address you may be able to use your Dynamic address by setting up a DynDNS service.
- Configure the TimeIPS Master Server.
The TimeIPS server will need an internal static IP address, but this address you will assign on your local network (this will not have anything to do with your ISP or Internet connection). For assistance setting up your Master Server please refer to this article: Getting Started
- Master's Location: Configure router for port forwarding.
We will use a common router (Linksys WRT54GL) as an example. Routers from other manufactures are similar, but their configuration option and menu items will be different. The web site portforward.com is a helpful resource that provides instructions on how to port forward many other routers. If you can not find the instructions on portforward.com please contact your router manufacturer for support and assistance.
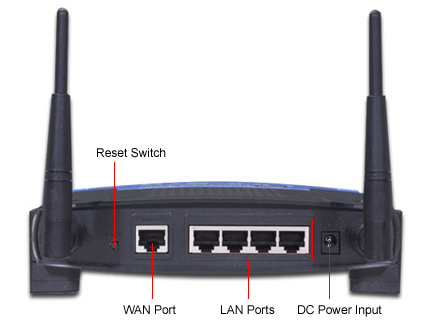
- Follow the wiring instructions that came with the router. Connect an Ethernet cable from your Cable/DSL modem to the port marked Internet or WAN on the router. Connect another Ethernet cable from your PC/Laptop to one of the four LAN ports on the router (labeled 1-4).
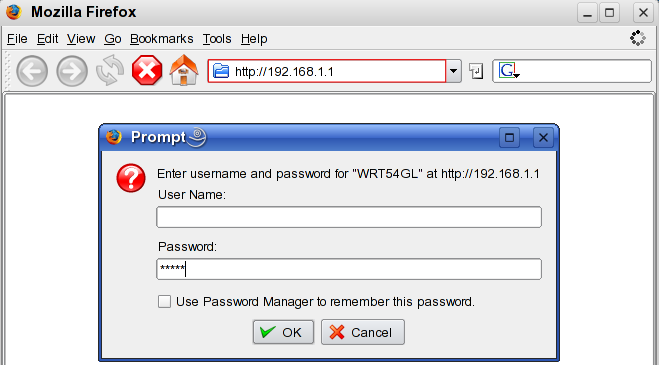
- Turn on your PC/Laptop and open a web browser.
- Type in HTTP://192.168.1.1 in the address bar. You should be prompted for a User Name: and Password:.
NOTE: If this is the first time to configure your Linksys WRT54GL the default username is blank and the password is Admin.
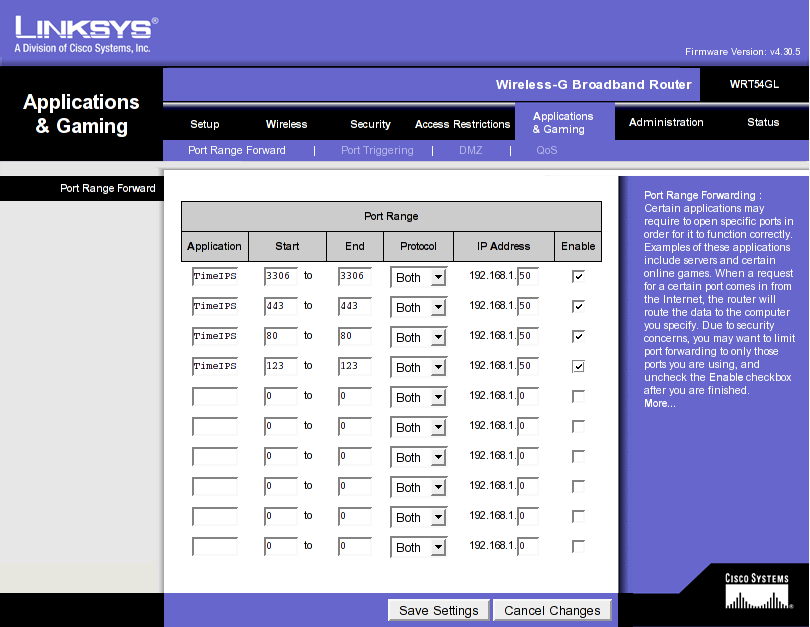
- Click on Applications & Gaming.
- Type the name of the rule under Application (example TimeIPS).
- Enter the number of the port you wish to forward under both the Start and the End. For the Clocks to connect with the Server you must forward port 3306. To find out what other ports are used by TimeIPS please refer to this article: Ports Used by TimeISP.
- Choose TCP from the drop down under Protocol.
- Enter your Master Server's IP address under IP Address.
- Put a check mark in the Enable box.
- Click on Save Settings button.
- Clock's Location: Configure the TimeIPS Clock.
- Connect all peripherals to the Clock. Connect the Clock to the router and power the system on.
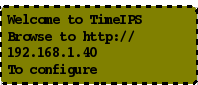
- Write down the IP address displayed on the Clock's LCD.
- Launch a web browser using a computer that is connected to the same router as the Clock.
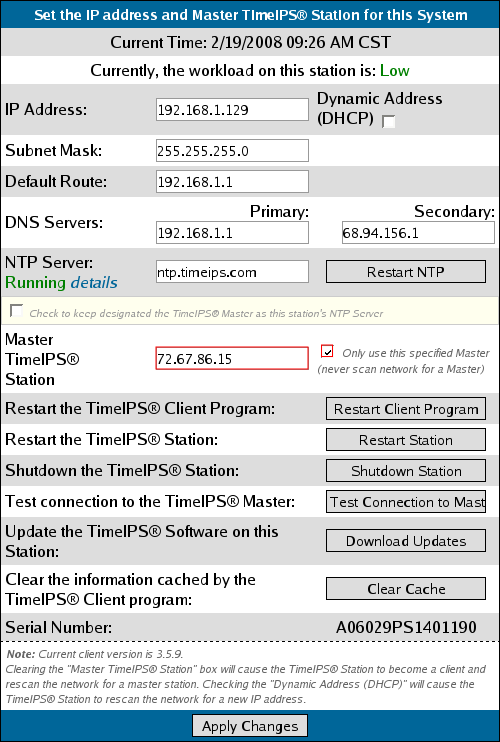
- Type the Clock's IP in the address field followed by /quickset_ip.php (example: http://192.168.1.129/quickset_ip.php).
- Enter the IP address of the Master Server in the Master TimeIPS Station field.
- Put a check mark in the box marked Only use this specified Master.
- Click on the Apply Changes button.
- After a few seconds the Clock's lcd will display Restarting client please wait.
- It will then change to Searching for TimeIPS Master
- Once the Master is found it will display Type or scan your ID.
- Congratulations!! You have now finished setting up your WAN. If you have more then one Clock connecting via the Internet repeat step 4 at the other Clock locations.
See Also:
DynDNS (1.3, 1.4, 1.5, 1.6, 1.8, 1.9, 1.10, 1.11, 2.0, 2.1, 2.2, 2.3, 2.4, 2.5, 3.0, 3.1, 3.2)
Ports Used by TimeIPS (1.3, 1.4, 1.5, 1.6)
|

 Information