Time clock systems by TimeIPS
Call Now! 316-264-1600
Information
Sales
Support
Knowledge Base Search:  
Main Menu
· Home

· Table of Contents
· Article Index

· Downloads
· New Features
· FAQ
· News
· Web Links

  
TimeIPS Knowledge Base

Table of Contents: Article IndexPrintable Version

Applies to versions: 1.6, 1.8, 1.9, 1.10


Paychex Paylink 9 Export Settings


TimeIPS Payroll Export can generate a file with your payroll data. The file can be opened in a spreadsheet application, such as Microsoft Excel or Open Office. Using the Payroll Integration with Benefits Tracking (IPSQBI) optional module, the file can be imported in your Paychex Paylink 9 payroll application.

Security Level Required: Payroll Administrator

Using the left pane Main Menu, click on: Administration » Payroll and Reports » Payroll Export


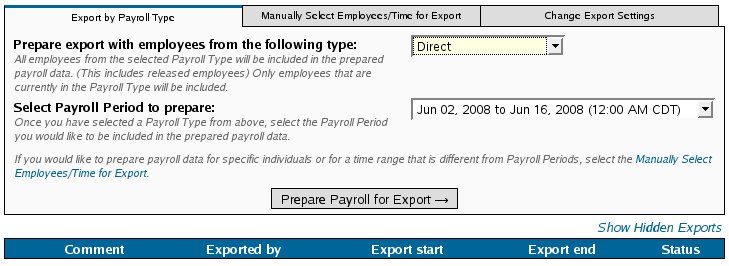
Step 1: Select Export Contents


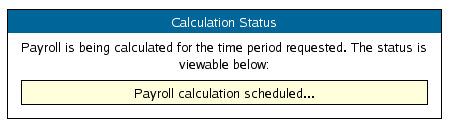
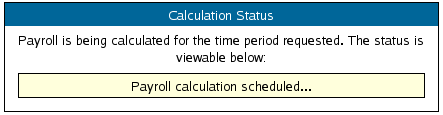
    Select a Payroll Type and Payroll Period for the date range you are working on from the drop-down boxes and click on the button labeled Prepare Payroll for Export. Next you should see the payroll calculation being scheduled


    NOTE: If necessary, it is possible to manually select your payroll time range and employees as well as change the export settings for payroll using the appropriately labeled tabs at the top of this page..


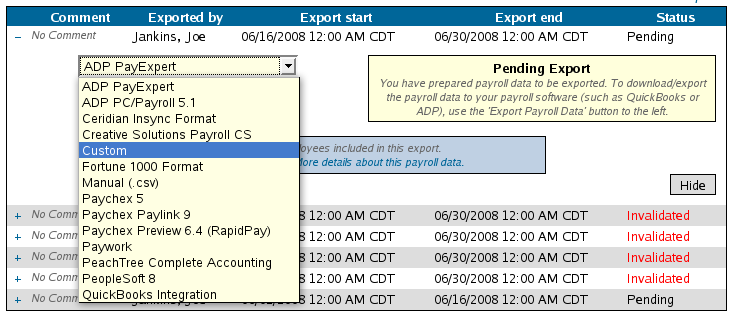
    Step 2: Choose an Export Format


    Select Paychex Paylink 9 from the drop down menu and then click on the button labeled Export Payroll Data


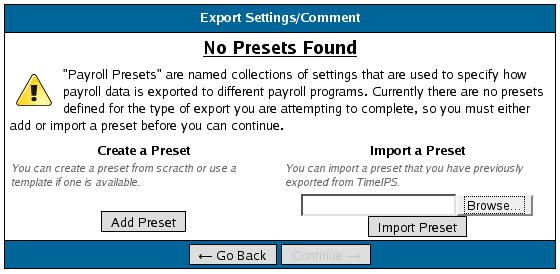
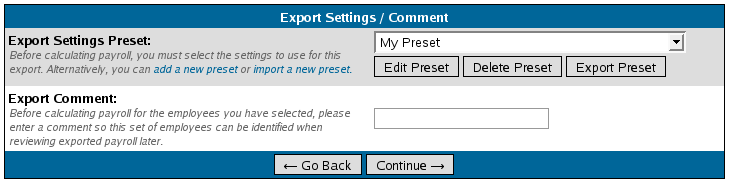
Click on Add Preset to begin setting up a preset for the Paychex Paylink 9 export

NOTE: A Preset is a set of stored settings that are used each time a payroll file is generated. If your settings change from one group of employees to another, you may create multiple presets and select the preset that applies for the group you are exporting at the time.


  • The preset window will appear.

  •  

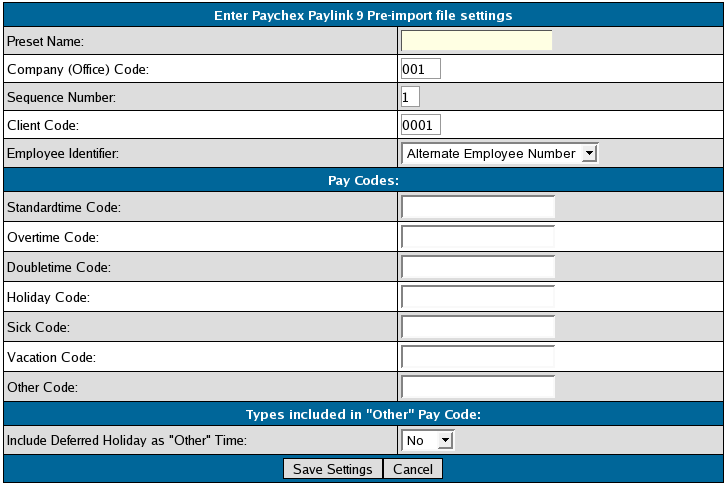
      Your preset options are:

    • Preset Name: Enter a descriptive name for your preset
    • Company (Office) Code: Must be 3 digits (use leading zeros if less than 3 digits.) This will be exported as the "Office Code" column in your payroll export file and is used as the first 3 digits of the export file name.
    • Sequence Number: This is the 1-digit Paychex site code. This will be used as the last digit in your export file name.
    • Client Code: Enter the 4-digit Paychex client number. This number will be used in between the Company Code and Sequence Number in the export file name and will be exported as the "Client Code" column in your payroll export file.
    • Employee Identifier: Your choices are "Alternate Employee Number", "Social Security Number (SSN)", or "Badge Number"
    • Standardtime Code: Enter the Code used to define regular hours
    • Overtime Code: Enter the Code used to define overtime hours
    • Doubletime Code: Enter the Code used to define Doubletime hours
    • Deferred Holiday Code: Enter the Code used to identify Deferred Holiday hours
    • Holiday Code: Enter the Code used to identify Holiday hours
    • Sick Code: Enter the Code used to identify Sick hours
    • Vacation Code: Enter the Code used to identified Vacation hours
    • Include Deferred Holiday as "Other" Time: Choose "Yes" to include deferred holiday hours with "Other" hours, otherwise, leave this option at "No".


  • Click on Save Settings to save, or Cancel to exit without saving.


    Step 3: Export Payroll


    1. On the next screen be sure that your new preset is the one selected in the Export Settings Preset drop down menu.
    2. Optionally if you wish to add a comment to the export making it unique and easily identifiable you can do so now.
    3. Click Continue


    Step 4: Download Payroll Export


    Note: Editing of time events is locked during payroll processing to avoid having another user make changes via the Time/Edit Report that would not be reflected properly in the current payroll run.
    Click on the download link to save the newly created payroll export file.
    If you have confirmed that the information contained in this export is correct and wish to permanently lock the payroll period click the button labeled Yes, the export was accepted otherwise choose Cancel, return to TimeIPS


    If you chose Cancel return to TimeIPS the export will be listed as Pending. Pending exports can be exported again to other payroll output formats as often as you like until they have been finalized

    If you chose Yes, the export was accepted you should now see the payroll run labeled as Exported Exported payroll runs are locked, time can no longer be edited in the system for this period of time.

    The TimeIPS Knowledge Base is updated frequently.
    Please continue to check back for further details about TimeIPS payroll exports.

    For immediate assistance with any of the above payroll exports,
    call our Customer Support staff at 877-846-3256.


  • See Also:
    Payroll Export (TimeIPS Version 1.6) (1.6, 1.8, 1.9, 1.10)
    Paychex Paylink 9 Export Settings (1.6, 1.8, 1.9, 1.10)

    Was this article relevant to your question? Yes No
    ©2004-2023 TimeIPS, Inc. All Rights Reserved - TimeIPS and the TimeIPS logo are registered trademarks of TimeIPS, Inc.
    "Intelligent Personnel System" "Run your Business. We'll watch the clock." are trademarks of TimeIPS, Inc.
    TimeIPS is protected by one or more patents. Patent No. US 7,114.684 B2.