Date printed: 04-19-2024 Last updated: 11-13-2015
To view our complete support knowledge base and most current version of this article visit support.timeips.com.
 Information Sales Support
Date printed: 04-19-2024 Last updated: 11-13-2015 To view our complete support knowledge base and most current version of this article visit support.timeips.com. |
316-264-1600 Information Sales Support |
Configure and use the TimeIPS Desktop Clocking Application.
Launch the TimeIPS Desktop Application by double clicking the application icon provided.
In the configuration box:

Enter the IP address of your TimeIPS server (or web address such as asp.timeips.com). If your server is an ASP system, replace the 80 with our port number. The Remote Clocking Biometric Unit should already be selected for the Scanner Field.
The TimeIPS Desktop Application needs to create a local .sql database file on your computer. Click the browse button to specify where you would like this file to be created and stored. You will also need to provide a name for the file. We suggest a meaningful name like TimeIPSDesktopAppDB or similar.
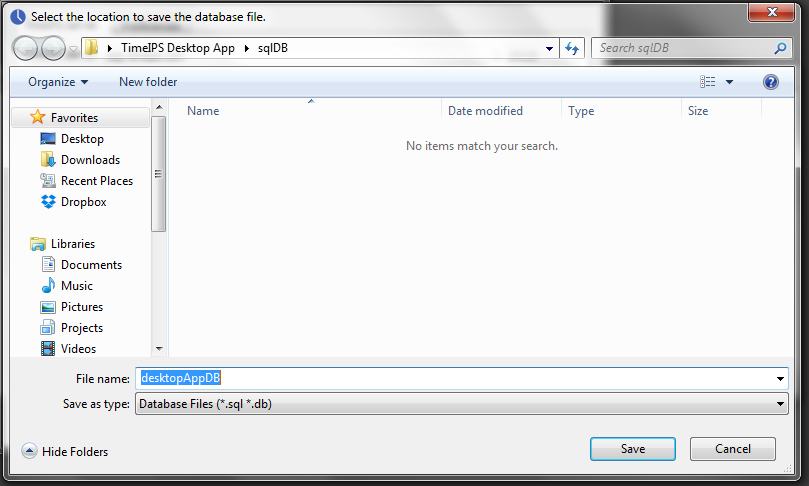
The file must be present for the TimeIPS desktop Application to function. If you are using the application on a computer system without permanent storage, we recommend placing the file on a flash drive or similar removable storage medium.
After specifying the IP address, Database file location and Scanner (if applicable), click apply.
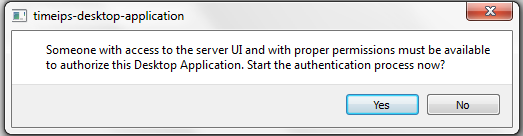
You will be notified that someone with access to the server and proper permissions will need to approve the applications access to the server.
At this point the approving user should be logged in to the TimeIPS server and on the Desktop App page located at:
When ready, the user in front of the Desktop Application should click “Yes” in the request access dialog to begin the authentication process.
The user logged onto the Desktop Application Page will be prompted to grant access to the computer using the Desktop Clocking App.
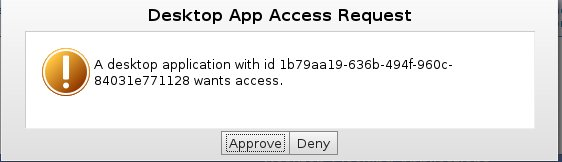
Clicking “Approve” will give you the authorization code to enter in the Desktop Clocking App to complete the authentication process.
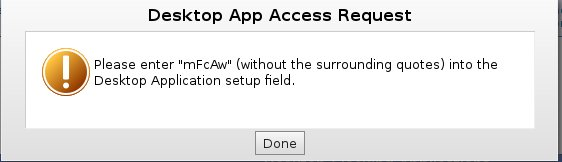
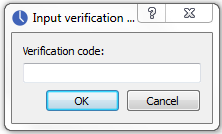
Enter the provided code in the Verification Code box on the Desktop Clocking Application and click “OK”
Your Desktop Clocking Application has now been authenticated for use.