
|
|
Applies to versions: 2.5, 3.0
Benefits Request and Approval - Manager View
Managers are automatically notified when employees submit a Benefit Request. Benefit Approvals allows managers to view Pending Requests as well as approve or deny them.
Required Modules:
- Benefits Request and Approval (IPSAPP)
- And either Payroll Integration with Benefits Tracking (IPSQBI) or Advanced Benefits Tracking (IPSBEN).
Using the left pane Main Menu » Administration, click on: Benefits » Benefit Approvals
The Benefit Approvals page is broken up into three sections: Display Options, Pending Requests, and Reviewed Requests. In addition, there are links at the top of the page to Edit Options and view the Benefits Calendar.
Display Options
- Select an Employee or Group from the drop down box.
- Click the Update Display button to view their requests.
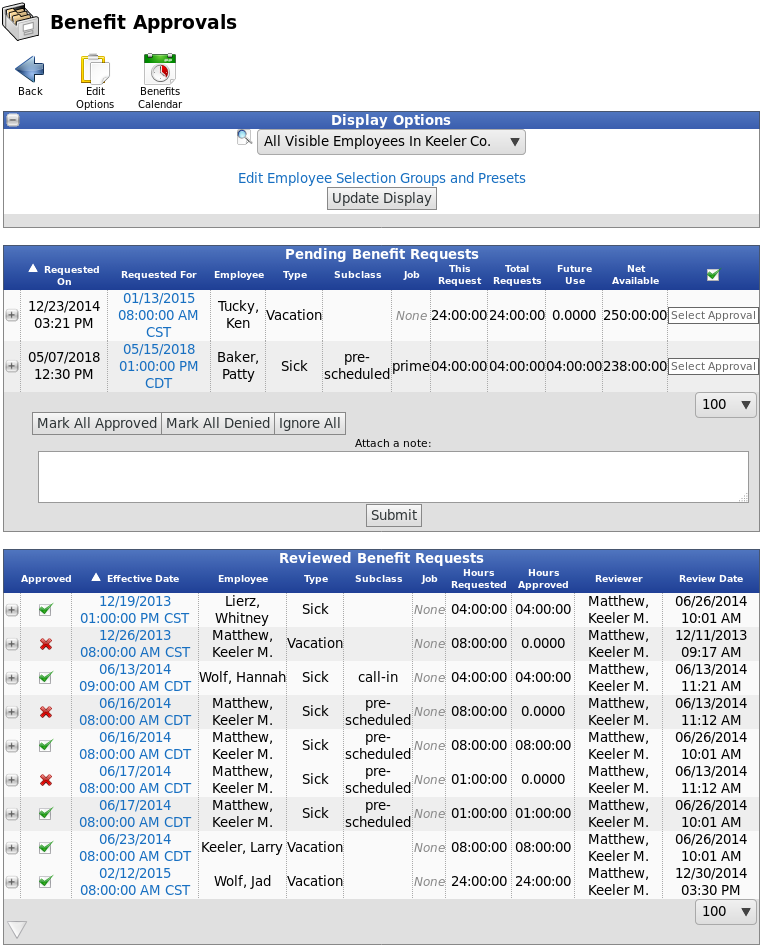
Pending Requests
The Pending Requests section lists all the benefit requests that are waiting for your approval or denial. Each request shows when it was requested, when it will be used, who it is for, what type of benefit (plus subclass, job, and/or department if applicable), and how much time is requested. The additional information is provided to help approvers understand how their approval will affect the employees benefit hours. You also have the ability to edit the Pending Request details.
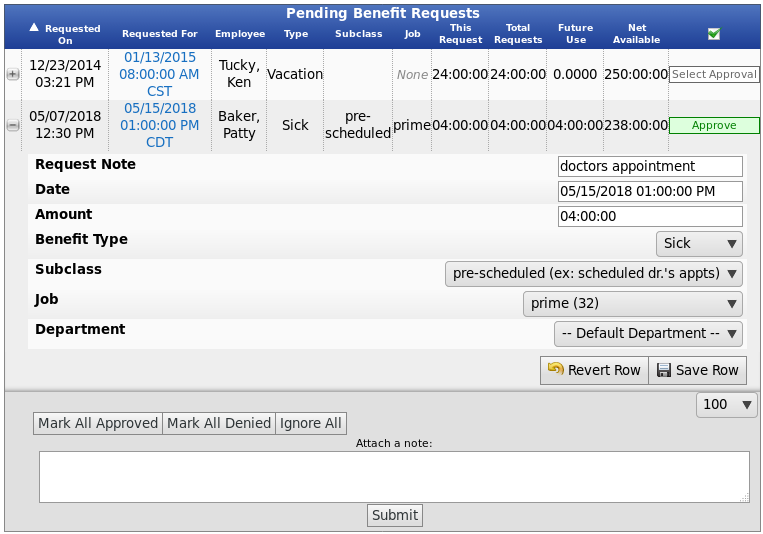
- If an Edit is made, be sure to click the Save Row Button to save the change.
- To Approve or Deny an individual request, click in the Select Approval box on the far right end of that request's row.
- Clicking once on "Select Approval", will change it to Approve.
- Clicking once on "Approve", will change it to Disapprove.
- Clicking once on "Disapprove", will change it back to "Select Approval".
- To Approve, Deny, or Ignore all requests at once, click the appropriate button: Mark All Approved, Mark All Denied, or Ignore All.
- Click the Submit button to process the request.
NOTE: Once you have approved a benefits request, the request will show as approved to the employee in their My Benefit Requests section of My TimeIPS® and will automatically be deducted from that benefit type in the Employee Benefits Report under Administration -> Benefits Report.
Reviewed Requests
The Reviewed Requests section lists all the benefit requests that have received approval or denial. Each request shows the approval status, when the benefit will be used, who it is for, what type of benefit it is (and subclass, if applicable), how much time is requested, how much time is approved, who reviewed it, and the date it was reviewed.
- A red X appears in the Approval box if the request has been Disapproved.

Requests listed in the Reviewed section, can still receive an approval change.
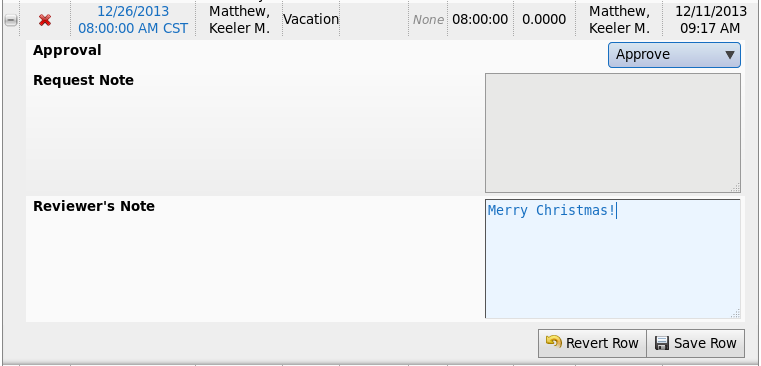
- A green check mark appears in the Approval box if the request has been Approved.

Email Notification Options
Initially, you will want to click on the Edit Options icon  at the top of the page, to set up your email notification options. at the top of the page, to set up your email notification options.
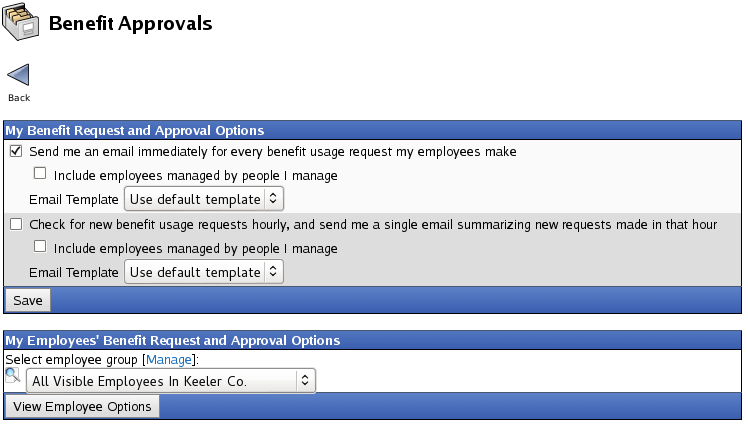
This will take you to the My Benefit Request and Approval Options screen where the following options are available:
- Send me an email immediately for every benefit usage request my employees make - This option will notify you of all of the new requests, deletions and edits for all of the employees that you directly manage at the instant they make the request.
- Include employees managed by people I manage - This option will notify you by email of every request, deletion and edit that every employee who falls under your hierarchy of management makes instantly when they make it.
- Check for new benefit usage requests hourly, and send me a single email summarizing new requests made in that hour - This option will send you an hourly email summarizing all new requests, edits and deletions for employees that you directly manage.
- Include employees managed by people I manage - This option will send you an hourly email summarizing all new requests, edits and deletions for all employees that fall under your hierarchy of management.
- If you have created a customized Email Template, choose it from the drop down list.
NOTE: Email Templates can be created, edited, and deleted by going to the left pane Main Menu » Administration, click on: System » E-mail Templates.
- Click the Save button to implement the changes.
Under the My Employees' Benefit Request and Approval Options section, you can also set up the email options for your employees.
- From the drop down menu, Select the employee group or individual.
- Click the View Employee Options button.

Once you have entered the Employee's Request and Approval Options page, you have the option to:
- Send an email notification to that employee when their benefit requests are reviewed.
- Send an email notification for working less than the scheduled day or week.
- Automatically deny or approve aging requests that are past a user-defined number of hours.
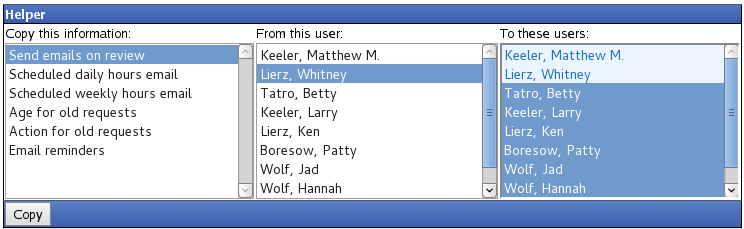
TIP: There is a Helper function (at the very bottom of the page) to copy the same settings from one employee to another to make setup where parameters are identical, easy and less time-consuming.
To View the Benefits Calendar
Click on the Benefits Calendar icon  at the top of the Benefit Approvals page. at the top of the Benefit Approvals page.
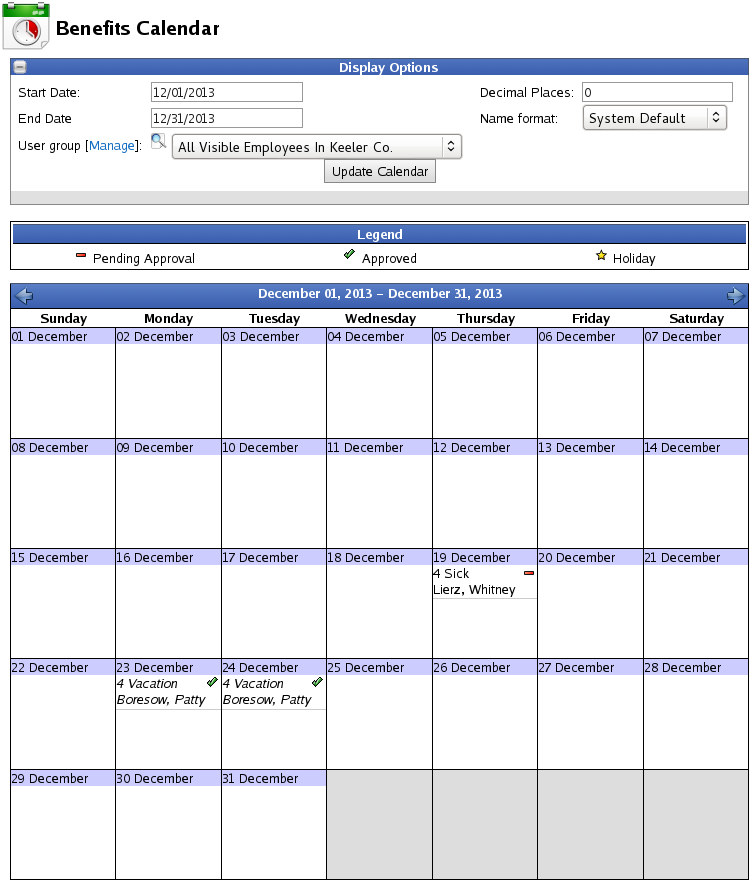
Display Options
- Click on the + (plus) sign on the far left side of the Display Options bar to expand the window.
- Customize the Date range, Name Format, how many Decimal Places appear in the Benefit Time, and the Employee or Group.
- Click the Update Calendar button to view the changes.
Was this article relevant to your question? Yes No |

 Information