Time clock systems by TimeIPS
Call Now! 316-264-1600
Information
Sales
Support
Knowledge Base Search:  
Main Menu
· Home

· Table of Contents
· Article Index

· Downloads
· New Features
· FAQ
· News
· Web Links

  
TimeIPS Knowledge Base

Table of Contents: Article IndexPrintable Version

Applies to versions: 3.1, 3.2, 3.3


ASP System Settings


The System Settings page lists the configuration settings for core components of your TimeIPS® Server. This includes System Management, Time/Date Configuration, Mail Settings, Memory Settings, and Remote Database Configuration.


Using the left pane Main Menu » Administration, click on: System » System Settings


System Management

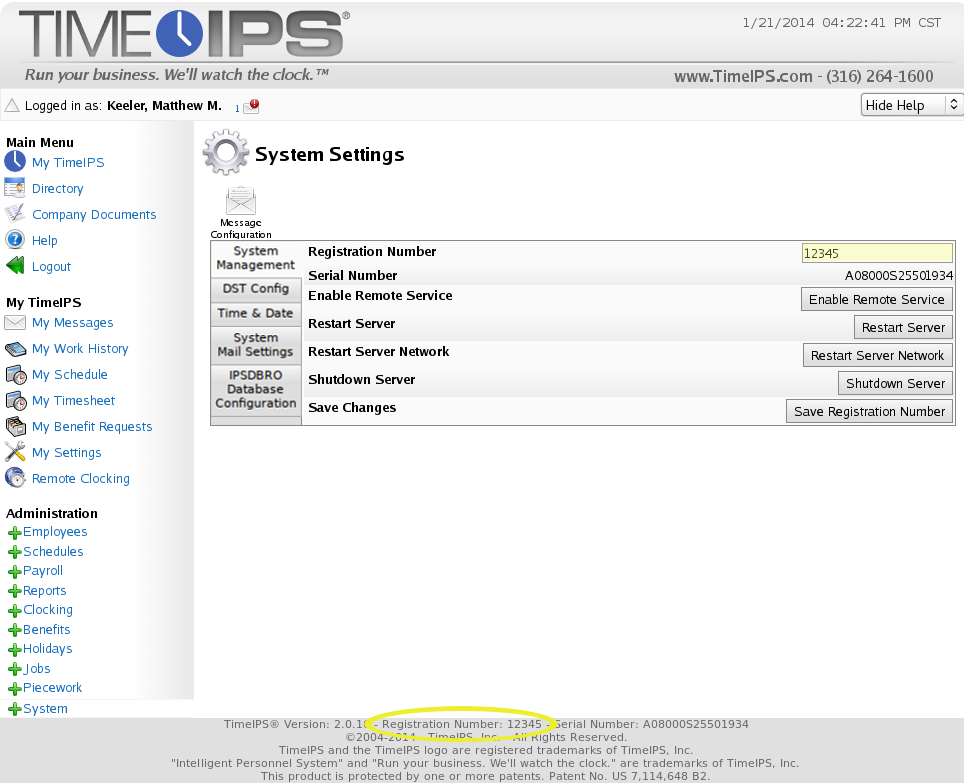
You can Enable Remote Service, Restart your master TimeIPS station, Restart the networking, and Shutdown your TimeIPS station for maintenance or moving.

  • If the Registration Number is blank, enter in your Registration Number and/or Customer ID. After saving this change, it will appear in the footer of your TimeIPS system.


  • Some troubleshooting procedures may require a TimeIPS support representative to access your TimeIPS® system. If directed by a TimeIPS support representative, click the Enable Remote Service button to access the Remote Service Authorization page.
  • Click the Restart Server button to restart your TimeIPS® server. Please wait 4-5 minutes for a full restart to finish. TimeIPS will be unavailable during this time.
    NOTE: The RESTART SERVER button is a complete power cycle whereas the RESTART SERVER NETWORK button restarts only the networking component of the server.
  • Click the Restart Server Network button to restart the TimeIPS® server's network. Please wait 2-3 minutes for a network restart to finish. TimeIPS may be briefly unavailable.
  • If you need to move or completely turn off power to the TimeIPS Server, click on the Shutdown Server button. Please wait 3-4 minutes for the system shutdown to complete. When the fan on the back of the TimeIPS system stops, the shutdown is complete, and the power cord can safely be removed.
    NOTE: If you have multiple TimeIPS stations, the clock stations can be shut down and restarted from their respective IP address links in Clock Configuration.
  • Click the Save Registration Number button to save your changes.


DST Config

Modify DST Boundaries for Time Zones.

  • If your company, any employees or divisions are in a time zone that observes Daylight Saving Time, select the time zone from the drop down list and click Edit DST Boundaries to view the dates when DST starts and stops each year.
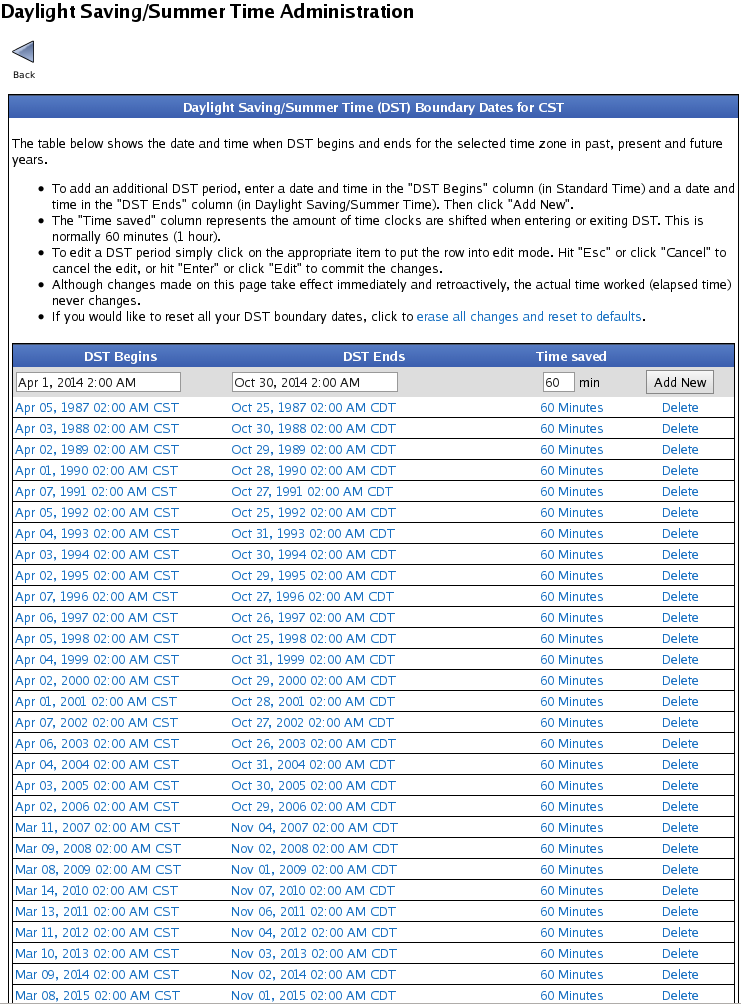


  • To add an additional DST period, go to the top of the list then enter a date and time in the DST Begins column (in Standard Time) and a date and time in the DST Ends column (in Daylight Saving/Summer Time).
  • Enter an amount of time in the Time saved column. This represents the amount of time clocks are shifted when entering or exiting DST, which is normally 60 minutes (1 hour).
  • Then click the Add New button.


  • To edit a DST period, simply click on the appropriate item to put the row into edit mode. Hit "Esc" or click Cancel to cancel the edit, or hit "Enter" or click Edit to commit the changes.


Time & Date

  • Check the Use NTP box to enable automatic time synchronization.
    NOTE: Using NTP for time synchronization on your TimeIPS® Server is recommended.
  • On some VM systems, the NTP service can still lose significant time. To combat this, you can force a restart of the NTP service every 10 minutes by checking the Force Restart box.
  • Enter the NTP Server Address you wish to synchronize to. (Recommended: ntp.timeips.com) By using Automatic Time Synchronization, your TimeIPS Station will automatically connect and synchronize its time to an NTP server. This is highly recommended because an unsynchronized local clock will drift, eventually resulting in incorrect times. Using this option requires an Internet connection or an NTP server available on your local network. If you have a firewall, be sure that port 123 is not blocked.
  • System Time: Set the date and time of your TimeIPS® Server's internal clock.
    Manually setting the time on your TimeIPS® Server is NOT generally recommended.
    If you do not have an Internet connection or an NTP server on your local network, you will need to use the local clock option. In this case we recommend checking the time at least once a week and adjusting as needed.
  • Click the Restart NTP Service button to manually perform a one time restart of the NTP server.
  • Click the Apply Changes button to save your changes.


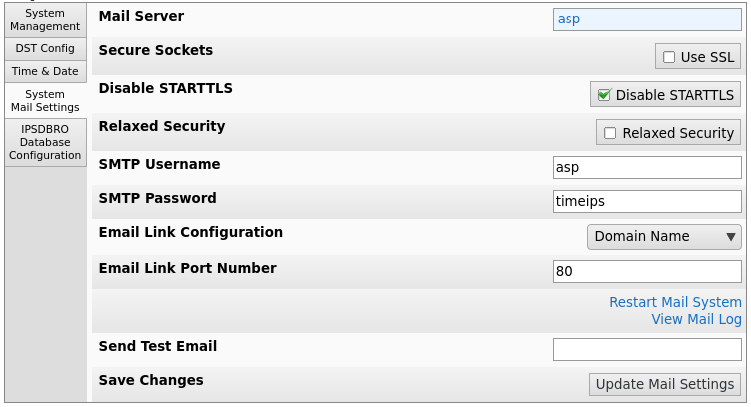
System Mail Settings

  • Mail Server: Enter the outgoing SMTP server you would like the TimeIPS® System to send mail through. The default port is 25; use "server:port" to specify a different port.
    NOTE: If "asp" is entered as the Mail Server and Update Mail Settings is clicked, the majority of settings disappear as those are set internally. The following settings will still be visible.

  • Email Link Configuration: Some outgoing email will contain links pointing back to specific pages on this server. If email is always accessed from inside your network, select Internal IP Address. If email is accessed from outside your network, and/or you have a router/firewall with port forwarding configured, select Domain Name and set the domain name under Company/Divisions->URL tab. NOTE: Some router/firewall configurations do not allow internal access to an external IP with port forwarding. If this is the case for you, Domain Name links will NOT work inside your network. In this case, select Provide Both Links.
  • Email Link Port Number: If you use port forwarding to redirect external requests to your TimeIPS® Server, set the port here so that links in E-Mails sent by this system will route properly.
  • The option to Restart Mail System is available.
  • If there are messages that have failed to send, you may want to View Mail Log for more details.
  • If you would like to Send a Test Email, enter an address and click the "Update Mail Settings" button.
  • Click the Update Mail Settings button to save your changes.


IPSDBRO Database Configuration

  • The Limited Remote Database Username is the username used for remote database access such as from an ODBC-compliant application. This user is used primarily for read-only access.
  • The Limited Remote Database Password must be between 8 and 16 characters long (inclusive). Leave blank unless changing password.
  • Confirm the Limited Remote Database Password by typing it a second time.
  • Click the Update Database Configuration button to save your changes.
<div class="note">


©2004-2023 TimeIPS, Inc. All Rights Reserved - TimeIPS and the TimeIPS logo are registered trademarks of TimeIPS, Inc.
"Intelligent Personnel System" "Run your Business. We'll watch the clock." are trademarks of TimeIPS, Inc.
TimeIPS is protected by one or more patents. Patent No. US 7,114.684 B2.