|
|
Applies to versions: 3.1, 3.2, 3.3, 4.0
Add/Edit Workweek Groups
Workweek Groups allow administrators to manage sets of employees who follow the same workweek schedule and have their overtime calculation done in the same way.
Using the left pane Main Menu » Administration, click on: Payroll » Workweek Groups
Add a Workweek Group
- Click on the + sign next to Add a New Workweek Group to expand the window.
- The Add a New Workweek Group screen will display.
- Enter the Workweek Group Name.
- Enter the date, time and time zone for the Workweek Start.
NOTE: This is an exact time of day (and day of week) when all employees who follow this Workweek Group start their own workweek. For example, if the workweek schedule for the employees in this group starts on Sunday at midnight, then any Sunday at 12:00 AM would be valid.
NOTE: Each Workweek Group must have at least one Workweek Period with a corresponding Overtime Policy and an effective date.
TIP: For the best historical tracking, you should select the first Sunday that any employee of this group used TimeIPS.
- Choose the Workweek Duration from the drop-down box.
NOTE: For most U.S. workers, this will be "One calendar week". Special employment situations may allow longer workweeks.
- Select the Overtime Policy you want to use with this Workweek Group from the drop-down box.
- Click on the Add New Workweek Group button to save.
- Once saved, the new Workweek Group will appear on the Active Workweek Groups list.
Add a New Workweek Period to an Existing Workweek Group
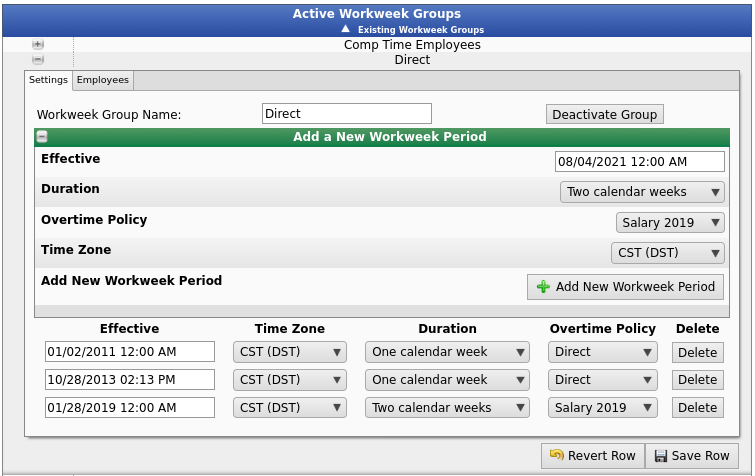
- Click on the + (plus) sign next to the Workweek Group name to expand the record.
NOTE: Click on the - (minus) sign next to the Workweek Group name to collapse its record.
- Click the + (plus) sign to the left of the Add a New Workweek Period bar.
- Enter the date and time the new workweek group becomes Effective, then select the Duration, Overtime Policy and Time Zone from the drop-down boxes.
- Click on the Add New Workweek Period button to add the new workweek group period to your existing workweek group.
- The new workweek group period will be added to the record.
Edit an Existing Workweek Period
- Click on the + (plus) sign next to the Workweek Group name to expand the record.
- Overwrite the current date and time with the new date and time in the Effective field. Make any other changes by selecting the new choice via the corresponding drop-down list then click on the Save Row button.
- The edited text/option will turn blue in color while the change is being made within the TimeIPS system.
NOTE: If the change you are making to the date affects a pending payroll, you will receive the following warning:
Click on "Yes" to invalidate the pending payroll and save your change. Click on "No" to exit the warning window, then click on your browser's "Reload/Refresh" icon to exit the record without saving.
- If the change does not affect pending payroll, the edited text turns black again, indicating that the new time and date has been saved.
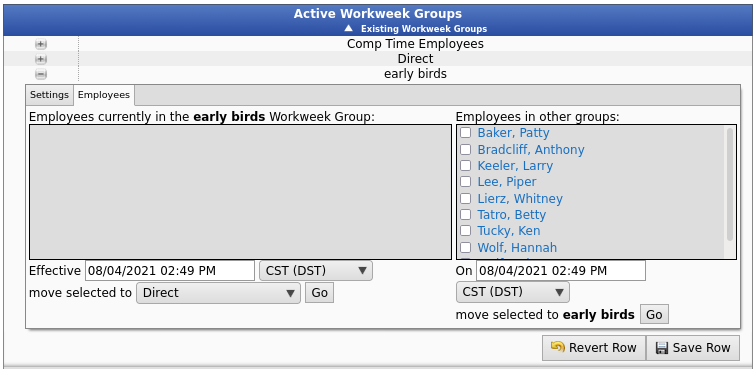
- Click on the Employees tab to add or remove employees to/from this group.

- Place a checkmark in the box next to the employee's name in the Workweek Group window that you wish to move.
- Enter the Effective date and time when the employee should be moved to the new group, then (if needed) select the time zone from the drop-down box.
- Choose the Workweek Group from the drop-down box, then click the Go button.
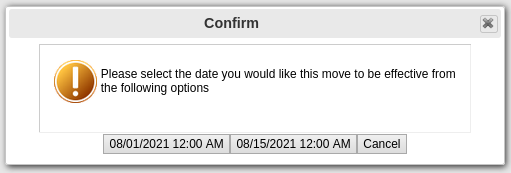
NOTE: If the effective date you have chosen does not line up with the start of a work week, the system will prompt you to choose between two start dates to continue.
|

 Information
 Sales
Sales Support


