|
|
Applies to versions: 3.3, 4.0
Add New Employee Templates
New Employee Templates allow creating customized forms with selected fields showing, configurable requirements, shown in the display order that makes the most sense, and with preferred default values. Custom validation is even available on most type-in fields. This can help onboard various types of employees quickly and accurately.
The ability to edit New Employee Templates is only available to employees with Full Access permissions.
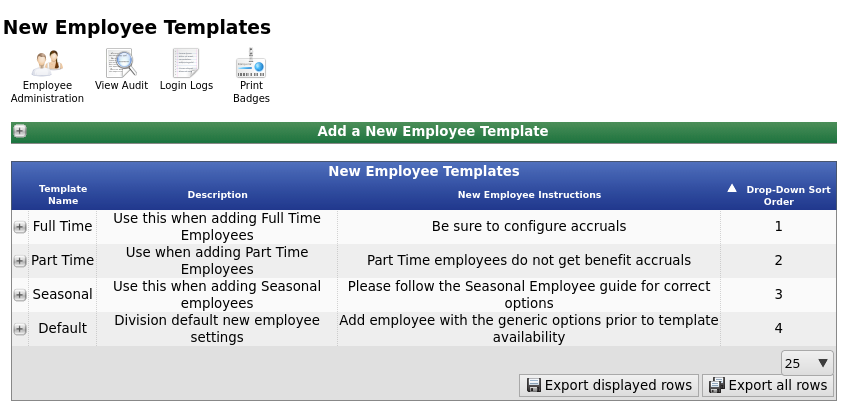
Using the left pane Main Menu, click on: Employees » Employee Administration » New Employee Templates
- Existing templates will be shown in the table where they can be edited and reordered.
- If templates have not been configured, only "Default" will be available. This template contains the same fields in the same order as used by systems prior to the introduction of New Employee Templates.
- Open any existing template to edit the fields displayed, their order, default values, instructions and validation.
- To create a new New Employee Template, click the + on the Green bar labeled "Add a New Employee Template"
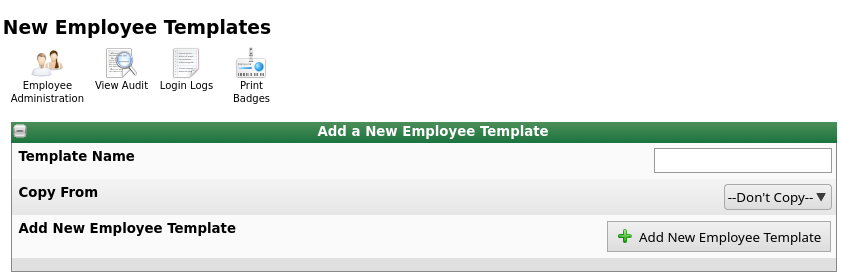
- Provide a Template Name that will help identify the type of employee this template is made to create. Examples include "Full Time" "Part Time" "Administrative" "Commission" etc.
- If the template is a variation of an existing template, use the Copy From option to make another similar template.
- The new template will open and settings can be adjusted. The Template Name will appear on the drop-down list for managers or employee administrators to select.
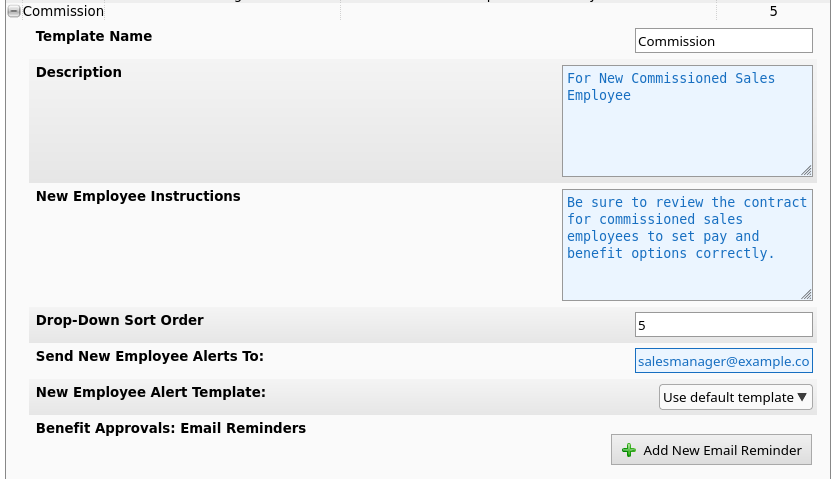
- Set the Description to explain when to use this template.
- Set the New Employee Instructions to something that will help make sure the template is used correctly and to explain any special steps that may need to be taken.
- The Drop-Down Sort Order can be a number. Lower numbers are shown first on the drop-down list.
- Set New Employee Alerts and the Template if you'd like to have someone receive an email any time an employee is added using this template.
- Set Benefit Approvals: Email Reminders if the employee made with this template should have Benefit Approval emails sent.
- Next, are a long list of possible New Employee fields. There are many of them, and most can probably remain hidden unless they need to be set differently for each new employee.
- Click the + next to a field to expand and edit the details.
- In this example, we have the ID/Badge field open.
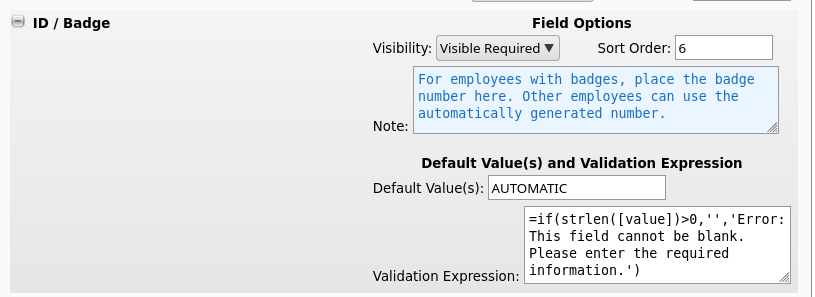
- The Visibility drop down allows the field to be shown and required, shown and optional, or hidden. (Note, some fields, like First Name and Last Name, are always visible and required).
- The Sort Order field can be set to a number to control where this field will appear when managers use it to add a new employee. If you want to place a field between two existing fields, decimals are acceptable. For example, sort order 6.5 will appear between two other fields with Sort Order 6 and 7.
- The Note field provides a way for you to give the manager special instructions on this specific field when adding a new employee. For example, when and how to set the badge number.
- The Default Value(s) field allows setting the initial value that will appear for this field when adding a new employee. The ID/Badge number has a special mode where "AUTOMATIC" will have the system try to generate the next available badge number. Some other fields also have special instructions. Be sure to turn on "All Help" at the top of the screen to see full instructions for each field.
- Note: If the Default Value is set and the Visibility is Hidden, the default value will be automatically used without a chance to change it. This may be desirable in many cases to ensure new employees have certain fields set as expected.
- The Validation Expression is optional and can be used to provide simple checks on the value entered. Expressions are extensively used in TimeIPS reporting and documentation is available on supported functions. The value entered is available as [value] in the expression. Some common examples follow:
- Ensure the badge number is at least 4 characters long:
=if(strlen([value])>=4,'','Error: Please enter a badge number at least 4 characters long.')
- Ensure the badge number is exactly 6 characters long:
=if(strlen([value])!=6,'','Error: Please enter a badge number exactly 6 characters long.')
- Ensure the employee's Employment/Pay History Status is one of an approved list
=if(in_list([value],'Training','New Hire','Regular'),'','Error: Status must be "Training", "New Hire", or "Regular".')
- For more complex expressions, please contact TimeIPS support for assistance.
- After all fields have been configured, click the Save Row button at the bottom. To preview the template, click the Employee Administration icon at the top, then expand the Add a New Employee green bar and select the template on the first line drop-down.
|

 Information
 Employee Import/Export optional module.