|
|
Applies to versions: 2.2, 2.3, 2.4, 2.5
Jobs
Job Administration allows you to configure jobs, manage employee job membership, pay rates, and configure job tracking on specific jobs and projects. You can also assign jobs to customers and organize your jobs by assigning them to categories. The IPSIPS optional module is required. The IPSJOB module provides additional options including unlimited numbers of jobs.
Using the left pane Main Menu » Administration, click on: Jobs » Jobs
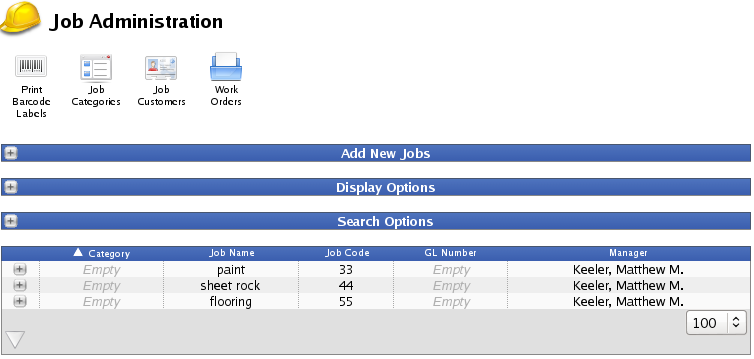
ADD A NEW JOB
TIP: If you plan on assigning jobs to customers for billing purposes or to organize jobs by categories, set up the Job Categories and Job Customers first.
- Click the + (plus) sign to the left of the Add New Jobs bar to expand the window.

- Job Name: If a computer monitor is connected directly to your TimeIPS time station, the Long Name displays when employees clock in and out of a job. Long names must be unique within each job category. Maximum 24 characters.
- Small Display Name: The job Short Name displays on the TimeIPS LCD display when employees clock, and on some reports. Maximum 14 characters.
- (Optional)Category: Job categories can be used to help organize jobs. Set up the categories before entering jobs by using the Job Categories link from the Jobs menu in TimeIPS.
- (Optional) Manager: If a manager is selected for a job, that employee can have the special ability to edit time events where an employee worked the job. For this to work, the employee must also have the Job Manager permission group, and within that group, the option to "Edit" must be selected for "Clock Events" for "Employees working on jobs you manage." Note that a job manager must still have the ability to view clock events for all employees that might work their job, as without view permission, the edit permission alone will not cause the employee to be visible.
- (Optional) Copy: If you select an existing job from this list and press "Create Job", a new job will be created with the settings from the copied job.
- (Required for Validated jobs) Job Code: A Job Code can be 1-12 alpha-numeric characters in length. Each Job Code must be unique. Employees clock in and out of jobs using the this job code. The employee will enter the job code from the TimeIPS numeric keypad, from an alpha-numeric computer keyboard connected to TimeIPS (PS2 or USB), or with a barcode scanner when clocking in/out of jobs.
NOTE: The TimeIPS 8150 Series Barcode Reader requires a minimum of 4 characters. The TimeIPS LS4000 Series Barcode Reader will read 1-12 characters.
NOTE: Job Codes can include numbers, capital and lower case letters, and dashes. Job Codes are case sensitive.
- (Optional) Description: Enter a description of the job for reference, if desired.
- Click on the Create Job button to add your new job.
ENTER JOB DETAILS or EDIT AN EXISTING JOB
- Click the + (plus) sign to the left of the Job Name to expand the window.

General Tab
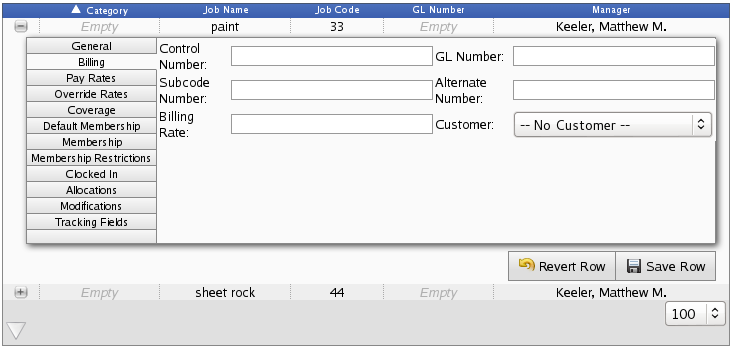
Billing Tab
Pay Rates Tab
Each job can be assigned a specific Pay Rate that will be applied to any employee who works this job, as long as a specific job rate has not been assigned to that employee.
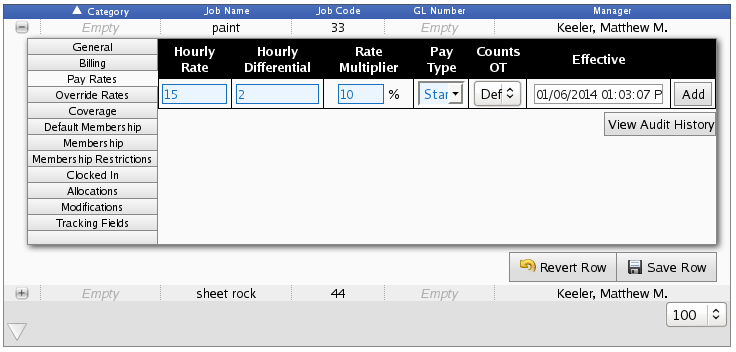
- To add a job Pay Rate:
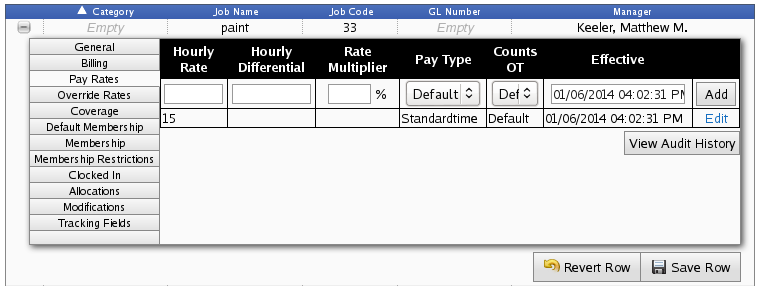
- Once it's added, click on the Edit button to make changes to the rate, add an expiration date, or delete the pay rate entry all together.
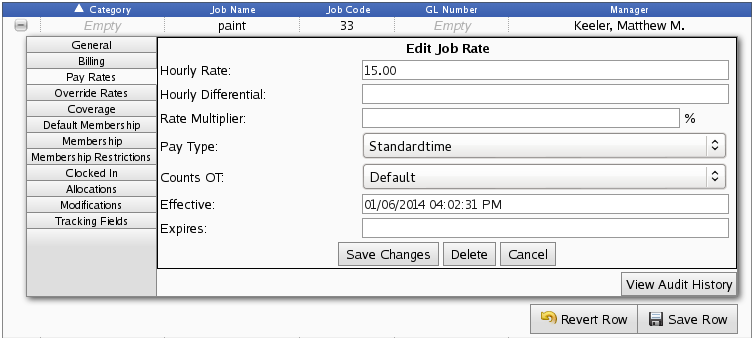
- To see a list of all the changes that have been made to pay rates, click the View Audit History button.

Override Rates Tab
Each job can be assigned specific pay rates per employee. This is done on the Override Rates tab which allows you to view and edit the individual employee job pay rates.
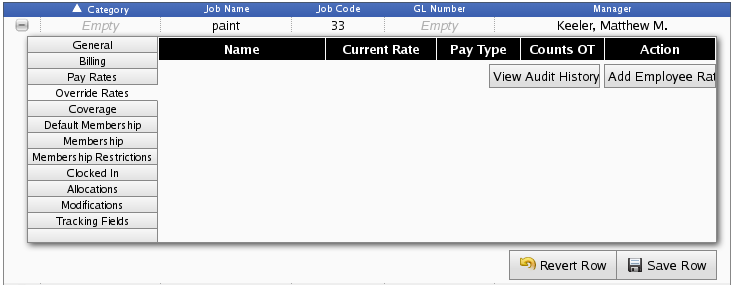
- Click on the Add Employee Rate button.
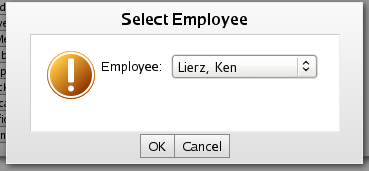
- Choose the Employee from the drop-down box and click on OK to continue or Cancel to close the window.
- After clicking on OK, the job rate option fields will appear below the name of the employee you selected.
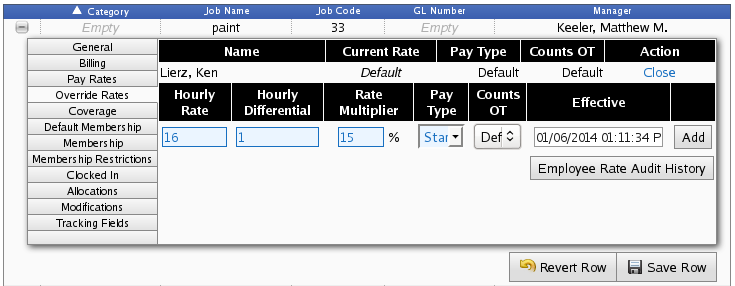
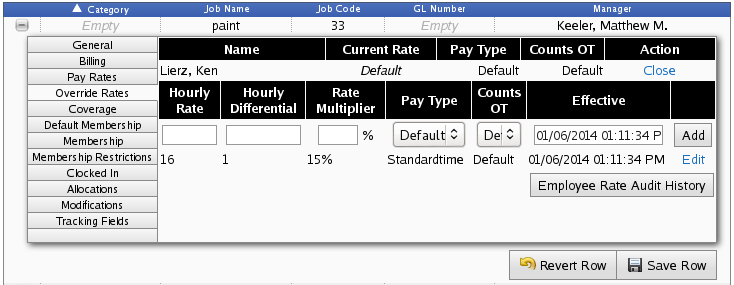
- Once it's added, click on the Edit button to make changes to the rate, add an expiration date, or delete the pay rate entry all together.
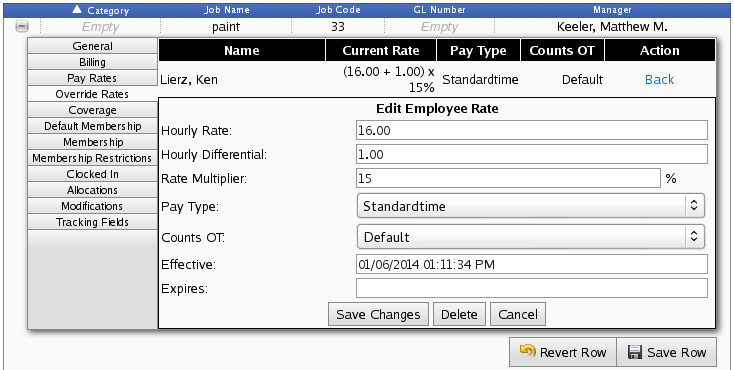

- Each employee that has been assigned an individual job rate will be listed by Name and Current Rate.
- To review all job rates that have been assigned to an individual employee, click on the Employee Rate Audit History button for that employee.

Coverage Tab
Each job can be assigned coverage rules. If the number of employees clocked into the job violates the rules, email alerts can be sent and the violations can be viewed with the "View Violation History" button.
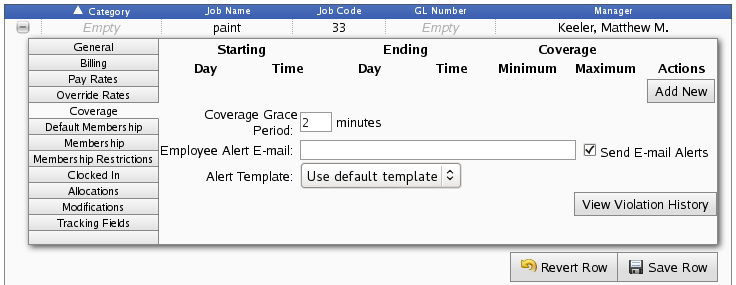
- To add a new coverage rule, click the Add New button.
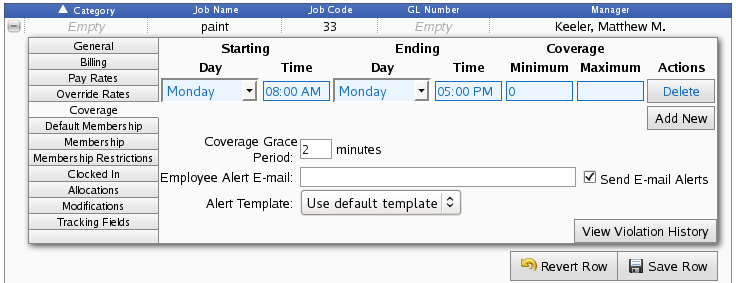
- Enter a Starting and Ending day and time, as well as the Minimum and/or Maximum number of employees that are allowed to be clocked in during this time.
- While this schedule rule is in effect, an alert will be sent if fewer than the minimum and more than the maxmum employees are clocked in beyond the Coverage Grace Period. This alert will be sent to the email address you enter in the Employee Alert E-Mail field. To stop sending alerts, uncheck the Send E-Mail Alerts box.
- Click the Save Row button to impletment the rule.
- Click the View Violation History button to see a list of all the violations that have been made to your coverage rules.

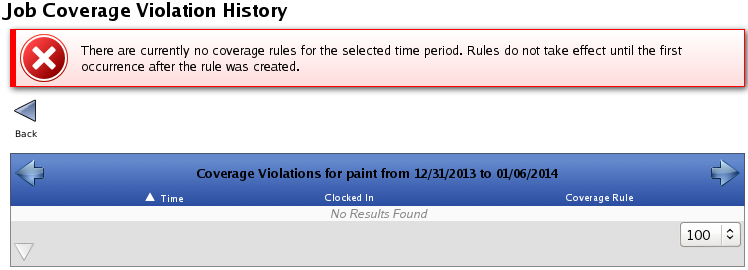
- Use the left arrow to view previous weeks and the right arrow to return back to more recent weeks.
Default Membership Tab
Employees can be assigned to a specific job by default. When employees clock in, they are automatically signed into the default job unless they manually choose a different job.
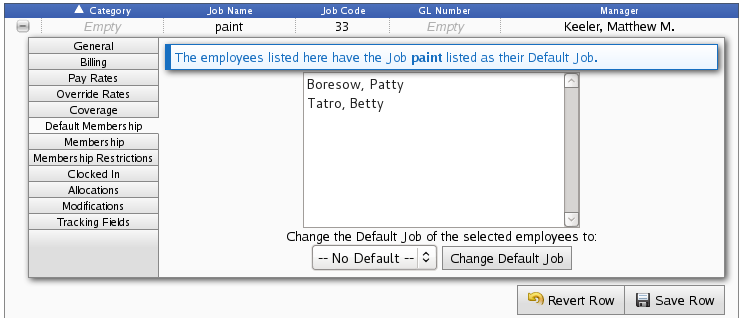
- To change an employees default job, click on the employee's name.
- Choose that employee's new default job from the drop down list, and then click the Change Default Job button.
NOTE: For employees to appear on the Default Membership list, employees must first be given a default job in the Employees section of TimeIPS (Employees >> Employees >> Employment tab). Once they appear on the list, their default job can be changed from their current Default Membership tab.
Membership Tab
Each job can be assigned a specific set of employees.

NOTE: Only active employees appear in this list. If an employee needs to be reactivated, select "Yes" Employeed from the Employees Employement tab.
Membership Restrictions Tab
The job can be restricted to allow only certain employees to clock in to that job.
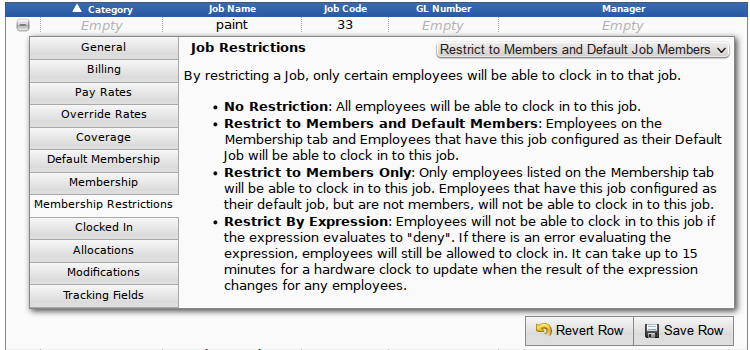
- No Restriction: All employees will be able to clock in to this job.
- Restrict to Members and Default Members: Employees on the Membership tab and Employees that have this job configured as their Default Job will be able to clock in to this job.
- Restrict to Members Only: Only employees listed on the Membership tab will be able to clock in to this job. Employees that have this job configured as their default job, but are not members, will not be able to clock in to this job.
- Restrict By Expression: Employees will not be able to clock in to this job if the expression evaluates to "deny". If there is an error evaluating the expression, employees will still be allowed to clock in. It can take up to 15 minutes for a hardware clock to update when the result of the expression changes for any employees.
Clocked In Tab
This tab provides a quick view of employees clocked into the job, as well as members and default members who are not clocked into this job.
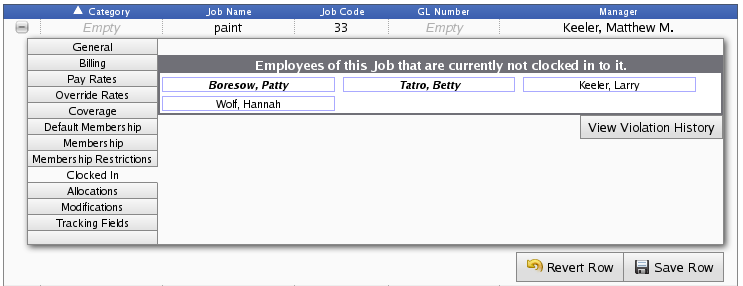
Default Members appear bold and italic, where as regular members do not.
The View Violation History link provides the same coverage violation report as mentioned in the Coverage section above.
Allocations Tab
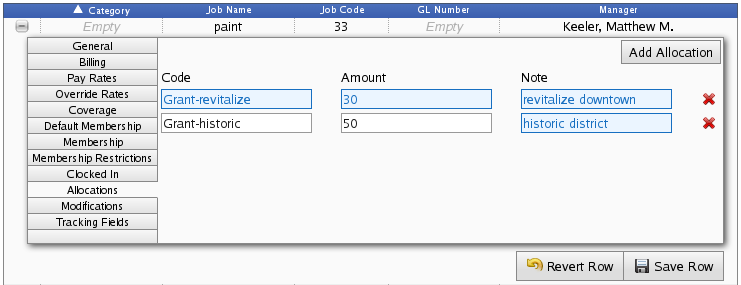
The Allocations tab allows you to allocate the employee's time into categories. Allocations are commonly used in conjuction with grants and are generally displayed on custom reports or custom payroll to show the proportion of time worked in different areas.
NOTE: This feature requires the IPSBRD module.
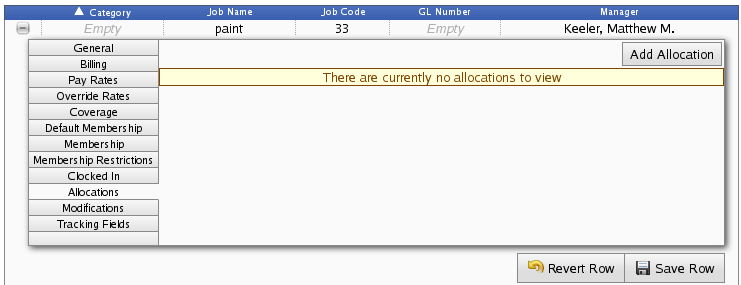
- To add, click the Add Allocation button and enter a unique Code, an Amount (this can be a specific amount or a percentage), and an optional Note.
- Click the red X to delete an allocation.
Modifications Tab
From the Modifications tab, you can set up job reassignment and a mininum job time.

Tracking Fields Tab
Tracking fields allow employees to provide additional information when clocking in or out.
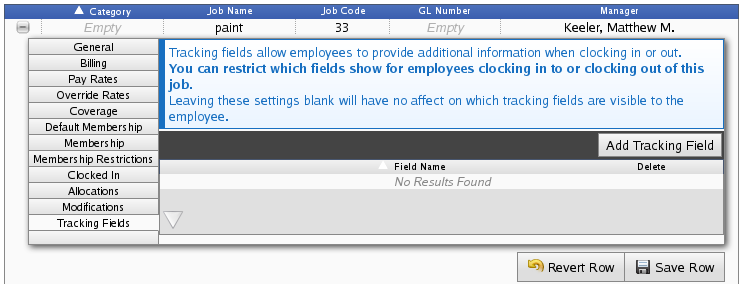
Leaving these settings blank will have no affect on which tracking fields are visible to the employee, but by adding tracking fields here, you are restricting which fields show for employees clocking in to or clocking out of this job.
- To add, click the Add Tracking Field button.

- Click on the Tracking Field to view the full list of options and select the one you wish to add, then click the Add button.
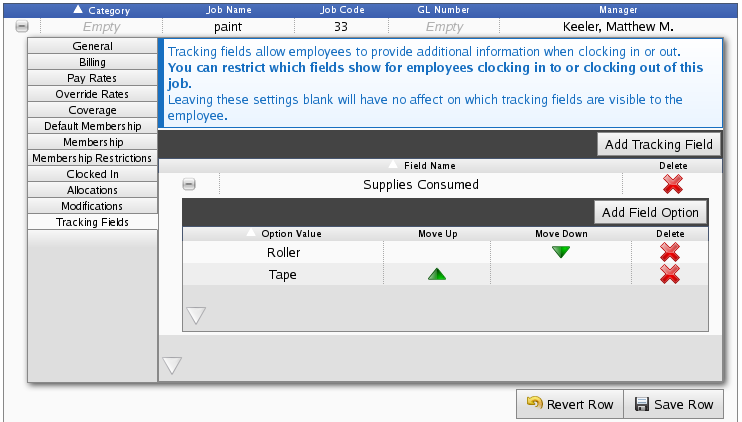
- To add field options, click the Add Field Option button.
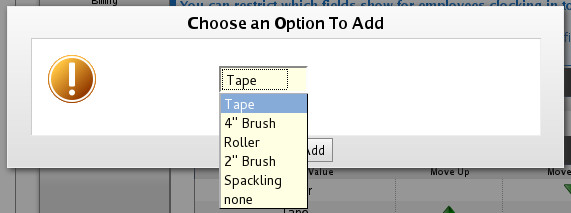
- Click on the Field Option to view the full list of options and select the one you wish to add, then click the Add button.
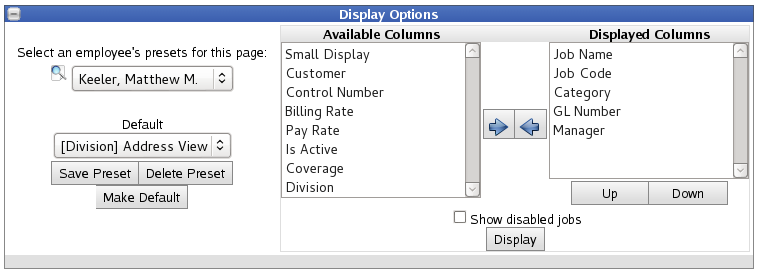
DISPLAY OPTIONS
Display Options allow you to customize the Jobs table.
- Click the + (plus sign) on the Display Options bar to expand the window.

SEARCH OPTIONS
To filter the list below, enter a value in one or more of the following fields and press Search. Use * for a wildcard. Fields left blank will not be used in filtering the list.

See Also:
Job Categories (2.0, 2.1, 2.2, 2.3, 2.4, 2.5, 3.0)
Job Customers (2.0, 2.1, 2.2, 2.3, 2.4, 2.5, 3.0)
Job Import/Export (2.0, 2.1, 2.2, 2.3, 2.4, 2.5, 3.0, 3.1)
|

 Information
 Sales
Sales Support


