|
|
Applies to versions: 3.1, 3.2, 3.3
Site Adminstration
The TimeIPS Site Management module allows designation of sites, each with specified employees, managers, supervisors, coverage schedules, and disconnection handling.
Using the left pane Main Menu » Administration, click on: Employees » Sites
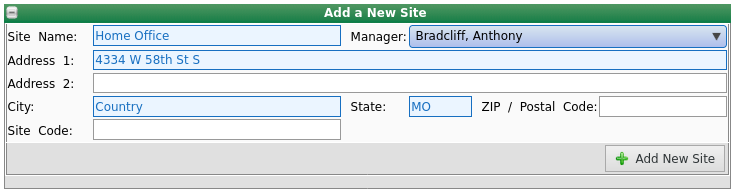
To Add a New Site:
- Click on the + (plus) sign in the upper left corner of the Add a New Site bar.
- Enter the Site Name.
- Choose the site Manager from the drop-down list. (optional)
NOTE: Employees with the Site Manager permission are listed on the "Manager" pull-down menu.
- Enter the physical Address. (optional)
- Enter a Site Code. (optional)
NOTE: Once a site is created, it can be edited but not deleted.
- Click the Add New Site button. The information will then be added to the Site Administration table.
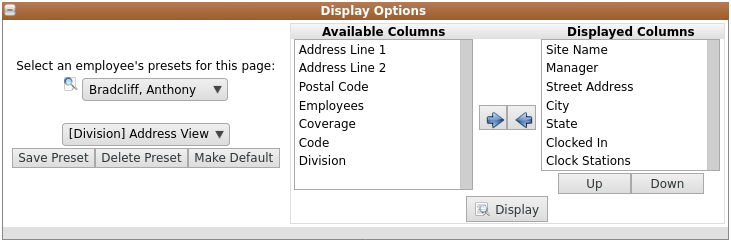
Display Options
Display Options allow you to customize the Site Administration table.
- Click the + (plus sign) on the Display Options bar to expand the window.
- Move items from the Available Columns window to the Displayed Columns window by clicking on the desired field to highlight it, then click on the right arrow to move it.
TIP: You can select multiple items to move by holding down the CTRL key while clicking on the individual fields. All the selected fields will be highlighted.
- To change the order in which the Displayed Columns appear, click on a field to highlight it and then use the Up and Down buttons to arrange the list in the order you prefer.
- Click on the Display button to view the changes in the Site Administration table.
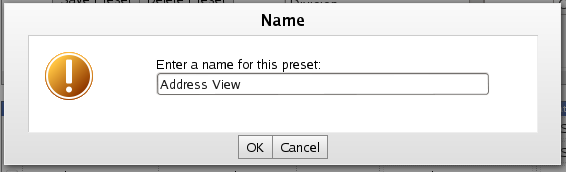
- OR - Click on Save Preset to save your custom view.
- You will be prompted to enter a Name for this Preset. Enter a descriptive name and click OK.
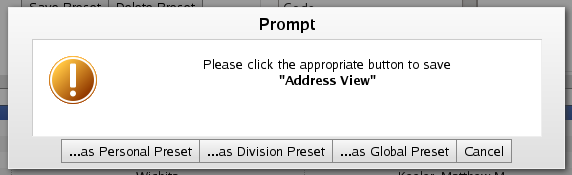
- You will then be prompted to choose between a Personal Preset, Division Preset, or Global Preset depending on which level should show this as an available option.
- To use a saved Preset display, select the Preset name from the pull-down menu. The Site Administration list will automatically refresh.
- Click on the Make Default button to see this custom view each time you return to the Site Adminstration page.
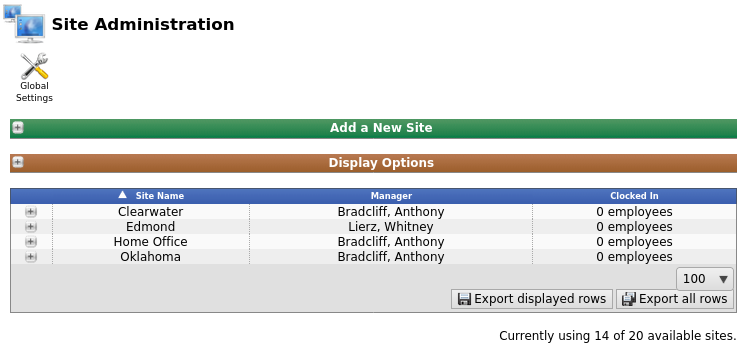
Site Adminstration Table
By default, managers can view and edit the data associated with the sites they manage. Only an employee with the Site Adminstration permission set to view and edit site data for all visible divisions, will be able to do so. (Permissions can be customized if needed by using the IPSPRM permissions module.)
- To sort the table by the selected column values, click on the column header (i.e., Site Name, Manager, Clocked In, etc.).
- To quickly access the detailed information for a site, click on a value within a column (such as a site's Name, Manager Name, Number of Employees, etc.) and the table will expand to the appropriate tab. (For instance, clicking on a name in the Manager column above will expand the table to the Information tab for that manager's site.)
TIP: Some of the fields, such as the site's Address, City, State and Postal Code are "edit-in-place" fields when displayed on the Site Administration table. You can type the information in the field displayed, rather than expanding the table and going to the appropriate tab. (For instance, you can click on the words "Country Time" in the City column above and the field will become editable, allowing you to change the site's City.)
- To view site details, click on the + (plus sign) to the left of the Site Name. The following tabs will display.
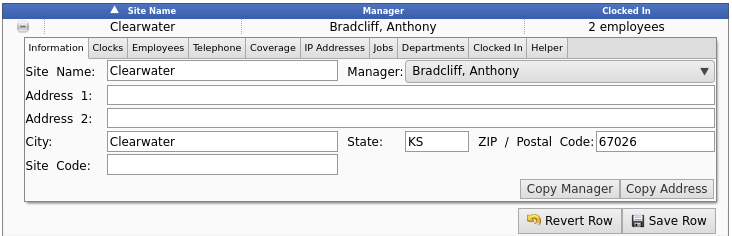
Information
The Information tab allows basic configuration of the site, including the Site Name, Manager, Address and Code.
- After adding and/or editing any information, click Save Row to ensure your changes take effect.
- To copy the Manager or Address over to another division, click the Copy Manager or Copy Address button. This opens the Helper tab. [See the Helper Tab section of this article for further instruction.]
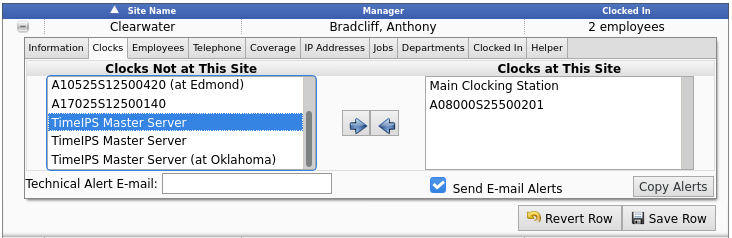
Clocks
The Clocks tab allows assigning a clock to the site.
- Use the Technical Alert E-mail address to specify who should get alerts if the assigned clock or networking at the site are down. Make sure the Send E-mail Alerts box is checked.
- To copy the alerts over to another division, click the Copy Alerts button. This opens the Helper tab. [See the Helper Tab section of this article for further instruction.]
- To add a clock to the site, click on the name of the clock in the box on the left, then click the blue arrow pointing to the right.
- To remove a clock from the site, click on the name of the clock in the box on the right, then click the blue arrow pointing to the left.
TIP: If you have multiple divisions, you may need to assign the clock to the division of the site for it to show in either box. Do this on the Clocking -> Clock Configuration page, under the General tab of the clock.
- Click Save Row to ensure your changes take effect.
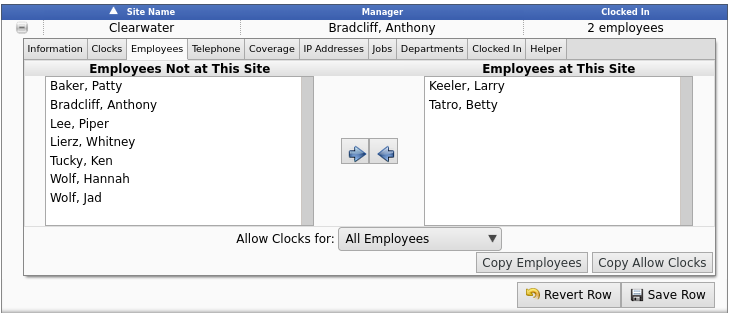
Employees
The Employees tab allows configuring which employees belong to the site. Employees can belong to multiple sites.
- First decide whether All Employees, or only employees belonging to this site, are allowed to clock in/out from the clocks associated with this site. Make this selection from the Allow Clocks for drop-down box.
- To add an employee to the site, click on the name of the employee in the box on the left, then click the blue arrow pointing to the right.
- To remove an employee from the site, click on the name of the employee in the box on the right, then click the blue arrow pointing to the left.
- Click Save Row to ensure your changes take effect.
- To duplicate these same selections to another division, click the Copy Employees or Copy Allow Clocks button. This opens the Helper tab. [See the Helper Tab section of this article for further instruction.]
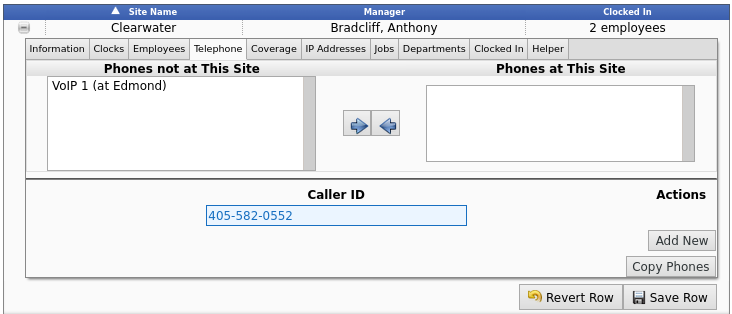
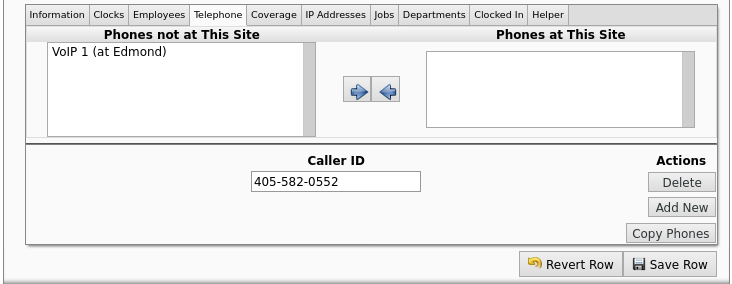
Telephone
The Telephone tab allows configuring selected telephone clocking devices and/or CallerID names/numbers to the site.

- To add a phone to the site, click on the name of the phone in the left box, then click the blue arrow pointing to the right.
- To remove a phone from the site, click on the name of the phone in the right box, then click the blue arrow pointing to the left.
- To associate these same phones to another division, click the Copy Phones button. This opens the Helper tab. [See the Helper Tab section of this article for further instructions.]
- To add a new Caller ID that will be permitted to use TimeIPS Telephone Clocking when a clock belonging to this site goes down, click Add New.
- Type in the Caller ID name or number in the empty box below Caller ID.
- After clicking Save Row, the option to Delete appears under Actions.
TIP: If "Track Coverage by Caller ID" is active, clock ins/outs made from these names or numbers will be associated with this site for coverage and reporting. In this case, Caller ID entries cannot belong to more than one site. See Global Settings.
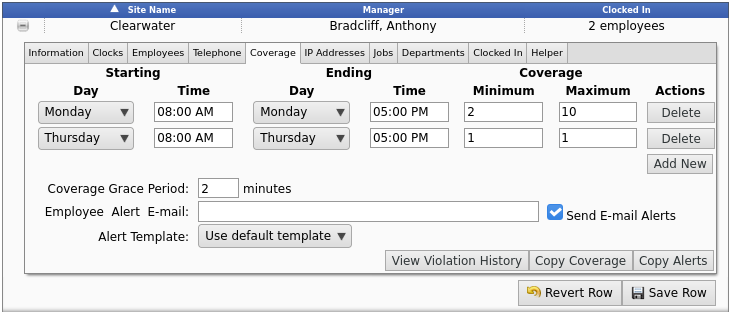
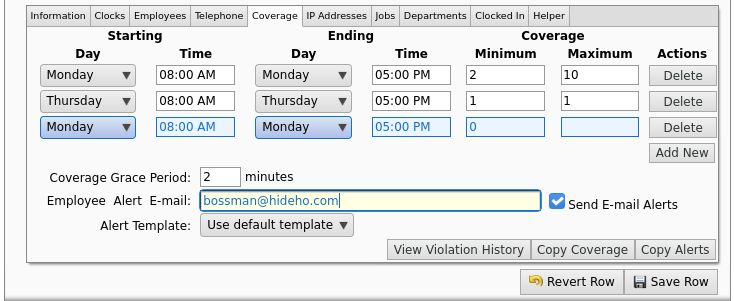
Coverage
The Site Coverage tab allows configuring ranges of time when an expected number of employees should be working the site. Alerts can be sent when too few or too many employees are working. The Grace Period allows a few minutes for employees to start working and finish working without triggering a coverage email alert.
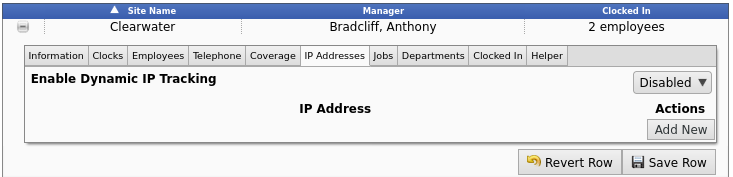
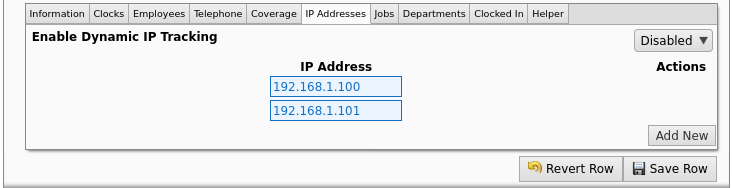
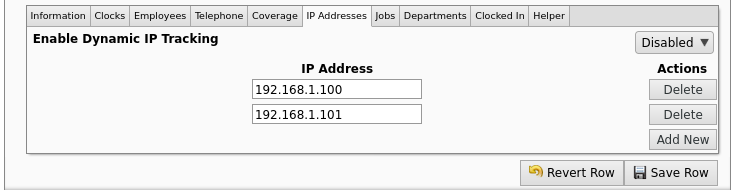
IP Addresses
The IP Address tab allows selected IP addresses to be connected to the site when employees are remote/web clocking.
- Click Add New, to add a new IP Address to be associated with this site for remote clocking.
- Type in the IP Address in the empty box.
- After clicking Save Row, the option to Delete appears under Actions.
- Dynamic IP Tracking allows new IP Addresses to be automatcially added to the list when a previously associated computer picks up a new one. Remote clocking can then continue to be available on that computer. If the new IP address has already been added to a different site, it will not be added to this site automatcially. To enable this feature, choose enable from the drop-down box.
TIP: If "Track Coverage by IP Address" is active, remote clocking made from these IP Addresses will be associated with this site for coverage and reporting. An IP Address cannot belong to more than one site. See Global Settings.
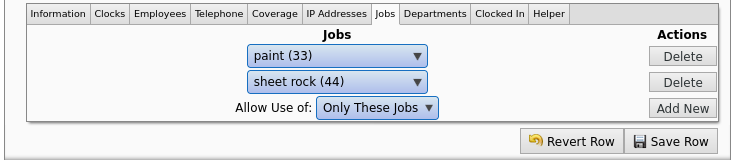
Jobs
Specific jobs can be connected to a site.
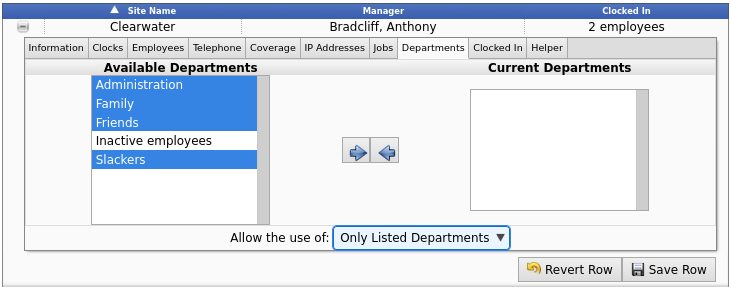
Departments
The Departments tab allows configuring of which departments belong to the site. Departments can belong to multiple sites.
- First decide whether to Allow the use of: All Departments or Only Listed Departments at this site. Make your selection from the drop-down box.
- If the Only Listed Departments option is selected, only those listed under Current Departments will be associated with this site. Move items from the Available Departments window to the Current Departments window by clicking on the desired field to highlight it, then click on the right arrow to move it.
TIP: You can select multiple items to move by holding down the CTRL key while clicking on the individual fields. All the selected fields will be highlighted.
Note: If an employee has a default department that is not associated with this site, and the employee clocks in without a department selected, the default department will still be used.
- Click Save Row to ensure your changes take effect.
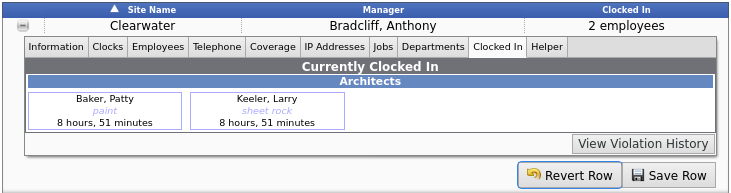
Clocked In
The Clocked In tab provides a quick view of which employees are currently clocked into the site.
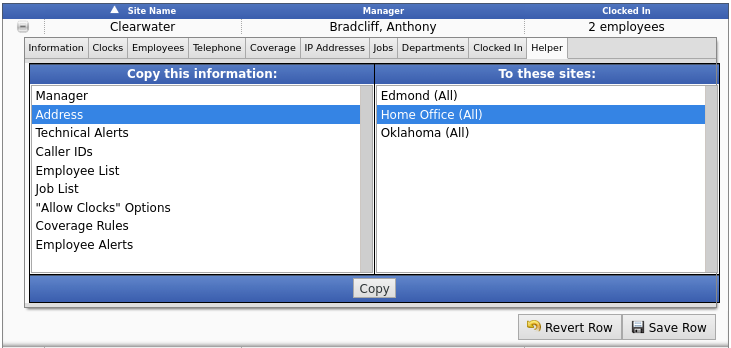
Helper
The Helper tab allows information from one site to be quickly copied to one or more additional sites.
- Click to highlight the Information and the Site(s) that should receive the information.
- Click the Copy button and then Save Row.
You can associate specific telephone numbers and IP addresses with your site Coverage settings to provide employees with additional means to clock into a site while simultaneously keeping track of your site coverage.
- At the top of the Site Administration page, click on the Global Settings icon.

- Check the box next to Track Coverage by IP Address to enable tracking by IP address. When an employee clocks in using Remote Clocking, the IP address will be used to determine which site the employee is clocked into.
- Check the box next to Track Coverage by Caller ID to enable tracking by phone number. When an employee clocks in using Telephone Clocking, the phone number will be used to determine which site the employee is clocked into.
NOTE: When this setting is active, Caller ID entries cannot belong to more than one site.
|

 Information