|
|
Applies to versions: 3.1, 3.2, 3.3
MasterBuilder Integration - Setup TimeIPS
TimeIPS can directly transfer employees' time worked into MasterBuilder with the MasterBuilder integration feature available in the optional IPSEPI enhanced payroll integration module. The Integration should be done on the computer where MasterBuilder is installed and payroll is run. Four applications will be running during the integration: TimeIPS, MasterBuilder API, the TimeIPS MasterBuilder client, and MasterBuilder.
1-Time Setup
SetUp TimeIPS
Before running the Master Builder Integration for the first time, you will need to setup your TimeIPS MasterBuilder Export Settings. These settings do not need to be adjusted each time you run the Integration unless changes are made to your MasterBuilder Payroll Types or other settings.
- Add MasterBuilder Employee ID and Comp Code
- Configure Payroll Export Settings
Add MasterBuilder Employee ID and Comp Code
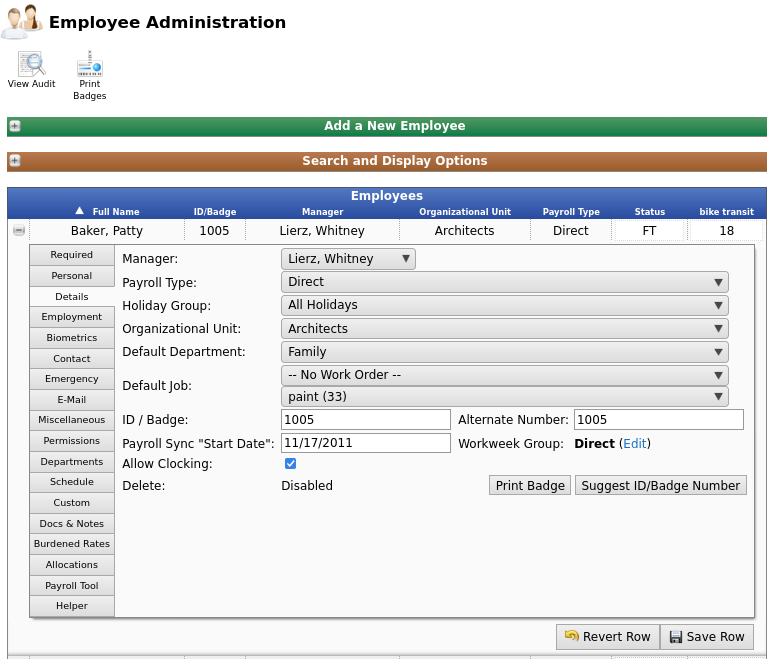
Using the left pane Main Menu » Administration, go to: Employees » Employees
- Click the plus (+) sign to the left of an employee's name and choose their Details tab.
- Put the Master Builder Employee ID in the Alternate Number field.
Note:You can find your employees Master Builder Employee ID in Master Builder by going to menu 5-1-1 and run a employee list report.
- Choose the Employment tab.
- Put the Master Builder Comp Code in the Title field.
Note:You can find your employees Master Builder comp code in Master Builder by going to menu 5-1-5 and run a workers comp report. You could also use other fields in TimeIPS to store the workers comp code such as the employee ssn field.
- Click the Save Row button to save.
Configure Payroll Export Settings
A MasterBuilder export setting will need to be created in order to export.
Using the left pane Main Menu » Administration, click on: Payroll » Payroll Export
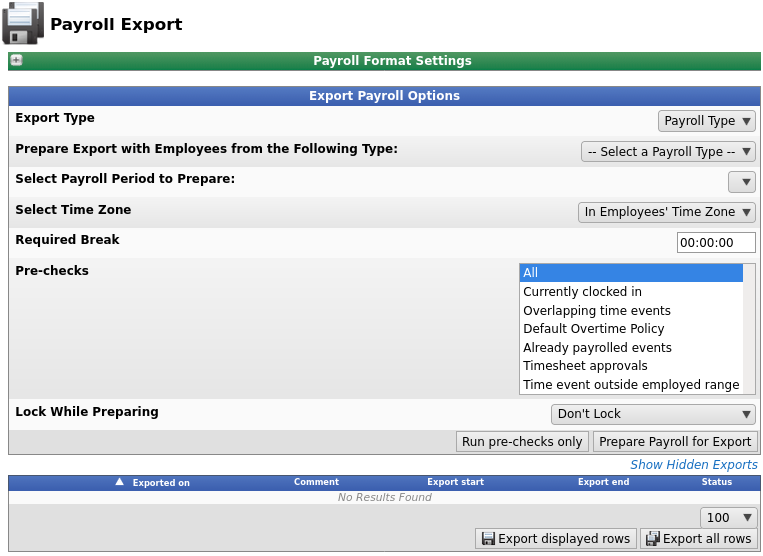
- Click the + (plus) sign to the left of Payroll Format Settings bar to expand the window.
- From the drop down box, select the Sage MasterBuilder file format to modify.
- Click the Edit Payroll Export Settings button to bring up the editing screen.
If you have not already created a MasterBuilder setting, you will see the following screen. 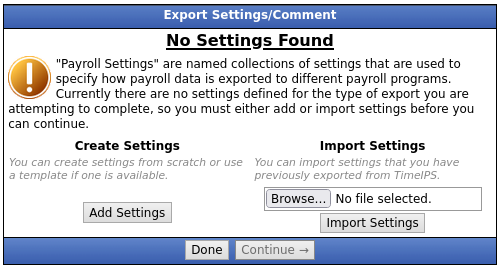
Click the Add Settings button to begin setup.
NOTE: Export Settings are a set of stored settings that are used each time a payroll file is generated. If your preferences change from one group of employees to another, you may create multiple export settings and select the set that applies for the group you are exporting at the time.
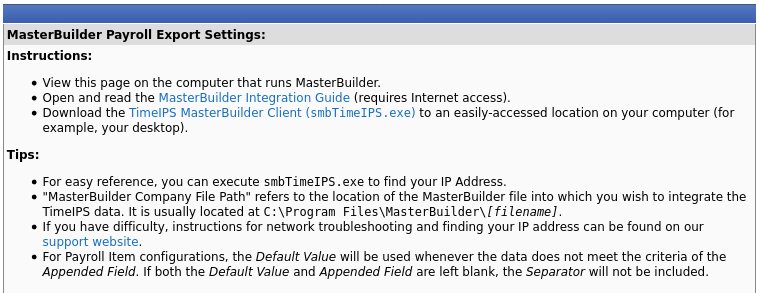
If you have not yet downloaded the TimeIPS MasterBuilder Client, you can do so here. Click on the TimeIPS MasterBuilder Client (smbTimeIPS.exe) link at the top of the page and save it to an easily-accessed location on your computer, such as your desktop. (Instructional article)
NOTE: Make sure to install the TimeIPS MasterBuilder Client on the computer running MasterBuilder. You will launch this application each time you run the payroll integration.
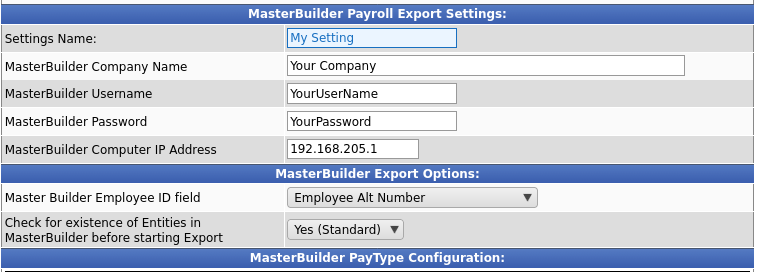
- The Setting Name can be anything you choose. In this example we have used the name My Setting
- The MasterBuilder File Company Name is the name of the Company in Masterbuilder that TimeIPS will be integrating with.
- The MasterBuilder Username is the User name of the user in Masterbuilder that TimeIPS will be integrating with.
- The MasterBuilder Computer IP Address is the IP address of the computer that you are running the MasterBuilder program on and is where you will run the Integration.
- Set the Master Builder Employee ID field to match the field in TimeIPS that you have entered the MasterBuilder Employee ID into.
- Set Check for existence of Entities in MasterBuilder before starting export to Yes.
NOTE: If this is set to yes and TimeIPS finds information that does not match in both MasterBuilders and TimeIPS it will not export until corrected.
- Set the correct code for the MasterBuilder Pay Type they can be 0-9.
NOTE: These are hard coded in MasterBuilder. Regular Pay-1, Overtime-2, Premium-3, Sick-4, Vacation-5, Holiday-6, Piece Work-7, Per Diem-8, and Misc-9.
- Setting up the "MasterBuilder Job Tracking and Custom Field".
- Once your selections have been configured, click on Save Settings to save, or Cancel to exit without saving.
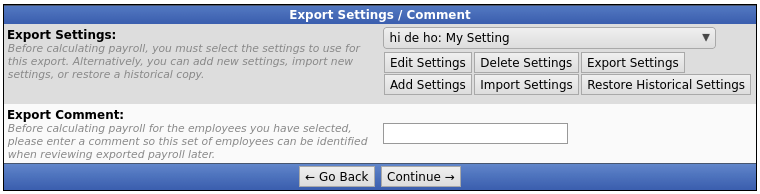
- On the next screen be sure that your new setting name is the one selected in the Export Settings drop down menu.
- Optionally, you can add a comment to the export making it unique and easily identifiable.
- Click Continue.
|

 Information