|
|
Applies to versions: 3.2, 3.3
TimeIPS Geo Zones
TimeIPS Geo Zones are used to configure areas for geo-fencing and location-aware clocking. Each Geo Zone is made up of one or more Locations. A Location is defined by GPS coordinates and a radius. Locations are grouped together in a Geo Zone for easy management. When an employee clocks from within any of the included Locations, the Geo Zone will be associated with the event for review on the Time Edit report or Custom Reporting.
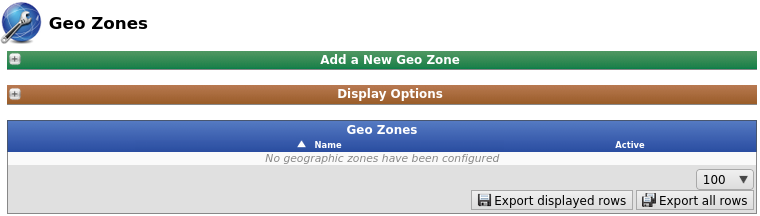
Using the left pane Main Menu » Administration, click on: Clocking » Geo Zones
Add a New Geo Zone
- Click on the + (plus) sign to the left of Add a New Geo Zone.
- Add a Name to identify this zone. Employees may see this name when clocking to confirm their location.
- Then click on the Add New Geo Zone button.

- The new geo zone will then appear in the Geo Zones list.
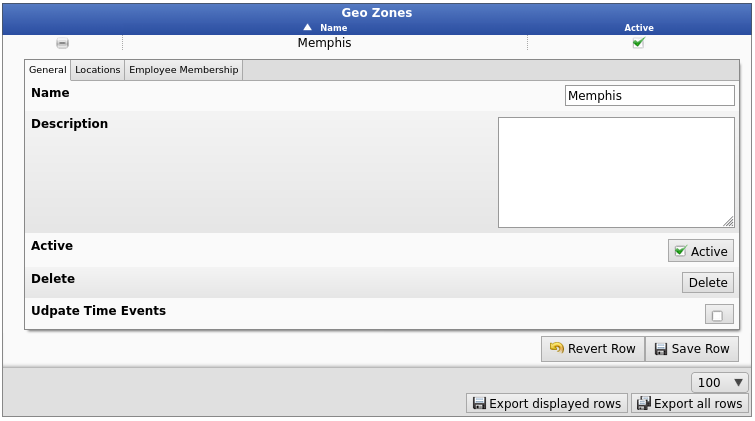
General
- If the window is not already expanded, click on the + (plus) sign to the left of the geo zone name to review, edit, and even delete the zone from your system.
- A Description can also be added here to help identify and differentiate between multiple geo zones.
- For this geo zone to be Active, check the Active box.
- Click the Delete button to remove it from the system.
- Check the Update Time Events box to update all existing time events with any changes made. This may take some time.
Locations
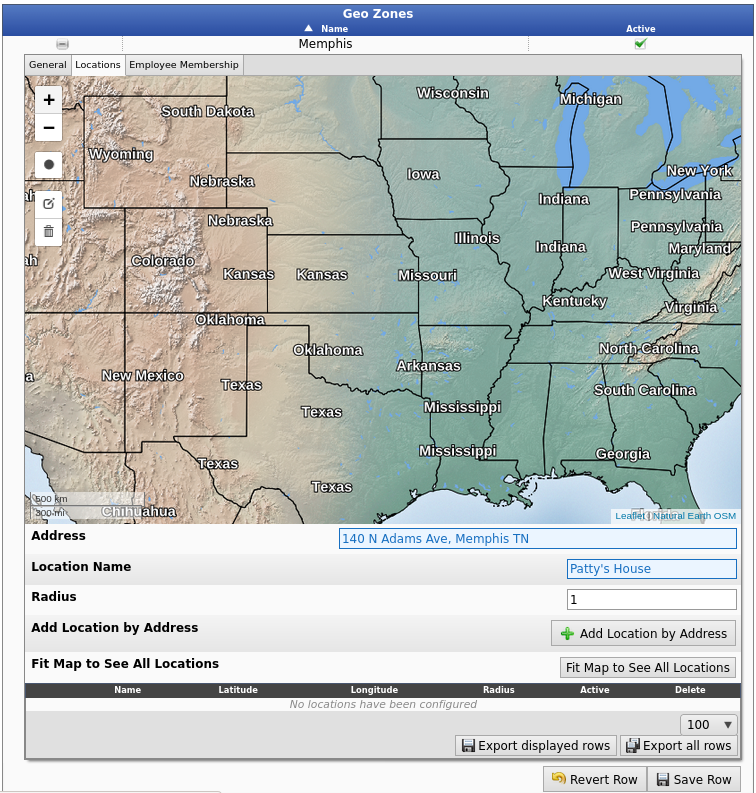
- If there are multiple locations configured, click the Fit Map to See All Location to view all locations at once.
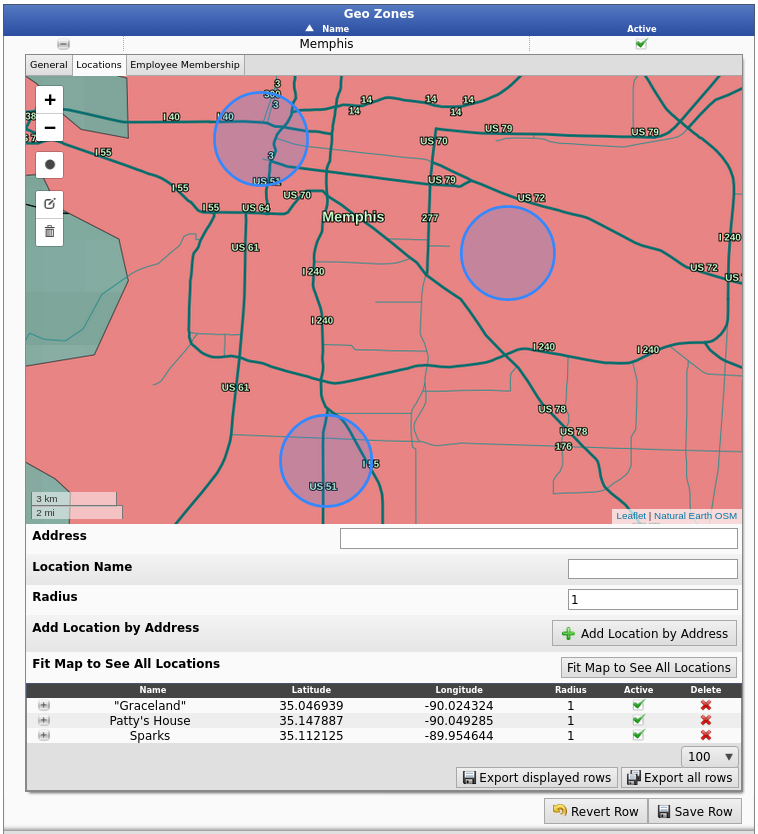
- To view just one of the locations, click on the locations name.
Add Location from the Map
Alternatively, locations can be added directly on the map
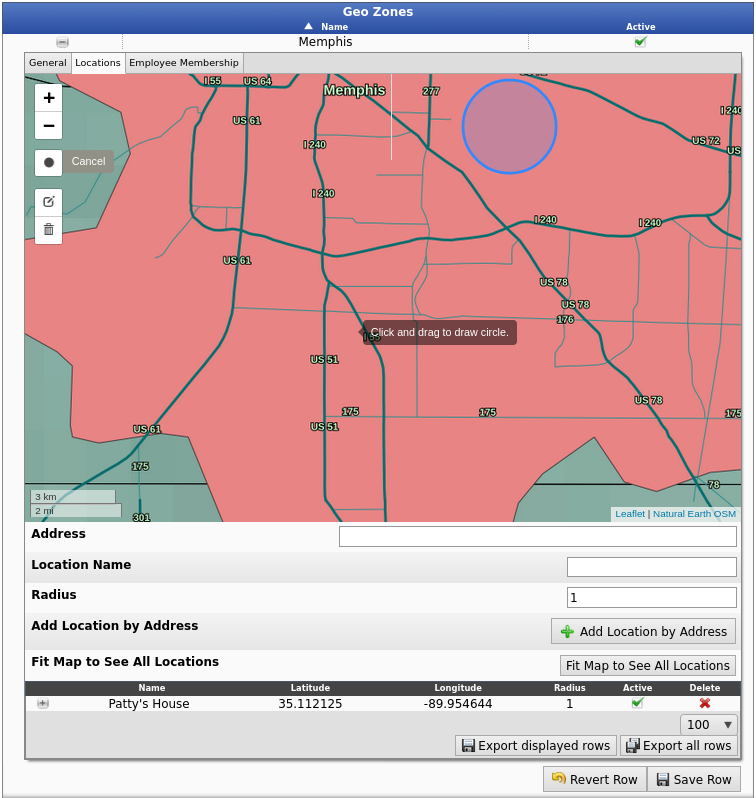
- First drag and zoom to find the location on the map, then click the . (circle) icon on the left of the map.
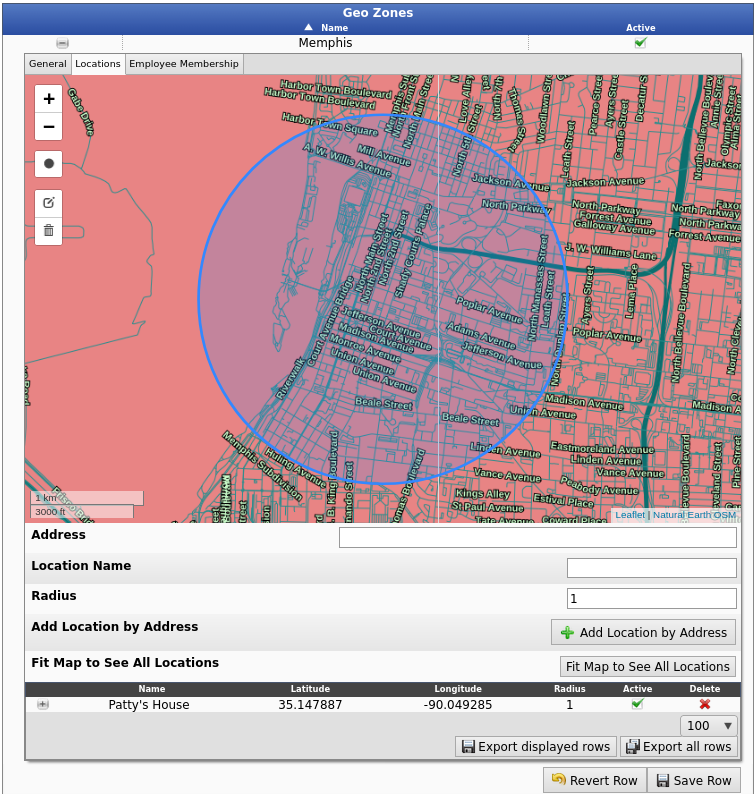
- A cross hair will appear. Click and drag on the map to Draw a Circle around the new location.
- When you release, the Create New Location window pops up.
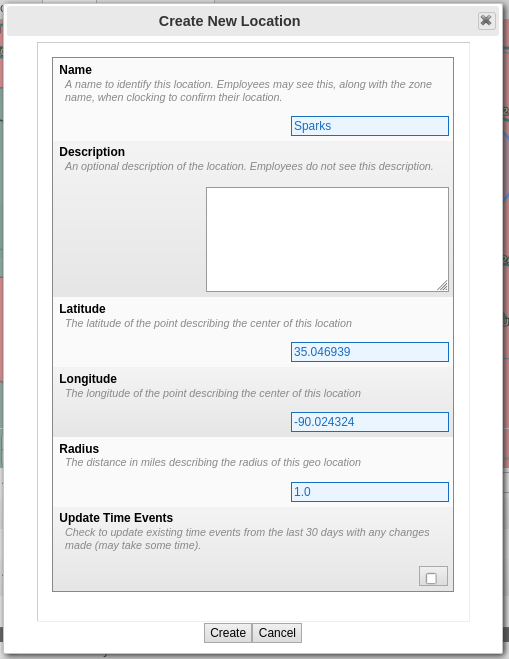
- Add a Name and an optional Description of the location. Employees do not see this description.
- If needed, make adjusts to
- The Latitude of the point describing the center of this location
- The Longitude of the point describing the center of this location
- The Radius
- Check the Update Time Events box to update existing time events from the last 30 days with any changes made. This may take some time.
- The new location will appear in the list below.
Edit a Location
- Click on the + (plus) sign to the left of the location name.
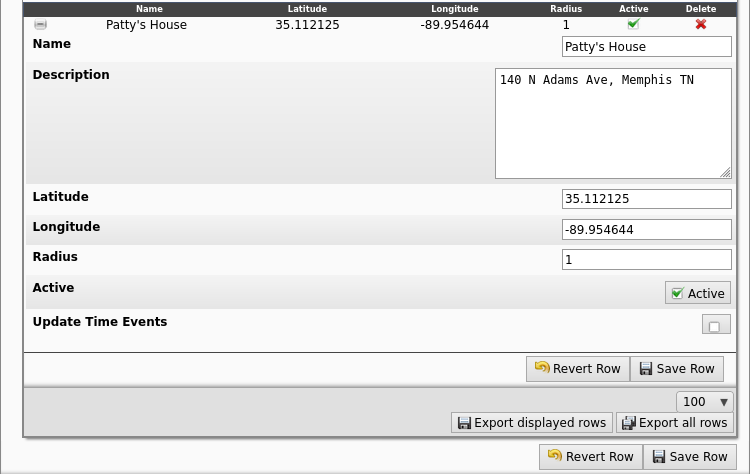
- In addition to the Name, Description, Latitude, Longitude, Radius, and Update Time Events that was previously mentioned, the status of this location can also be set now. For this location to be Active, check the Active box.
- Click the Save Row button to save changes.
Editing can also be done right on the map.
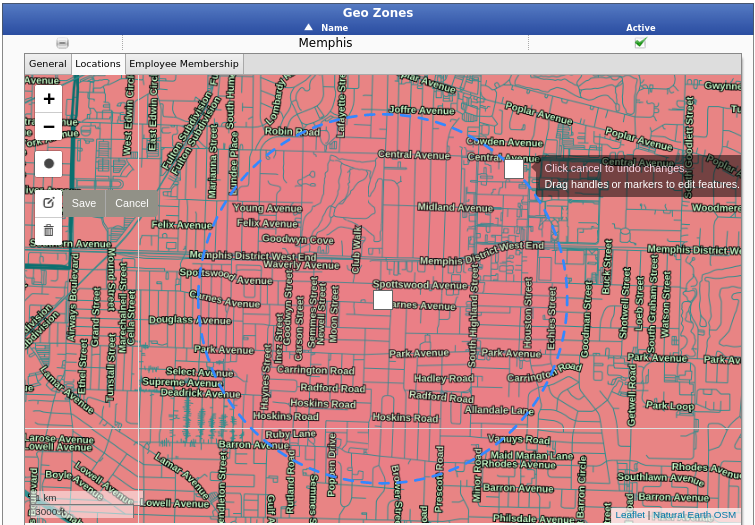
- Click the name of the location that needs to edited.
- Click on the pencil and paper icon to Edit Layers.
- Click and drag the center of the circle to move the location.
- Click and drag the handle on the circle's outline to change the radius.
- Next to the Edit Layers icon, click Cancel or Save changes when finished.
- To remove one or all of the locations, click on the trash icon to Delete Layers from the map.
- Click on the location(s) to be removed and then click the Save button next to the Delete Layers icon.
- Alternatively, select Cancel or to remove ALL of the locations in this zone, click Clear All .
Employee Membership
Time events are only tagged with Geo Zone/Location for member employees. Membership Mode determines how this Geo Zone applies to member employees.
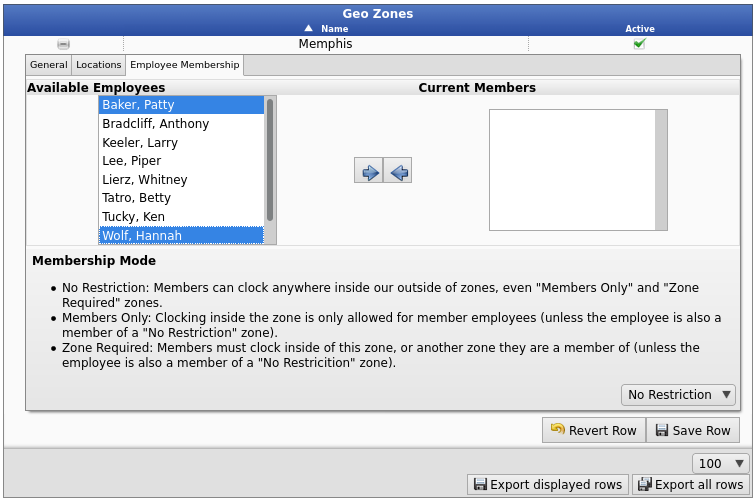
- Select the employee(s) from the Available Employees list by clicking on them. To select multiples, hold down the Ctrl button while clicking on the names.
- Then click on the blue arrow pointing to the right to move the employee(s) to the Current Members list.
- Choose one of the following Memberships Modes:
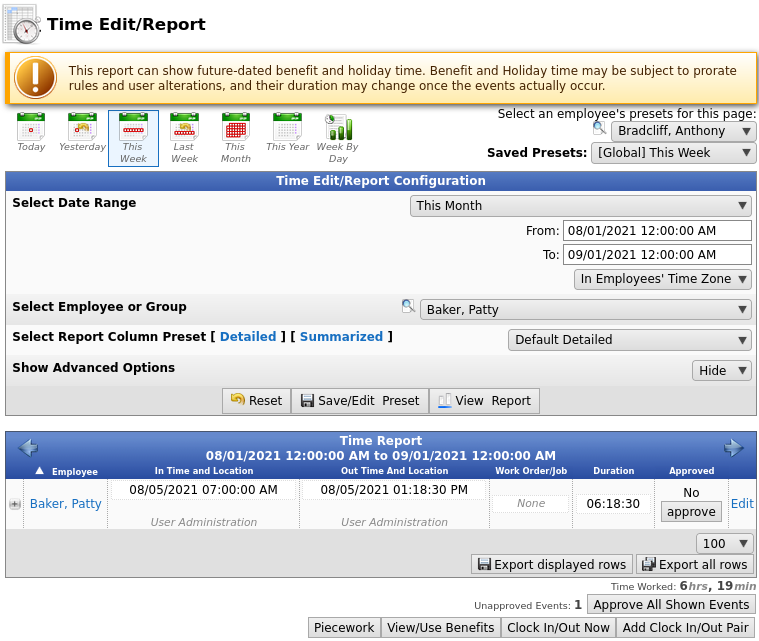
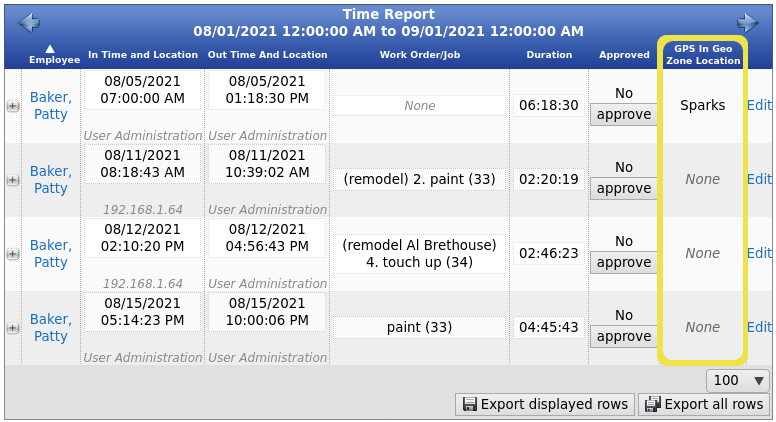
To view an employee's clocked Geo Zone, go to Reports -> Time Edit/Report and run a Time Report for the employee for the date in question.
Run Time Edit Report
- Select the Date Range and Employee or Group to be included.
- Choose one of the Detailed options.
- Click View Report.
- Click the + (plus) sign to the left of the employee's name.
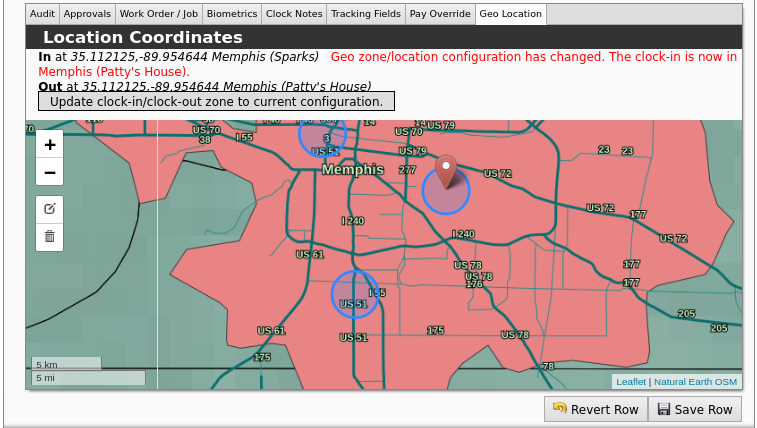
- Go to the Geo Location tab.
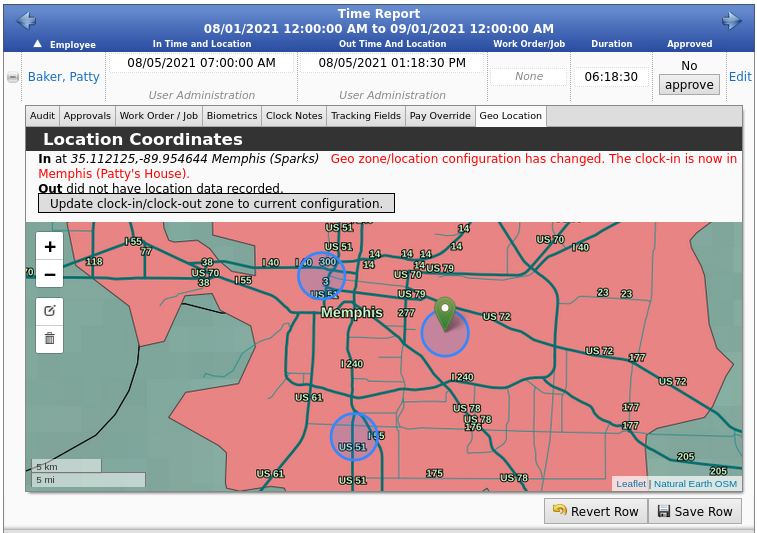
Note: Geo Location can also be selected as a "Select Report Column Preset" in order to see it for all the events without having to open the event and go to the Geo Location tab. Choices include GPS In Coordinates, GPS In Geo Zone, GPS In Geo Zone Location, GPS Out Coordinates, GPS Out Geo Zone, and GPS Out Geo Zone Location.
- To change or add missing locations, click Edit.
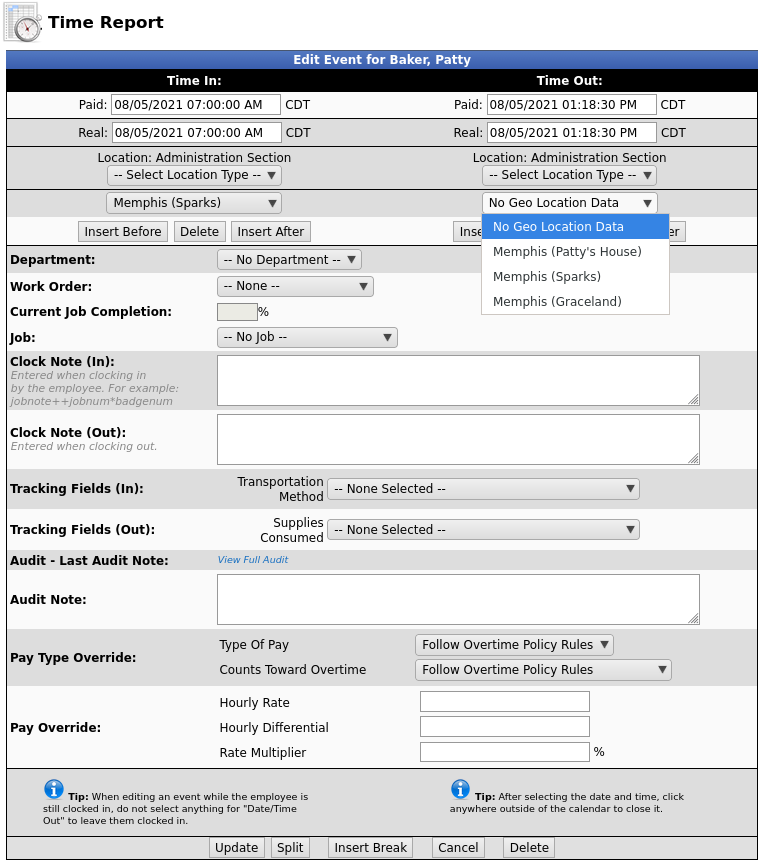
- Under the Location: Administration Section for both Time In and Time Out, there is a drop down menu for Geo Location.
In this example, the employee clocked in from "Memphis (Sparks)", but No Geo Location Data was collected during the clock out.
- Make the needed changes and click Update.
Remote/Web Clocking Setup
Under Administration, click on Clocking > Remote/Web Clocking

The last two options relate to Geo Zones.
- To Enable Geo Zone/Location data gathering when clocking remotely, check the corresponding box.
- To Require Geo Location data gathering when clocking remotely, check that corresponding box.
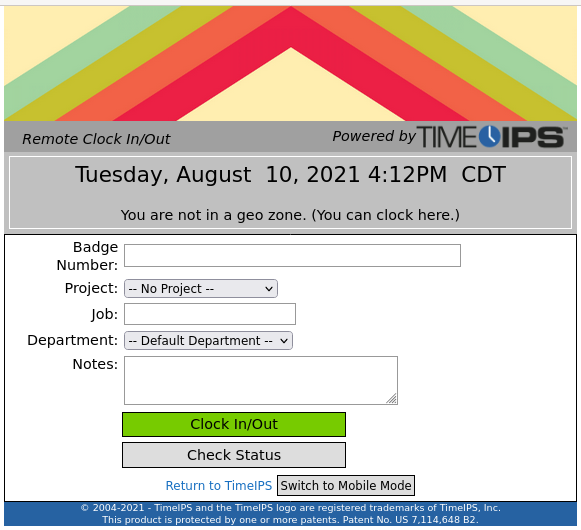
Remote Clocking
Employees will need to access the secure Remote Clocking address using https in order to display location. A popup will ask to Allow the server to access the employees location. It is recommended to check Remember and then click Allow.

Location information is displayed under the time. In this example, it says "You are not in a geo zone. (You can clock here.)"
|

 Information