|
|
Applies to versions: 3.2, 3.3
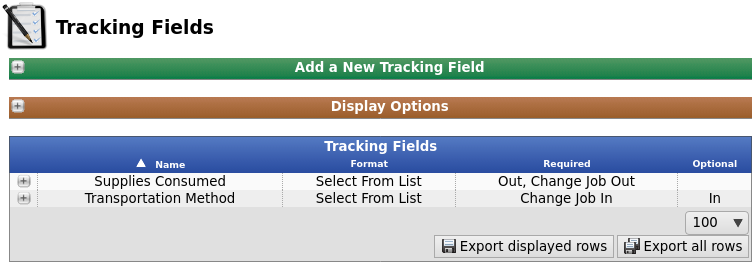
Tracking Fields
Tracking fields allow employees to provide additional information when they clock in, clock out, or change jobs. You can specify when each field is presented to the employee by changing the values for "Required on In", "Required on Out", and "Required on Job Change."
Using the left pane Main Menu » Administration, click on: Clocking » Tracking Fields
Add a New Tracking Field

- Click the + (plus) sign to the left of the Add a New Tracking Field bar.
- New Field Name: provide the name for a new tracking field.
- Click the Add New Tracking Field button to save.
NOTE: The Tracking Field settings are set up in the Tracking Fields table below.
Setup and Edit
- Click the + (plus) sign to the left of the Tracking Field Name.
Field Settings tab 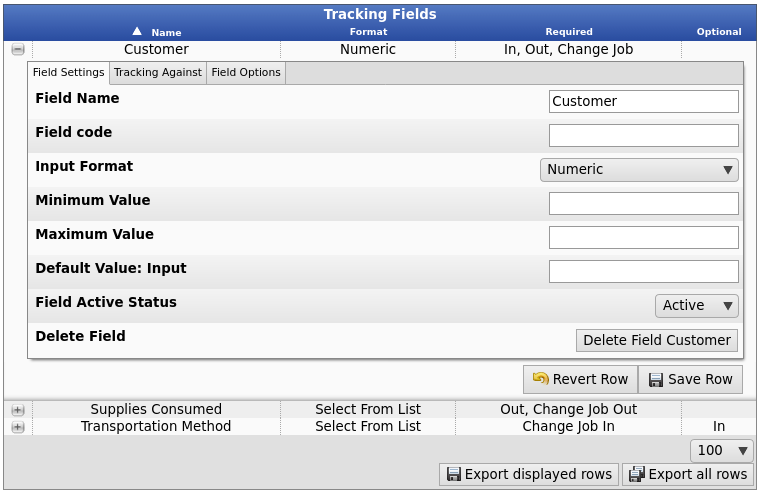
- The Field Name of the item that you wish to track can be edited here.
- (Optional) Add a tracking Field Code to differentiate between multiple fields with the same name.
- The Input Format defines the acceptable input values that employees can provide for this field.
- Choosing Numeric allows you to define a Minimum, Maximum, and Default Value.
- Choosing Alphabetic, Alphanumeric, or Alphanumeric + Symbols allows you to define a Minimum and Maximum Length as well as a Default Value.
- Choosing Select From List allows you to define a list of valid field options on the Field Options tab. Once there are field options added, a Default Option can be chosen from the Field Settings tab.
NOTE: If the "Input Format" is changed, click the "Save Row" button to update the other setting options before continuing.
- Field Active Status: Making this field inactive hides it from many parts of the employee interface while maintaining historical data.
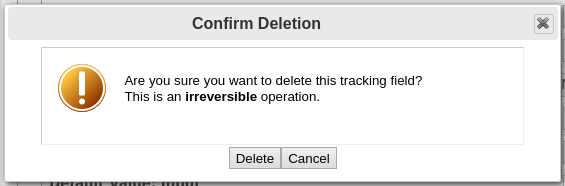
- Clicking the Delete Field button removes this tracking field from the entire system.
NOTE: A Tracking Field is only able to be deleted if it has not yet been used. Once the tracking field has been used, the Delete option is no longer displayed. Alternatively, the field can be made inactive.
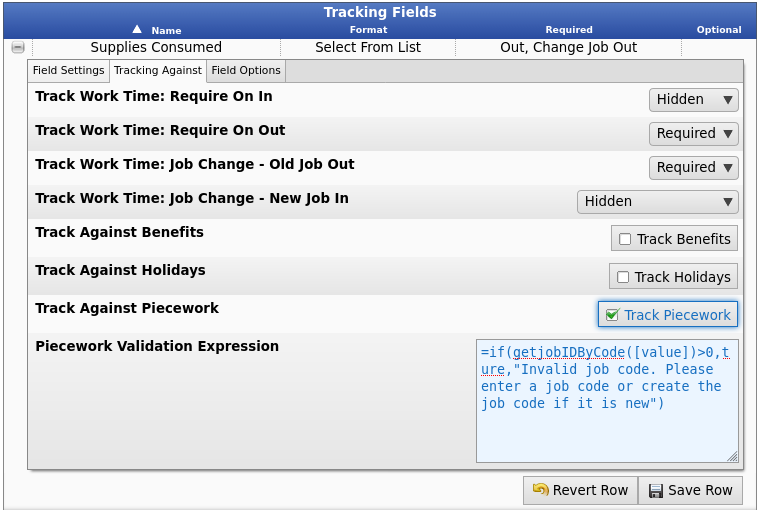
Tracking Against tab 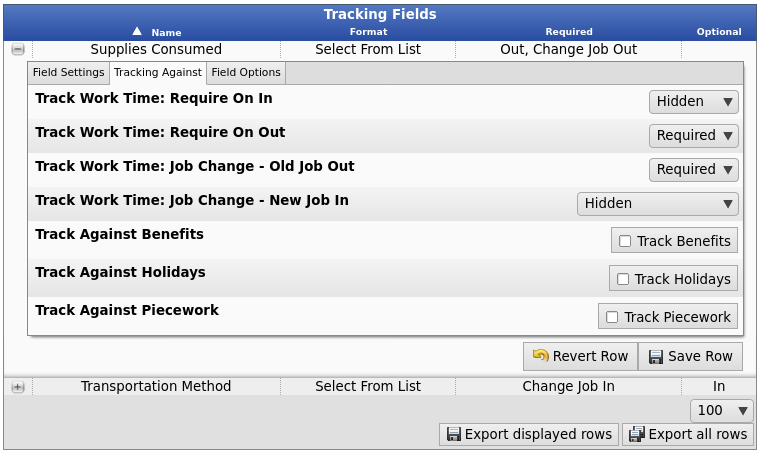
- Decide when this tracking field should be Required vs Optional or Hidden all together.
- When Clocking In.
- When Clocking Out
- When Leaving a Job during a job change.
- When Starting a New Job during a job change.
- If the same value should be applied to both the Clock Out of the Old Job and the Clock In to the New Job during a job change, then set "New Job In" to Shared/Single Input and set Old Job Out to either required or optional.
- If this tracking field should be associated with Benefit usages, Holiday events, or Piecework events, then check the correlating box.
-
Field Options tab
If "Select From List" was chosen on the Field Settings tab, the Field Options tab will be available to define a list of valid field options. Field Options can have additional associated information such as codes for payroll.
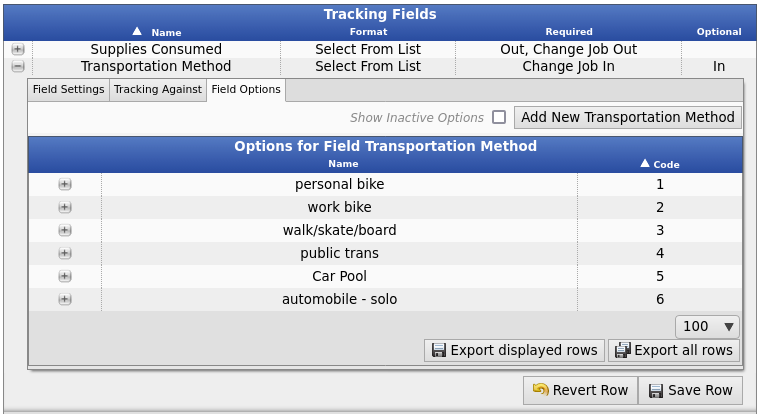
- Click the Add New (Your Tracking Field Name) button. In the example above, we click the Add New Transportation Method button.
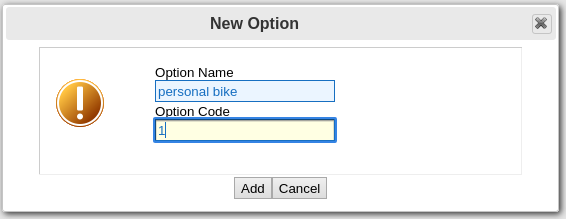
- Type a descriptive Name to identify this option within the tracking field.
- Type a Code to be associated with this option. This code can be used for payroll and/or to choose the field option at a clock.
- Click the Add button.
The New Option will now appear in the Options list.
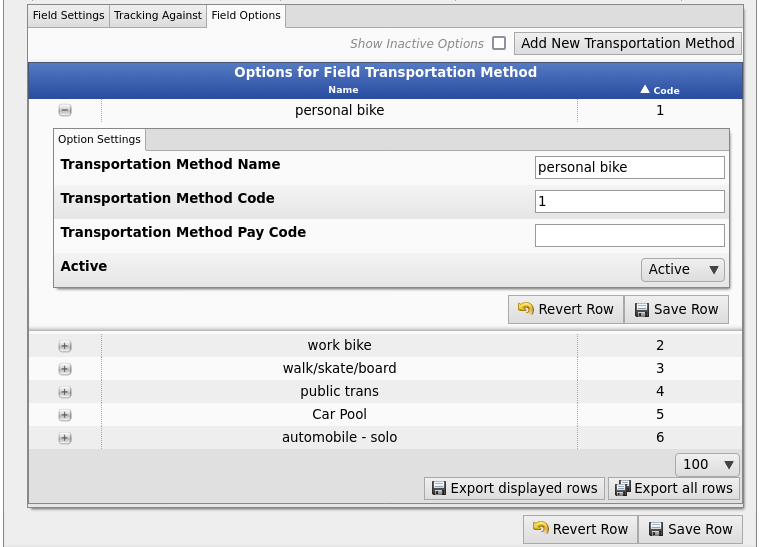
- Click the + (plus) sign to the left of the Option Name to display the Options Settings tab.
- If necessary, edit the Name used to identify this option.
- If necessary, edit the Code to be associated with this option. This code can be used for payroll and/or to choose the field option at a clock.
- Optionally, a Pay Code can be added. The Pay Code is used for custom reporting and payroll.
- By default, the Option is Active. To make this Option unavailable to employees, change this to Inactive.
- Click the Save Row button to save your changes.
|

 Information