Time clock systems by TimeIPS
Call Now! 316-264-1600
Information
Sales
Support
Knowledge Base Search:  
Main Menu
· Home

· Table of Contents
· Article Index

· Downloads
· New Features
· FAQ
· News
· Web Links

  
TimeIPS Knowledge Base

Table of Contents: Article IndexPrintable Version

Applies to versions: 3.2


Benefits


TimeIPS Benefits feature allows you to track sick and vacation time accrued and used.


The Payroll Integration with Benefits Tracking module (IPSQBI) is required.

Included features:

  • One accrual group
  • Two tenure levels
  • Vacation and Sick accrual types
  • Automatic weekly accruals


With the optional Advanced Benefits Tracking module (IPSBEN), the following features are added:

  • Unlimited accrual groups
  • Unlimited tenure levels
  • Unlimited custom plus Vacation and Sick accrual types
  • Flexible accrual periods
  • Enhanced configuration options including caps and prorating


With the optional Compensatory Time module (IPSCOMP), comp time can be stored and used like a benefit which facilitates compliance with the "FLSA 29 US 207 (o)(3)(A) Compensatory time" for eligible employees.


Using the left pane Main Menu » Administration, click on: Benefits » Employee Benefits Details


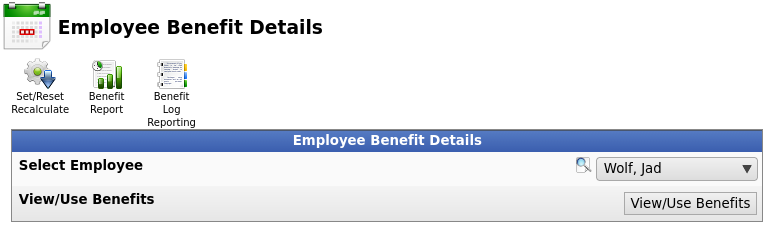
To display employee benefit and accrual information on the Employee Benefit Details screen,

  • Select an Employee from the drop down box.
  • Click the View/Use Benefits button. 


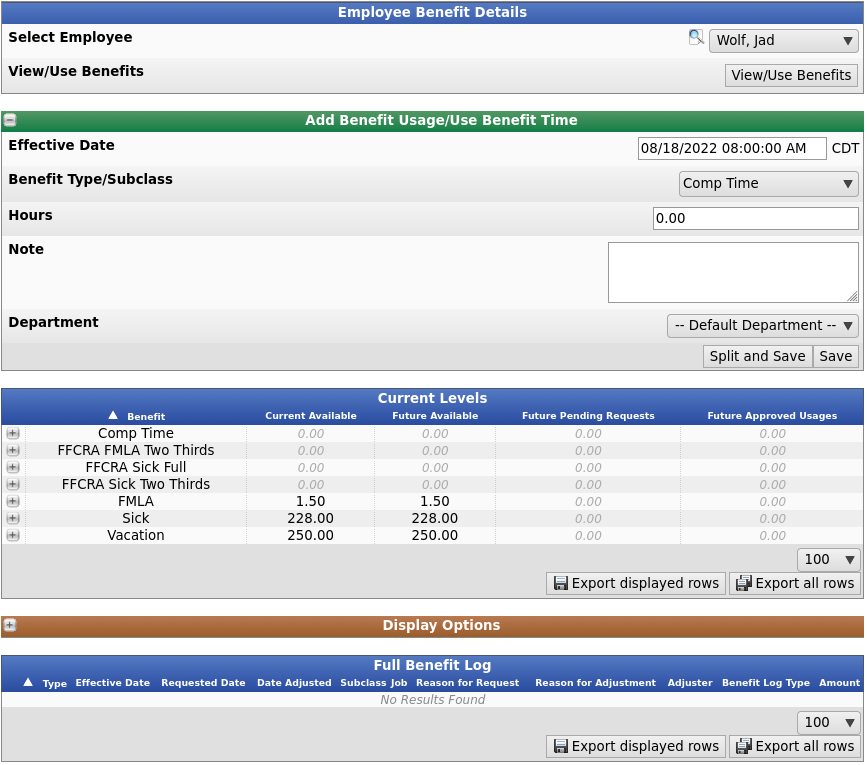
Once the screen is done loading, you will notice that Employee Benefit Details is still viewable, and more information is now being displayed on your screen. These sections are:


Add Benefit Usage/Use Benefit Time
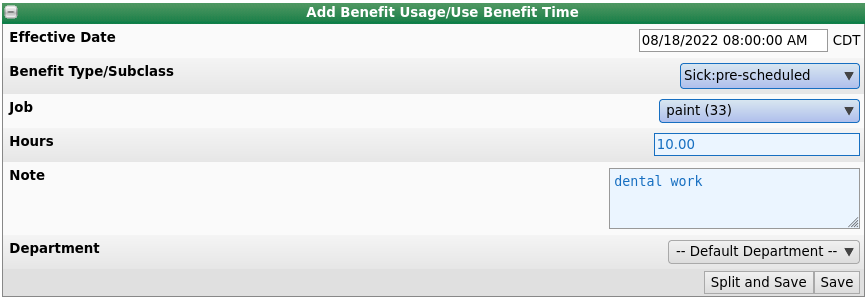

  • Input the Effective Date and time that the employee has requested off.
  • Benefit Type/Subclass: Select the type of benefit that is to be used by the employee.  If Subclasses and/or Comp Time is set up in the system, those will be available for selection as well. (See the Compensatory Time article for more information.)
  • Select the Job that should be tracked against this benefit usage.
    NOTE: This option will only appear if job tracking has been set to allow or require for this benefit on the Benefit/Accrual Type page.
  • Hours: Input the amount of time that the employee has requested to expend.
  • Note: An optional comment describing the reason for the request.
  • Select the Department associated with this benefit usage.


  • Choose to either Split and Save, or just Save.

    If you choose to Split, you can do so either by Schedule or 8 Hour Weekdays.

    Make sure the Effective Date is set to when you want the benefit usage to start. The system will attempt to split it.

     If the split is correct, click the Submit button. Otherwise, choose Cancel and enter two separate events.


Current Levels

Current Levels allows you to view and add time in a particular benefit type.


  • Click on the + (plus) sign next to the benefit type to view the benefit availability with a detailed listing for each accrual, usage, or reset.


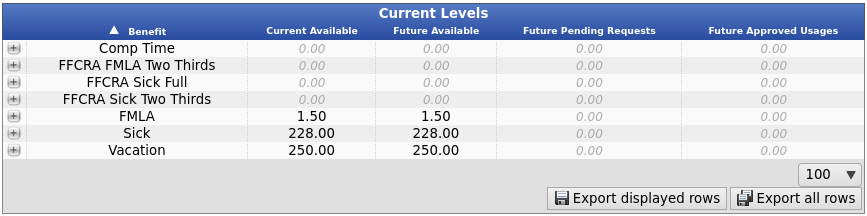
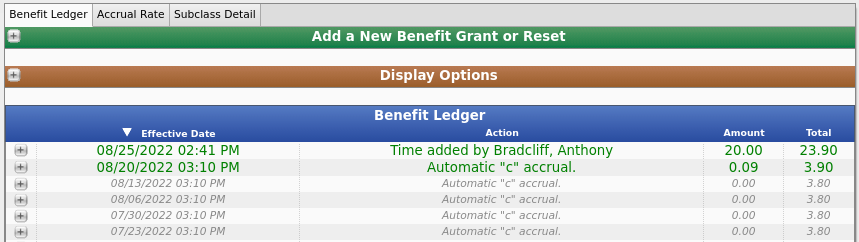
The Benefit Ledger tab shows the historical activity for each benefit type. Each event shows the Time the event took place, what Action was taken, the Amount of time effected, and the running Total of time remaining for that benefit type.

If the row is gray, the event is either in the future (as shown in the top event dated 9/20/2022) or it has a zero duration (as shown in the bottom three events here) which has no effect on the totals. A green row indicates that it is a grant which increases the available time. Red indicates that a benefit was used which decreases the available time.


For more options, click the + (plus) sign on the left hand side of the Display Options bar.


  • To include additional information, select the item from the Columns list.
    TIP: Press and hold the Ctrl key to select multiple items.
  • To Show All Before the Latest Benefit Reset, check the corresponding box.
  • To Show Time Below the Date, check the corresponding box.
  • To reuse these settings in the future, click the Save Preset button.


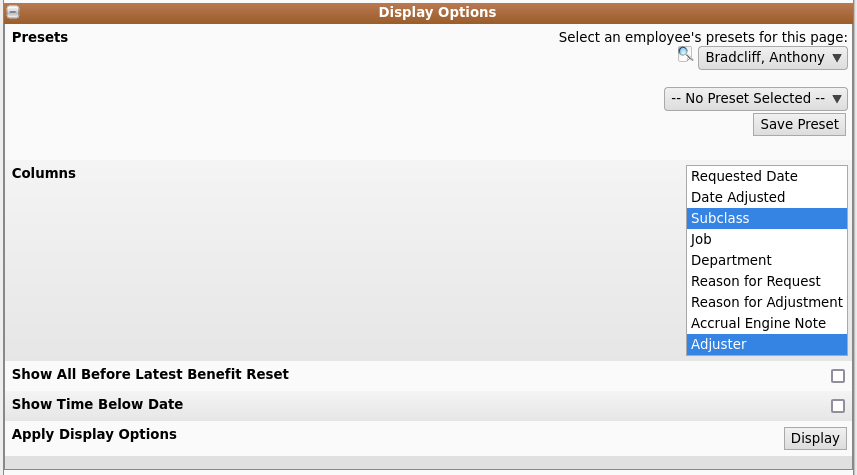
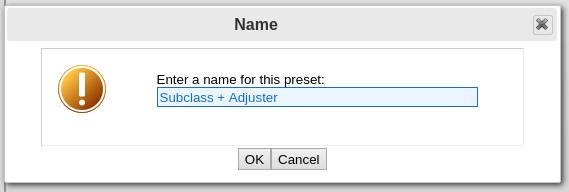
Enter a name


and which level has access to it.


The preset will then be found in the Presets drop-down list. It can be made the default by clicking the Make Default button.


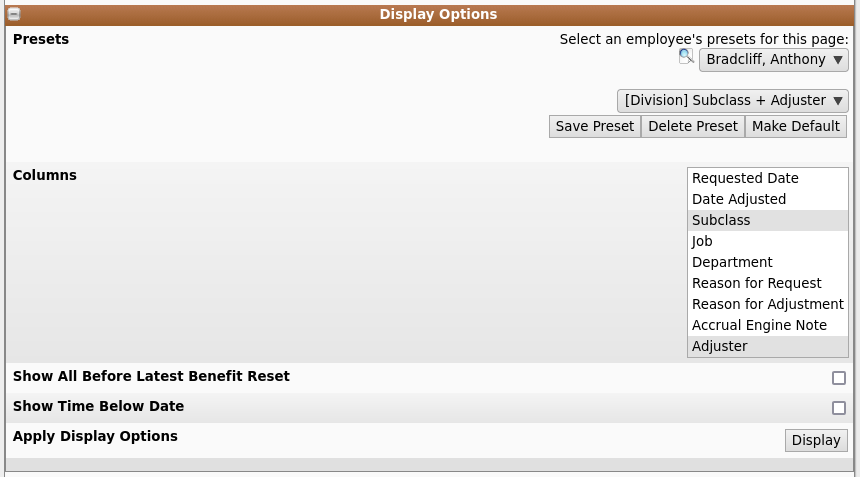
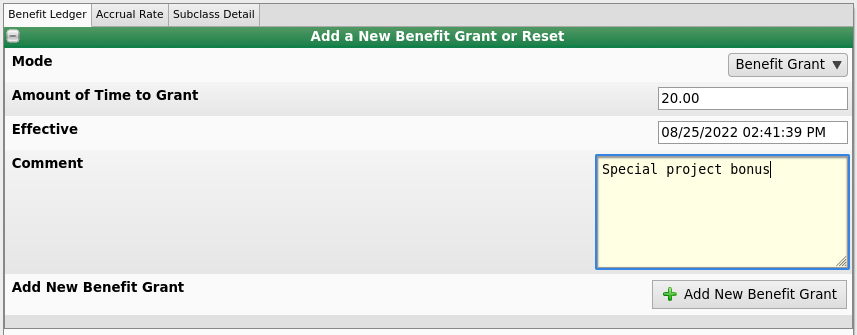
To manually Add benefit time to an employee's bucket, click the + (plus) sign on the left hand side of the Add a New Benefit Grant or Reset bar.


  • Select "Benefit Grant" as the Mode.
  • Enter the Amount of Time to Grant
  • Select the Effective Date and Time
  • Enter an optional Comment

  • Click the Add New Benefit Grant button. The grant will appear in the Benefit Ledger and as a "Benefit Grant" on the Full Benefit Log.


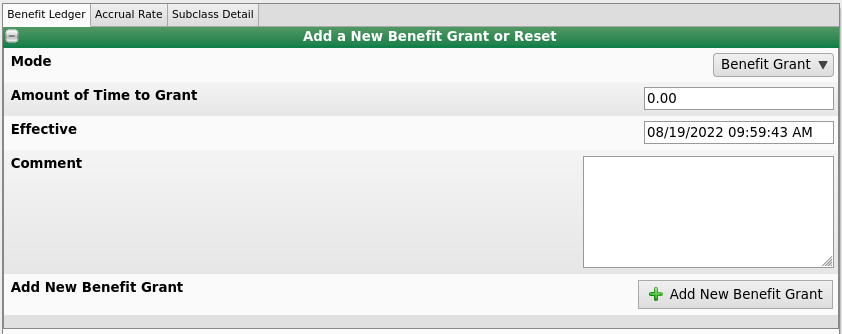
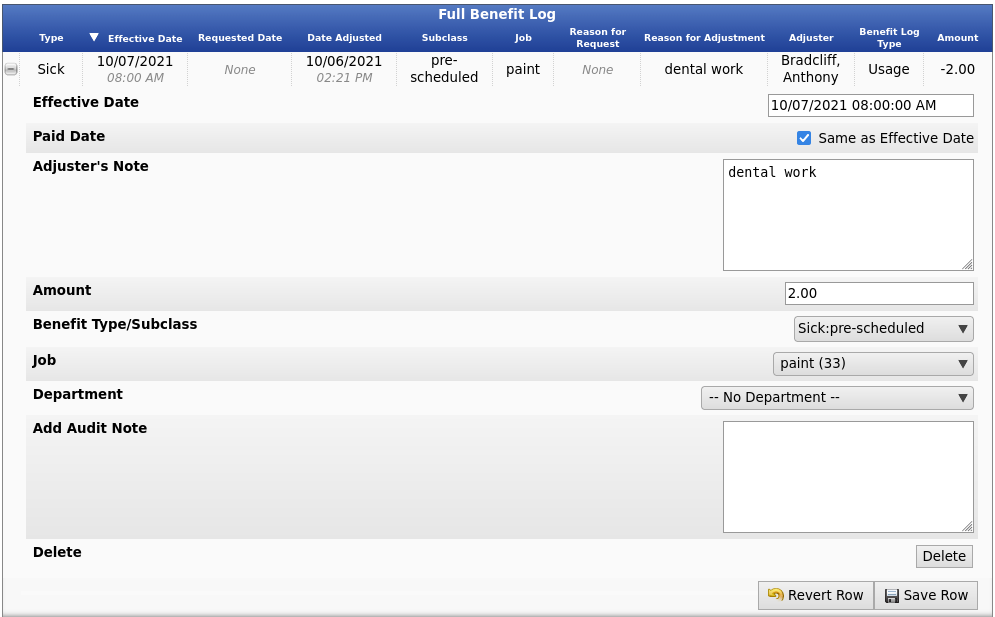
To Edit or Delete the grant from the Benefit Ledger, click the + (plus) sign to the left of the Effective Date.

After making all necessary changes, click the Save Row button. The history of Audits/Notes will appear at the bottom.

Note: Benefits can only be edited or deleted while payroll is unlocked.


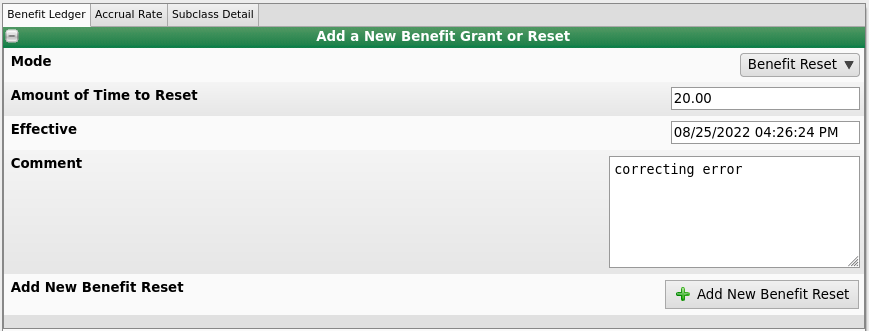
To Reset the accrued time, click the + (plus) sign on the left hand side of the Add a New Benefit Grant or Reset bar.

  • Select "Benefit Reset" as the Mode.
  • Enter the Amount of Time to Reset.
  • Enter the date/time this addition should be Effective.
  • Optionally, add a brief Comment explaining why the time is being reset.
  • Click the Add New Benefit Reset button.
  • NOTE: Adjustments such as this appear on the Benefit Ledger and as a "Benefit Reset" on the Full Benefit Log.


NOTE: To see the accruals, grants and resets on the Benefit Ledger prior to this reset, check the Show All Before Latest Benefit Reset in the Display Options window and click the Display button.


The Accrual Rate tab shows the amount of time and the frequency in which benefit time is accrued, as well as the maximum allowed amount of accrual time.


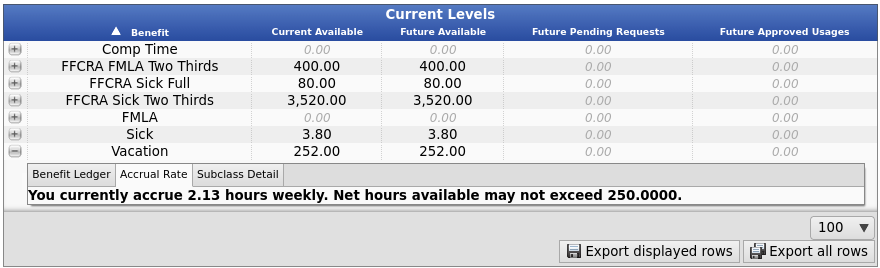
The Subclass Detail tab lists the subclass(es) associated with the benefit type, a description of each, and the total amount of time each subclass has been used.
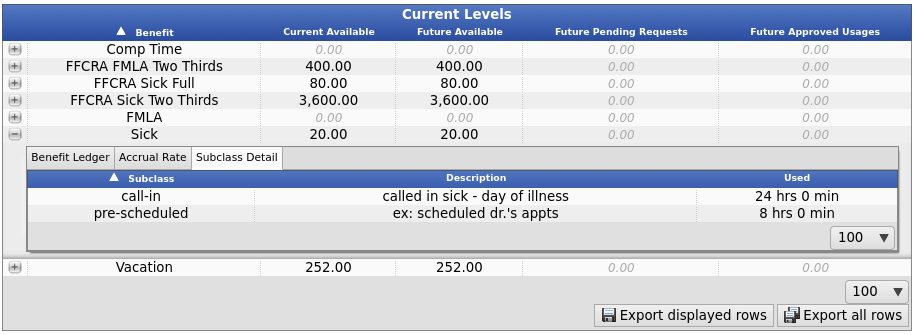


Full Benefit Log

The Full Benefit Log is used to view an employee's history of benefit usage, grants, resets, accruals, and corrections.


  • Click on the + (plus) sign to the far left of the Display Options bar.


  • Optionally, select a Preset if one has been created.
  • Select a Date Range from the drop down list or manually type in the date and time.
  • Select which date will appear in the Date Field. Choose between Date Adjusted, Requested Date, or Effective Date.
  • Select the Benefit Types, Benefit Log Types, and Columns to be included.
    TIP: Hold down the Ctrl button while selecting multiple items.
  • To Show Time Below Date, check the coresponding box. If the column is wide enough and the box is unchecked, the time will appear on the same line as the date.
  • To Show Deleted Events, check the coresponding box. Note, not all of the information is available for deleted events.
  • Click the Display button to apply the display options and view the entries.


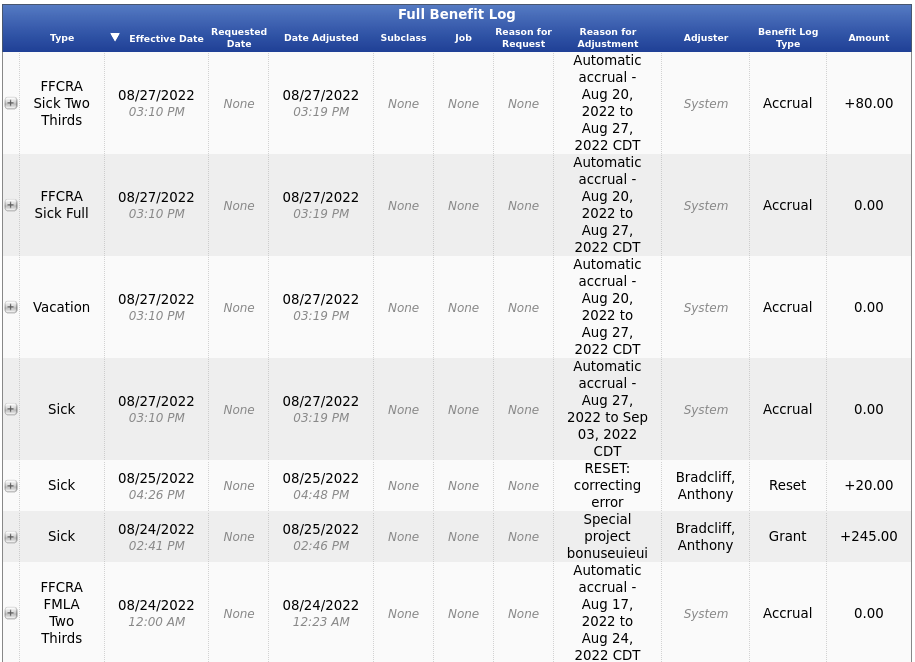
The following details are listed for each event.

  • The Type of benefit used, accrued, reset or granted.
  • The Effective Date of usage, accrual, reset, or grant.
  • The Requested Date of usage, accrual, reset, or grant.
  • The Date that it was Adjusted.
  • The benefit Subclass used if applicable.
  • The Job that was tracked against the usage, accrual, reset or grant.
  • The Reason for the Requested usage, accrual, reset, or grant.
  • The person that made the adjustments.
  • The Benefit Log Type.
  • The adjustment Amount or duration of the usage, accrual, reset, or grant.


EDIT the Full Benefit Log
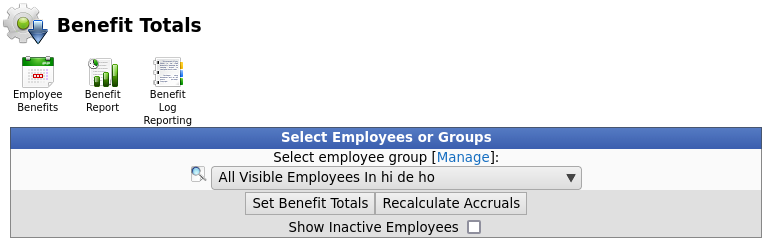
  • Click on the + (plus) sign the left of the entriy you wish to view and/or edit the benefit usage details.


  • Requested Date: Shows the date that the employee requested to use a benefit (if different than Effective Date).
  • Effective Date: The date that the benefit goes into effect.
  • Paid Date: Placing a check next to "Same as Effective Date" tells the system that as soon as the benefit usage goes into effect, that the employee will be paid for that time.
  • Request Note: Display a note that is left by the employee.
  • Adjusters Note: A text area that can be used to reply to the employee about benefit usage.
  • Amount: This is where you will set the length of time that has been approved for the employee.
  • Benefit Type/Subclass: In this drop down, you would select the type of benefit that the employee will be using. If a subclass has been added to this benefit type, that will be available in the drop down. If the system is set up for comp time, that will be available here as well.
  • Job: Select the job this benefit should be tracked against.
  • Department: You would use this if you are tracking the benefit usage by department. If no departments are present then this option will not appear.
  • Add Audit Note: Allows you to add an additional note for auditing purposes.

  • Click the Save Row button to save the changes.


SET : RESET : RECALCULATE

To Set, Reset, or Recalculate Benefits, click on the Set/Reset Recalculate icon at the top of the page.

For more information, go to the Set Reset Recalulate Benefits article.

  • Select "Benefit Grant" as the Mode.
  • Enter the Amount of Time to Grant
  • Select the Effective Date and Time
  • Enter an optional Commentre


©2004-2023 TimeIPS, Inc. All Rights Reserved - TimeIPS and the TimeIPS logo are registered trademarks of TimeIPS, Inc.
"Intelligent Personnel System" "Run your Business. We'll watch the clock." are trademarks of TimeIPS, Inc.
TimeIPS is protected by one or more patents. Patent No. US 7,114.684 B2.