|
|
Applies to versions: 3.1, 3.2, 3.3
Real-Time Work Order Tracking
This Article covers how to create and use work orders in TimeIPS that contain one or more jobs. This feature requires the Real-Time Work Order Tracking (IPSJWO) module.
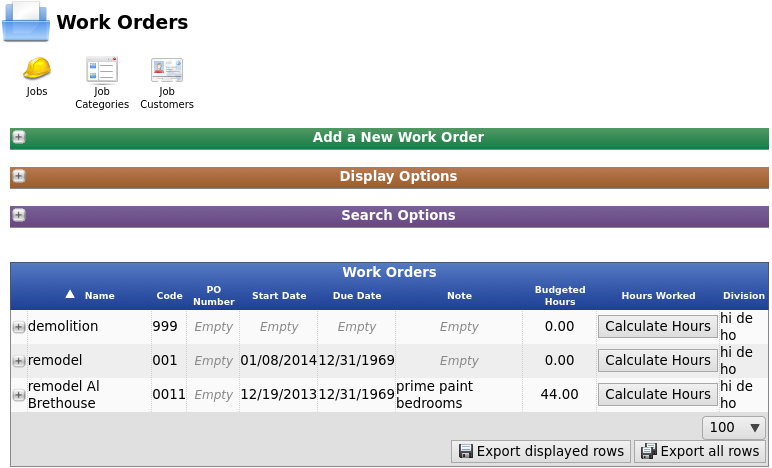
Using the left pane Main Menu » Administration, click on: Jobs » Work Orders
Add a New Work Order
- Click the + (plus) sign to the left of the Add a New Work Order bar to expand the window.
- Enter a unique Name that describes this work order.
- Optionally, you can Copy From an existing work order by selecting it from the drop down list.
In this example system, 2 work orders have been created to act as templates for future work orders with the same grouping or order of jobs.
- Click the Add New Work Order button to generate the new category.
EDIT or Enter Details for an existing Work Order
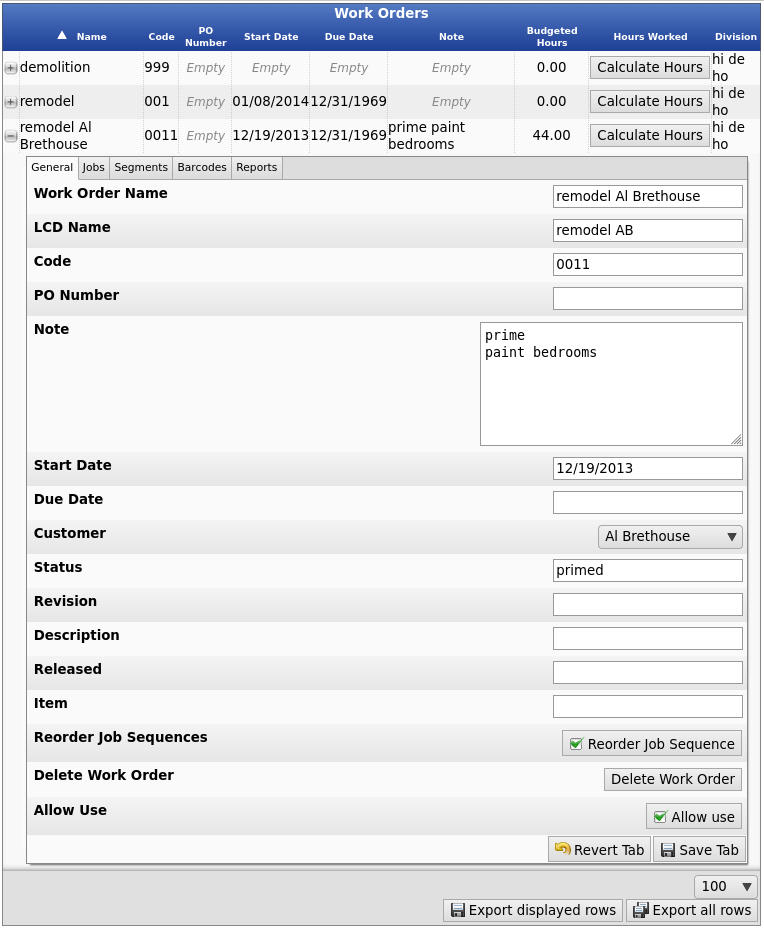
- Click the + (plus) sign to the left of the Work Order Name to expand the window.
General information
- If necessary, enter/adjust the Work Order Name and/or LCD Name.
- In the LCD Name field, type the name you wish to be displayed on the TImeIPS LCD screen.
- Type the Code employees will use to clock into this Work Order.
NOTE: To use a barcode scanner with a work order, the CODE must be a 4 or more digit numeric value.
- Optionally, enter a PO number for the purchase order associated with this Work Order.
- Optionally, enter a Note for this Work Order.
- Type or select the Start Date from the drop down calendar. This is when the Work Order is scheduled to begin.
- Due Date: Enter or select the date the Work Order is due to be completed.
- From the drop down menu, choose the Customer that will receive the bill for this Work Order. (For instructions on creating a customer, see the Job Customers article.)
- The following are optional descriptive data fields that can be used in association with this Work Order: Status, Revision, Description, Released, and Item.
- Checking the Reorder Job Sequences box results in the following: If there are numeric gaps in the Job Order sequence (found on the Jobs tab), the gaps will automatically be closed creating a contiguous yet still relative order.
Example 1: If you have 3 jobs listed and you remove job ordered "2", the job ordered "3" will become "2" to close the gap. If you try to change 3 to 19, it will not change.
If you do not want the order number to automatically change, uncheck the Reorder Job Sequences box.
Example 2: If you have 3 jobs listed and you remove job ordered "2", the job ordered "3" remains "3". If you manually change "3" (using the Change Order To... box) to "19", it stays 19 regardless if there are job order numbers 1 through 18 or if there is another 19.
- The Work Order can be deleted by clicking on the Delete Work Order button.
- To Allow Use of this Work Order, check the box.
- Click on the Save Tab button to save your changes.
Assign Jobs
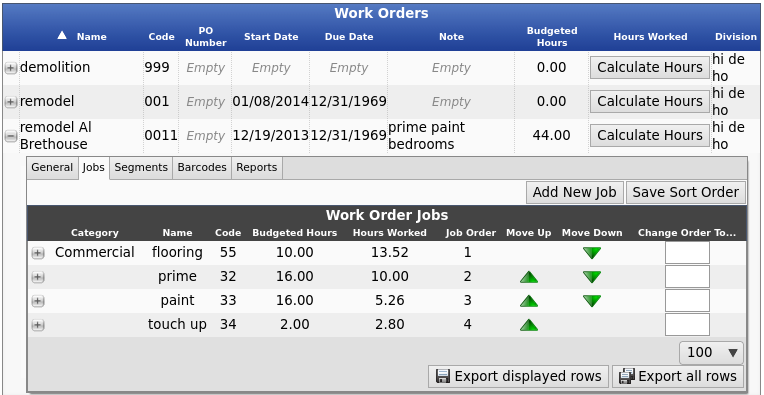
From the Jobs tab, you can assign, remove, and edit Jobs associated with work orders.
- Click the + (plus) sign to the left of the Work Order Name to expand the window.
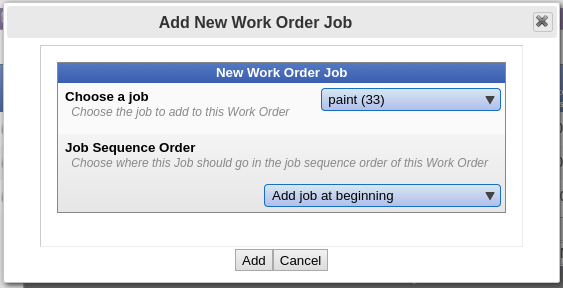
- Click on the Jobs tab, then click the Add New Job button.
- Use the drop down menu to Choose a Job. (For instructions on creating a job, see the Jobs article.)
- Optionally, choose where this job will appear in the Job Sequence Order.
- Click on the Add button.
- To rearrange the Jobs, click on the Move Up and Move Down arrows or enter the Job Order number into the Change Order To... box.
- Click the + (plus) sign to the left of the Job Name to expand the window.
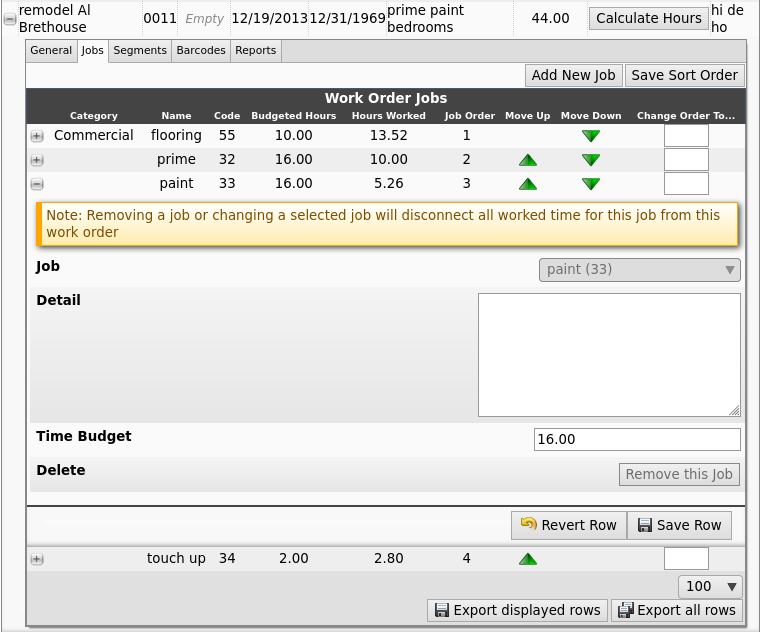
- Optionally, add important notes or job Details.
- Optionally, set a Time Budget (in hours) for the job.
NOTE: The Budgeted Hours assigned to the individual Jobs in this Work Order will appear as a total in the "Budgeted Hours" column of the Work Order table. In the example shown, the individual Jobs have not been assigned Budgeted Hours and therefore the Work Order's Budgeted Hours also reflects 00:00.
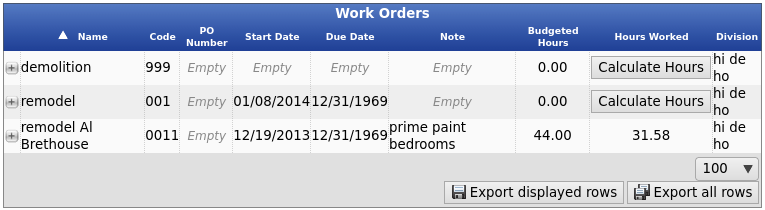
Once there is time worked in these Jobs, you can click the "Calculate Hours" button to generate the total "Hours Worked".
- To delete the job from this Work Order, click on the Remove this Job button.
- To assign another job to the work order, click on the Add New Job button again and repeat the process.
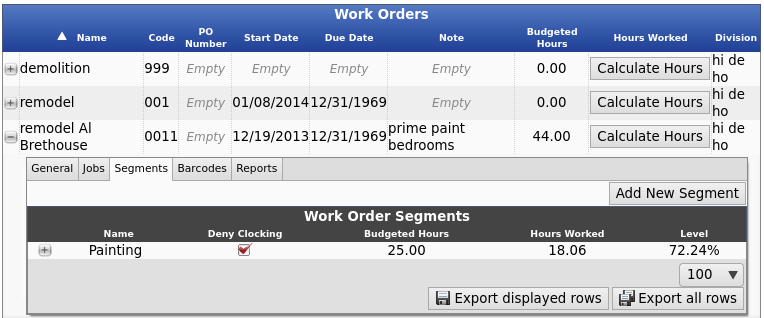
Segments
From the Segments tab, you can create, remove, and edit Segments of Jobs. Multiple Jobs can be grouped into Segments which combines their budgeted hours. For example: Prime, Paint, and Touch Up might be separate Jobs to make sure those specific tasks are assigned and completed, but the hours budgeted for Painting are really the combined hours spent on these 3 Jobs. These 3 Jobs can be grouped together as a Segment and the total hours worked on this Segment can be tracked. Alerts can be sent out if the worked time is reaching the hours budgeted.
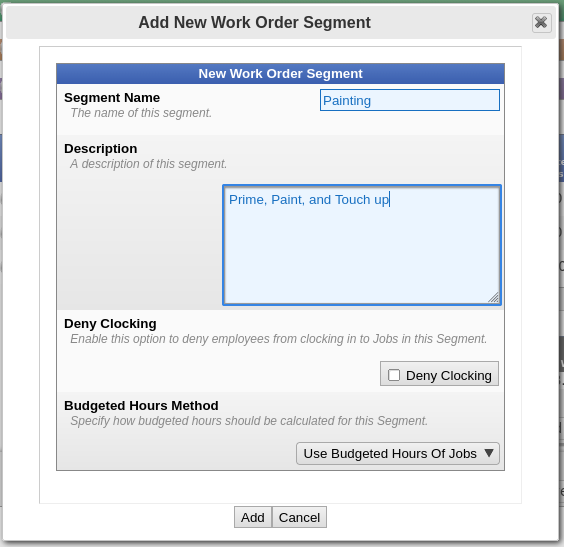
- To create a new Segment, click the Add New Segment button.
- Name the Segment.
- Optionally, give it a Description.
- If employees should be prevented from clocking into Jobs in this Segment, check the Deny Clocking box.
- Specify which Method should be used to calculate Budgeted Hours.
- Click the Add button to save.
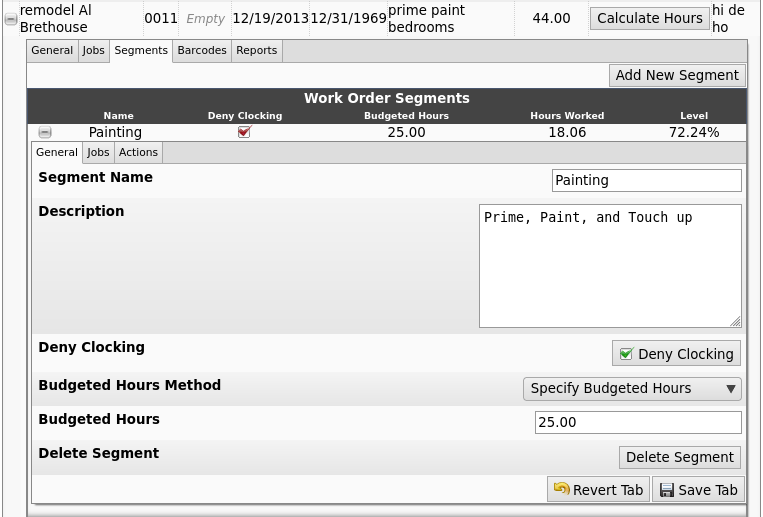
- Click on the + (plus) sign to the left of the Segment Name.
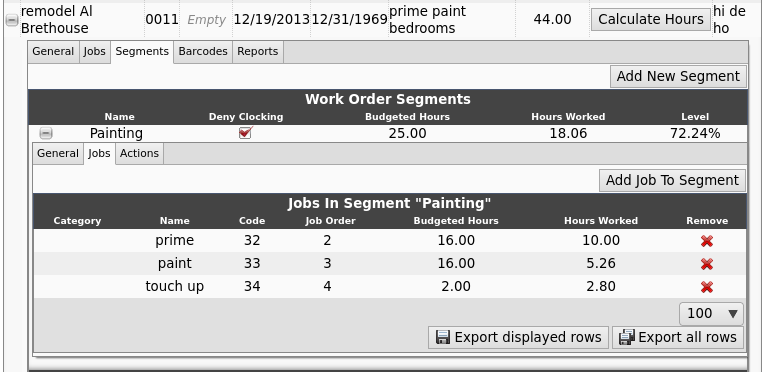
- From the JOBS tab, you can Add Jobs to this Segment. The following 3 steps will need to be repeated for each Job you want to include.
- Click the Add Job to Segment button.
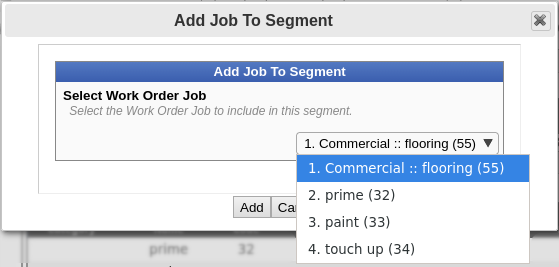
- Select a Work Order Job from the drop down box to be included in this Segment.
- Click the Add button.
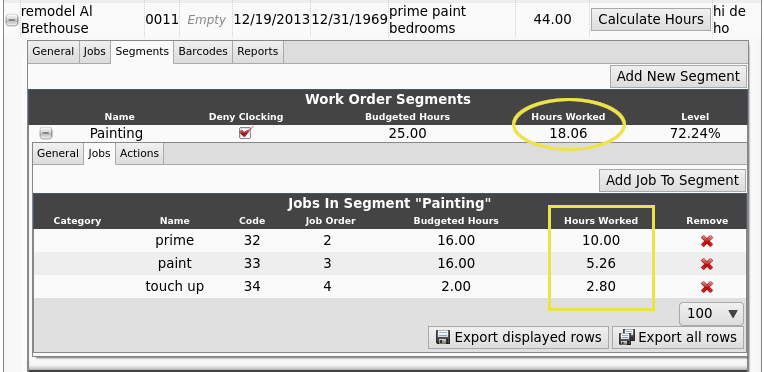
- Once there is worked time, it will appear in the Hours Worked column of the Jobs in Segment table and as a total in the Work Order Segments table.
- You can also view the total hours worked for this Segment on the Time Report. First, go to the Time Edit/Report page. Choose Show Advanced Options. Select the Work Order then the Segment from the Filter by Job drop down list. Make sure the Date Range includes all the time worked. To finish, click the View Report button. The Time Worked will be listed at the bottom next to the blue square.
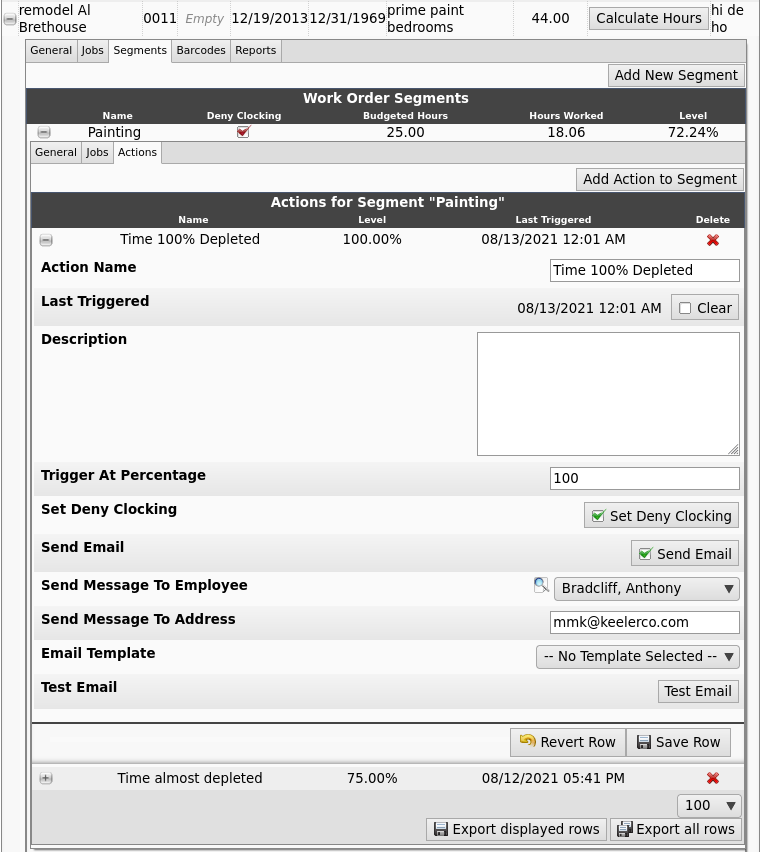
- To setup Alerts and other actions, go to the ACTIONS tab and click the Add Action to Segment button.
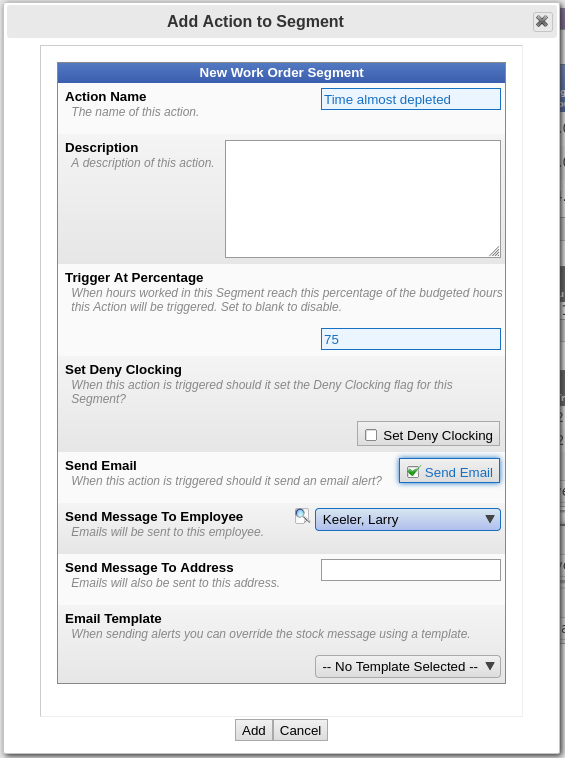
Action Example 1:
- Name the Action.
- Optionally, give this Action a Description.
- Suppy a Trigger At Percentage. When hours worked in this Segment reach this percentage of the budgeted hours this Action will be triggered. Set to blank to disable.
- Optionally, Set Deny Clocking. If this box is checked when the action is triggered, employees will not be able to clock in to any job in this Segment.
- Optionally, choose to Send an Email alert.
- From the drop down list, select an Employee to receive the email alert.
- And/or enter one or more Email Addresses that will receive the email alert. Separate mutilple addresses with a space.
- Optionally, choose an Email Template to override the stock message. If you have the IPSEML module you can configure your own template.
- Click the Add button to implement the Action.
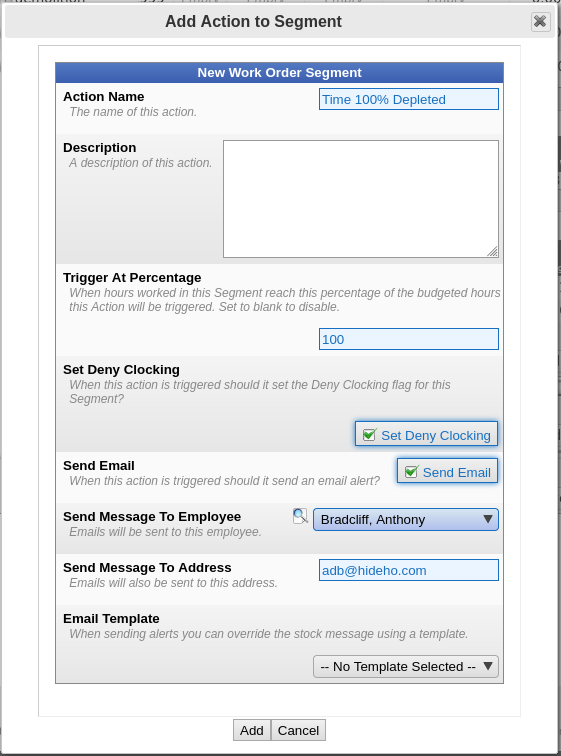
Action Example 2:
Generate Barcodes
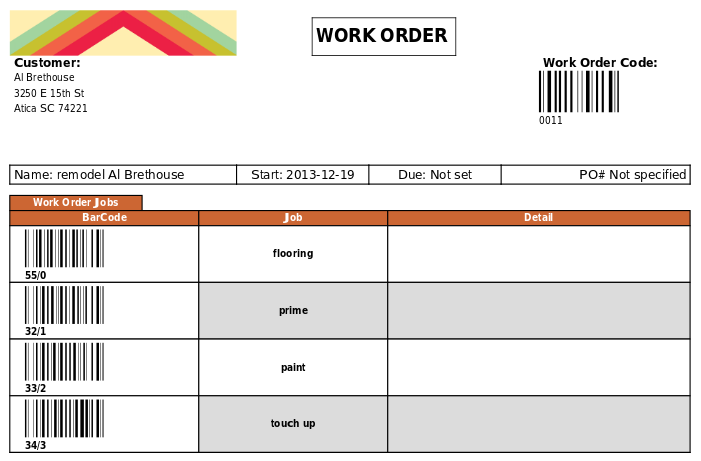
From the Barcodes tab, you can generate and print a Barcode of the work order and all of the jobs assigned to the work order. The Barcodes can then be scanned using a barcode reader to clock into a specific job on a specific work order. Therefore, this provides time tracking and can be reviewed using the Work Order Report.
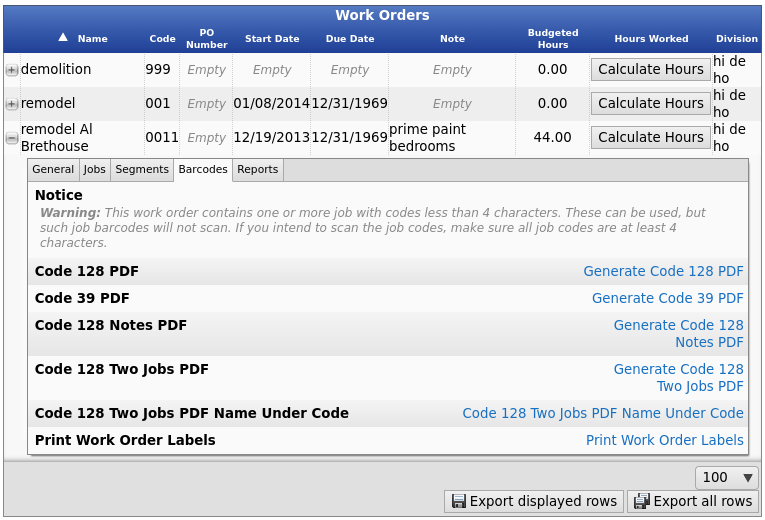
- Click on the appropriate link to Generate a PDF.
- Code 128 PDF: Work Order Summary with Code 128 Barcodes for Smart Clocking
- Code 39 PDF: Work Order Summary with Code 39 Barcodes for Explicit Clocking
- Code 128 Notes PDF: Work Order Summary with Code 128 Barcodes for notes and Smart Clocking
- Code 128 Two Jobs PDF: Work Order Summary showing two Work Order Jobs per row.
Uses Code 128 Barcodes for Smart Clocking
- Code 128 Two Jobs PDF Name Under Code: Work Order Summary showing two Work Order Jobs per row with the job name under the barcode. Uses Code 128 Barcodes for Smart Clocking
- Print Work Order Labels: Print a PDF with just Work Order barcodes.
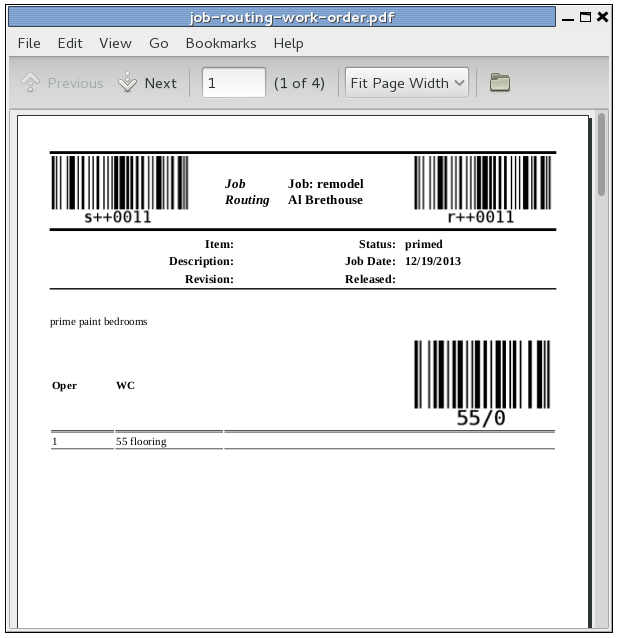
Job Routing Reports
From the Reports tab, you can generate and print Job Routing reports which are designed for Work Orders with long Job descriptions.
For this report, the descriptions support several formatting options:
- Lines that start with | will be indented half way across the page.
- Lines that start with + will be bold.
- Lines that start with |+ will be indented half way across the page and be bold.
- Standard HTML formatting is also supported, including tables, italics, bold, etc.
- Varients of this report can be created by TimeIPS to meet specific needs for job routhing in your application.

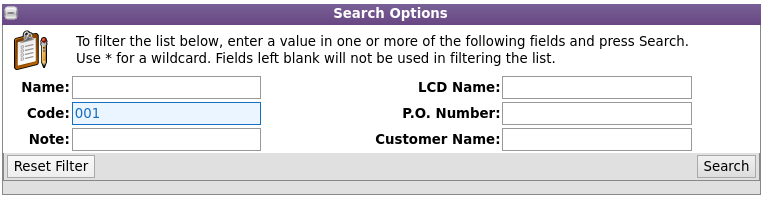
Search Options
To filter the list below, enter a value in one or more of the following fields and click the Search button. Use * for a wildcard. Fields left blank will not be used in filtering the list.
Clocking into a Work Order
- Using Explicit Clocking and "Select from List" in Clock Configuration
When using + to clock in or * to change jobs, the employee will be presented with a list of work orders. Use the Up and Down arrows (8 and 2 keys) on the keypad to go through the list and select a work order, then press Enter. The employee will then be presented with the list of jobs for that work order. Select a job and press Enter.
- Using Explicit Clocking and "Text Input" in Clock Configuration
When using + to clock in or * to change jobs, the employee will be prompted to enter a work order. Enter the work order code using the keypad and press Enter, or scan the work order barcode using a barcode reader. The employee will then be prompted to enter a job code. Enter the job code using the keypad and press Enter, or scan the job code barcode using a barcode reader. (Note that the job code may include a slash and an additional number if a given job code appears more than once in the work order.)
- Using Smart Clocking
When using the "smart clocking" feature to clock in or change jobs, the employee must enter the work order code and job code in the following format:
work order*job code*badge number
(Note that the job code may include a slash and an additional number if a given job code appears more than once in the work order.)
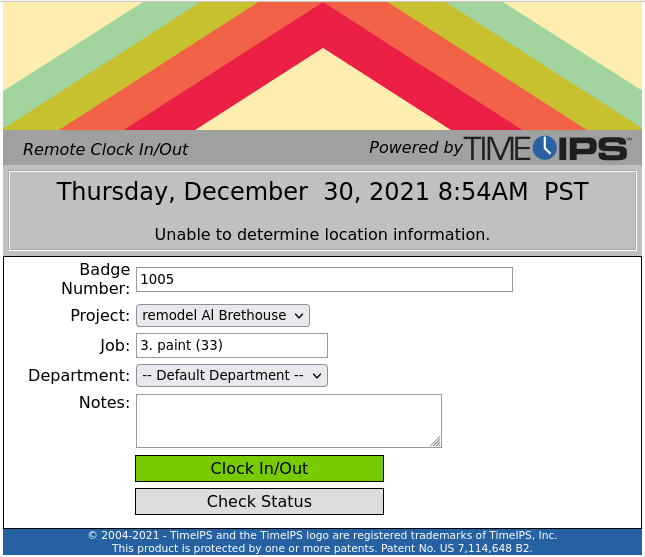
- Tools » Remote/Web Clocking
When using the remote clocking feature, type in your Badge Number. Select the Work Order from the drop down list, then select the Job from its drop down list. (In the Example below, Work Order has been renamed "Project".) Add notes if needed and click on the Click In/Out button.
|

 Information