316-264-1600 Information Sales Support Information Sales Support |
|
Applies to versions: 3.2, 3.3Compensatory TimeThe Compensatory Time (IPSCOMP) module facilitates compliance with the "FLSA 29 US 207 (o)(3)(A) Compensatory time" for eligible employees.
Comp time in TimeIPS has three parts.
System Setup
Step 1: Install the IPSCOMP ModuleUsing the left pane Main Menu » Administration, click on: System » Modules/Upgrades
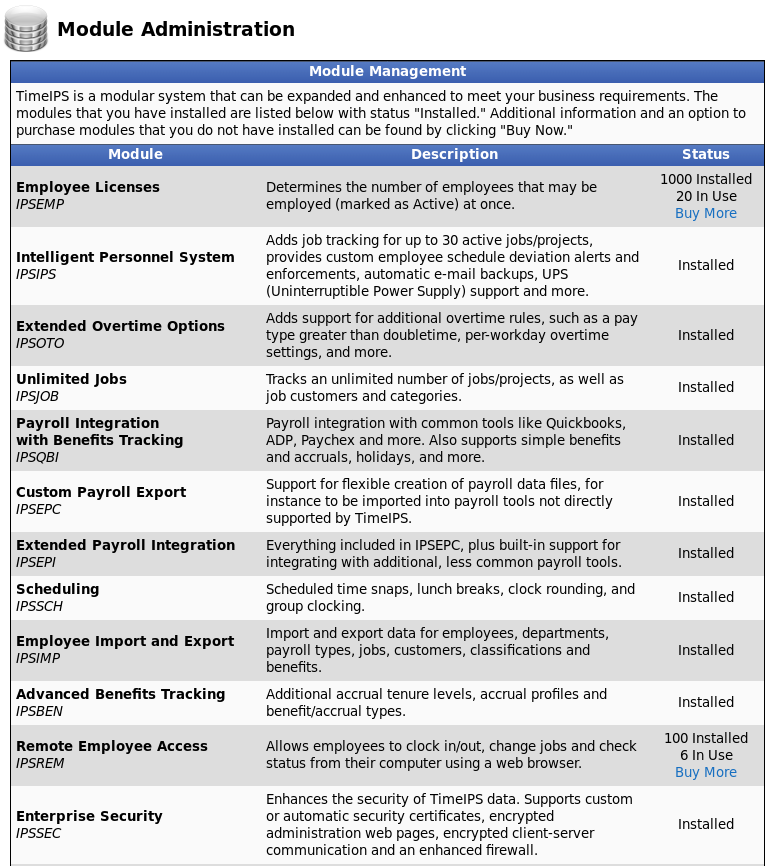 Additional information and an option to purchase the IPSCOMP module can be found by clicking "Buy Now" on the Compensatory Time row.
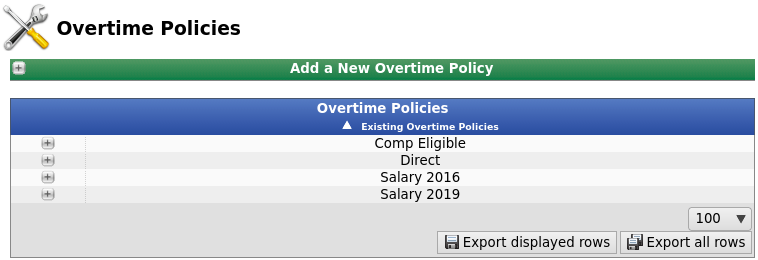
Step 2: Enable Comp Time in an Overtime PolicyUsing the left pane Main Menu » Administration, click on: Payroll » Overtime Policies
Either create a new Overtime Policy or edit an existing one.
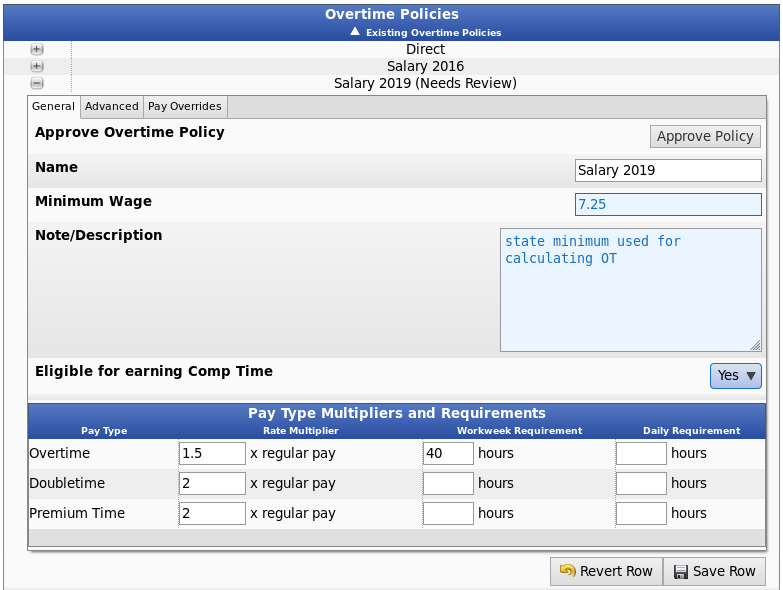
From the General tab, set the Eligible for earning Comp Time option to "Yes" and click the Save Row button. (See the Overtime Policies article for further instruction.)
Step 3: Assign the Overtime Policy to a Workweek GroupUsing the left pane Main Menu » Administration, click on: Payroll » Workweek Groups
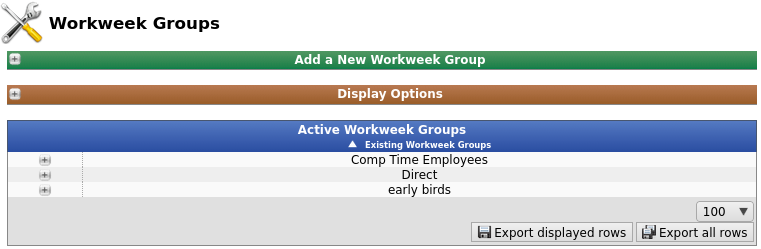 Either create a new Workweek Group or edit an existing one.
 From the Settings tab, select the Overime Policy from the drop down menu and click the Save Row button. (See the Workweek Groups article for further instruction.)
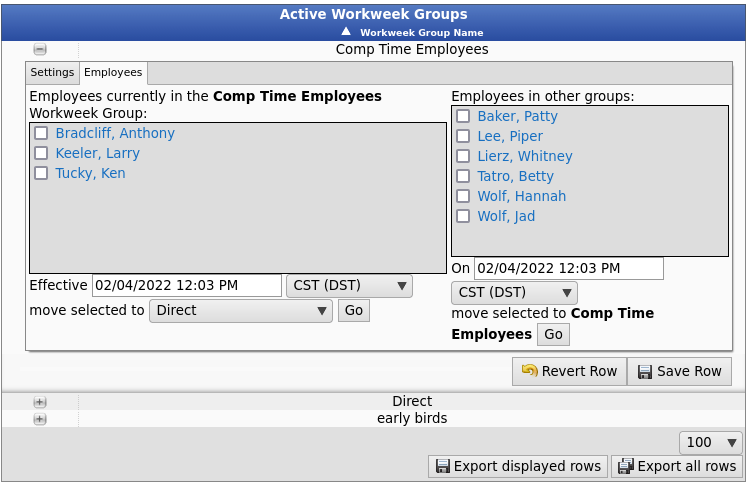
Step 4: Assign Employees to the Workweek GroupUsing the left pane Main Menu » Administration, click on: Payroll » Workweek Groups
Click the + (plus) sign next to the name of the Workweek Group that has been assigned the Overtime Policy with Comp Time enabled.
From the Employees tab, move comp time eligible employees into this group and uneligible employees out of this group.
(See the Workweek Groups article for further instruction.)
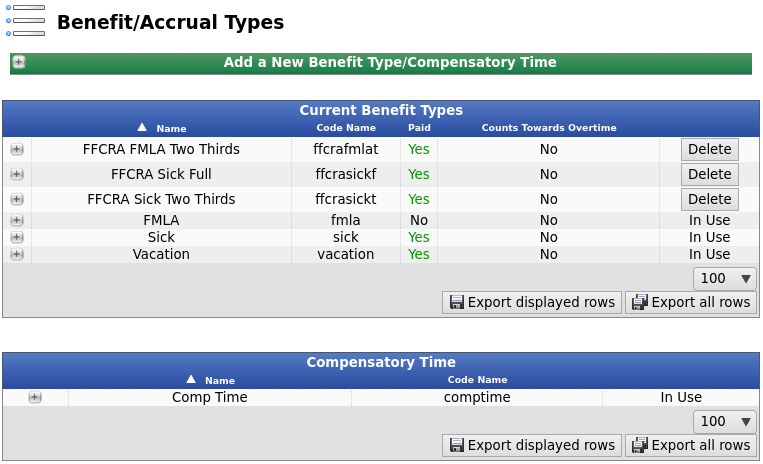
Step 5: Create a New Compensatory TimeUsing the left pane Main Menu » Administration, click on: Benefits » Benefit Types
For further instruction, see the Benefit Types article.
Step 6: Grant Compensatory Time to EmployeesUsing the left pane Main Menu » Administration, click on: Benefits » Employee Benefits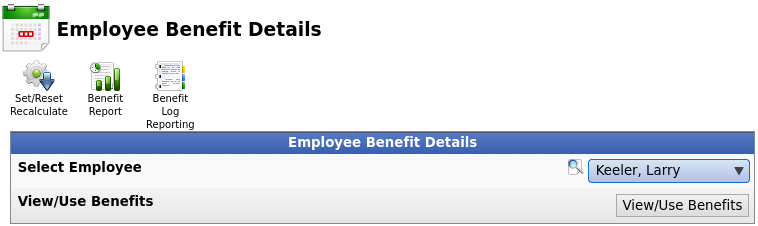
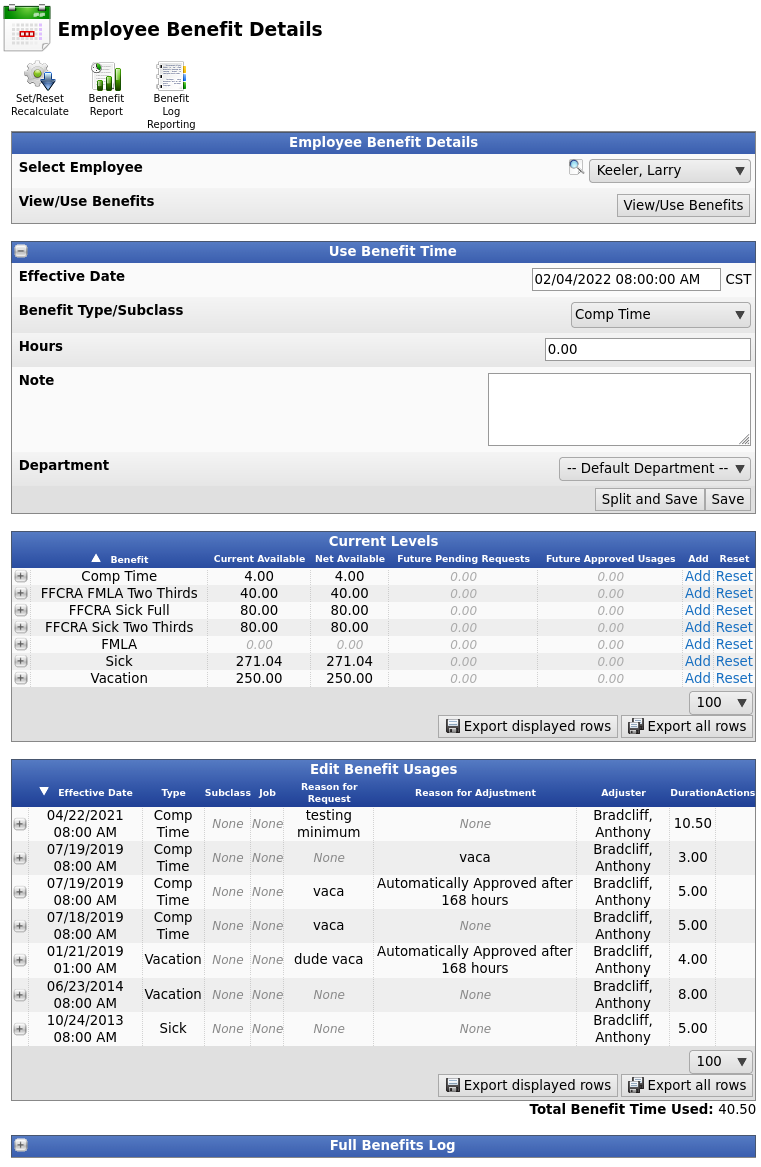
Under Current Levels 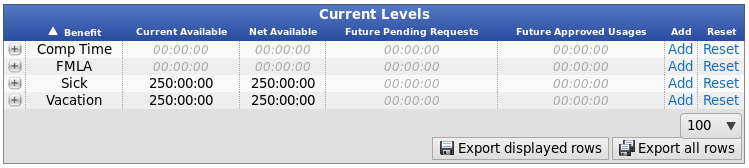
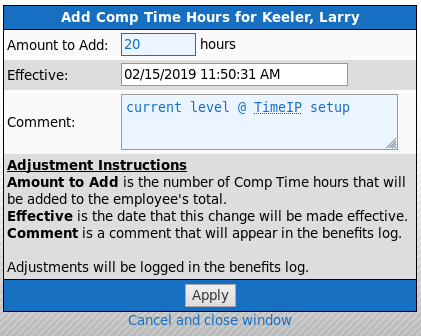
The added hours will then display in the Current Levels window under Comp Time. 
Overtime Conversion
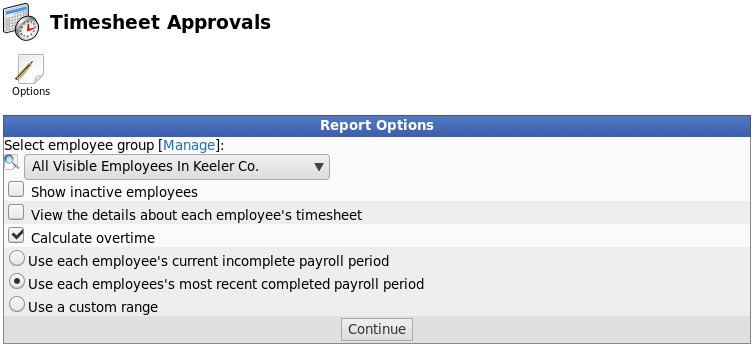
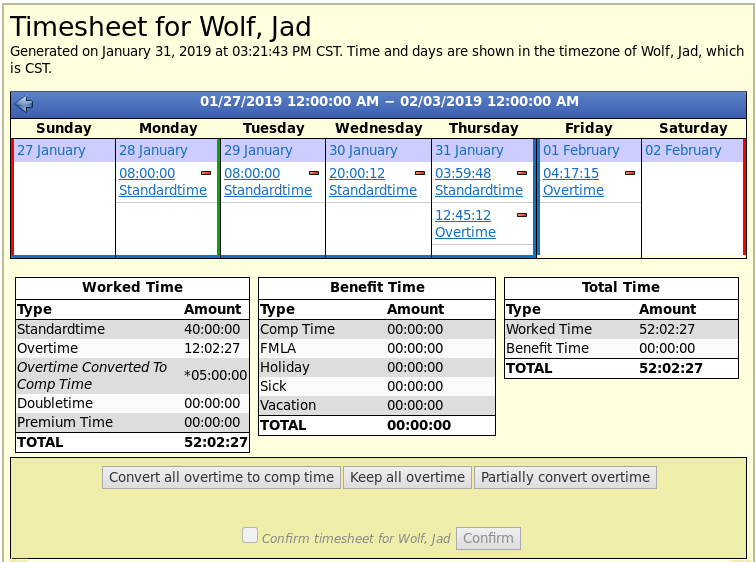
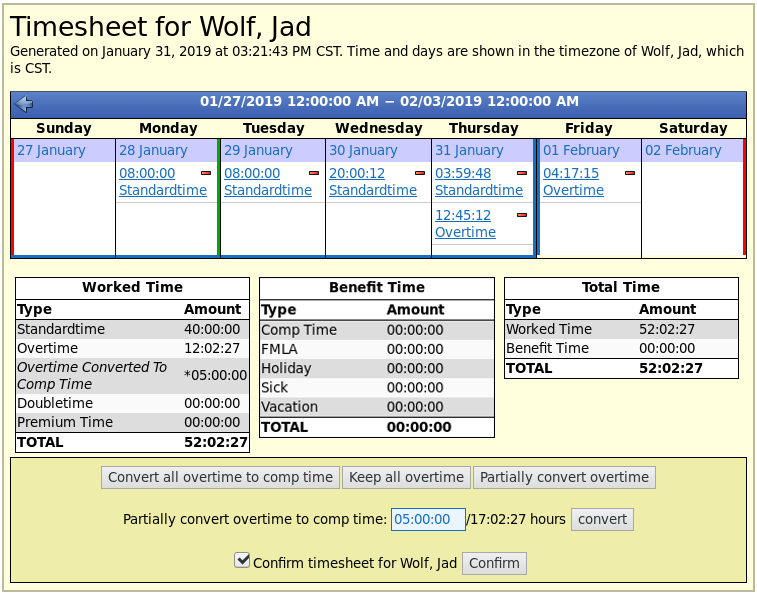
Convert Overtime into Comp TimeUsing the left pane Main Menu » under Administration, click on Payroll » Timesheet Approvals
This will bring up the Report Options window where managers can configure the report. Make your selections then click the Continue button to vew the report. (See the Timesheet Approvals article for more detail.)
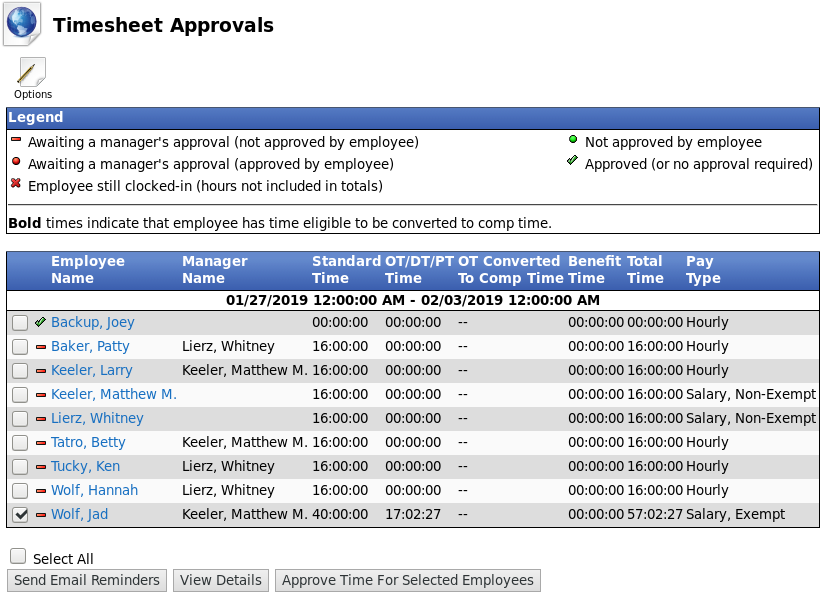
For a more detailed view and to convert overtime into comp time, check the box next to the employee's name and click the View Details button.
If an employee has overtime and is eligible to convert overtime to comp time, then options to Convert all overtime to comp time, Keep all overtime, and Partially convert overtime will display.
Use Earned Comp Time
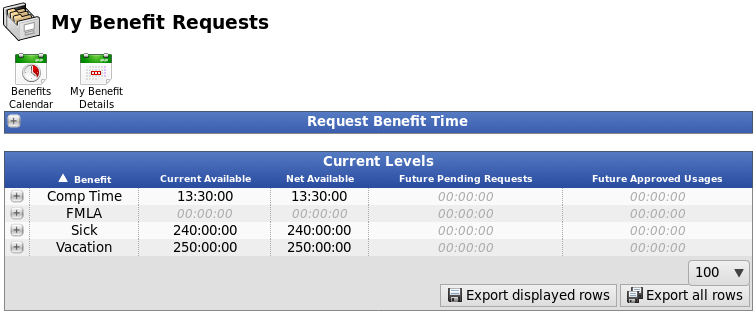
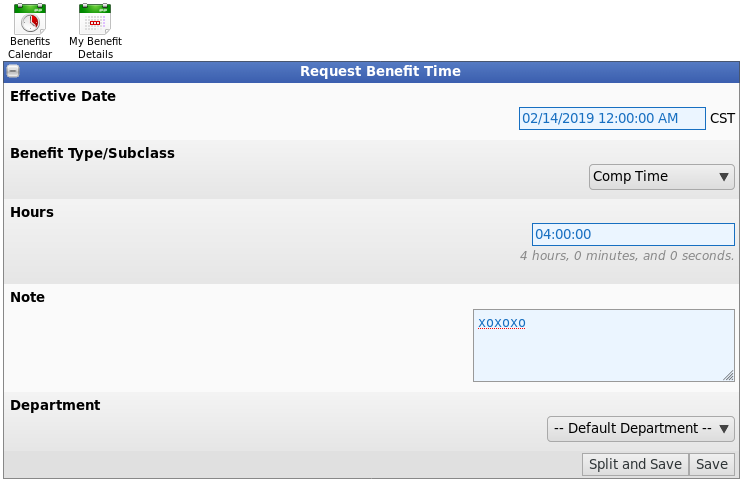
EmployeesUsing the left pane Main Menu » click on My Benefit Requests
The Current Levels table will show the amount of time that is available for each benefit type including comp time. If there is comp time available, click on the + (plus) sign on the left side of the Request Benefit Time bar.
From the Benefit Type/Subclass drop down menu, select the name of the comp time you wish to use. Make your other selections then click the Save or Split and Save button to submit your request. (See the My Benefit Requests article for more detail.)
ManagersUsing the left pane Main Menu » Administration, click on: Benefits » Employee Benefits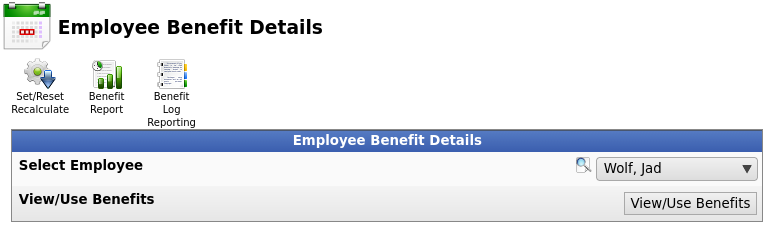
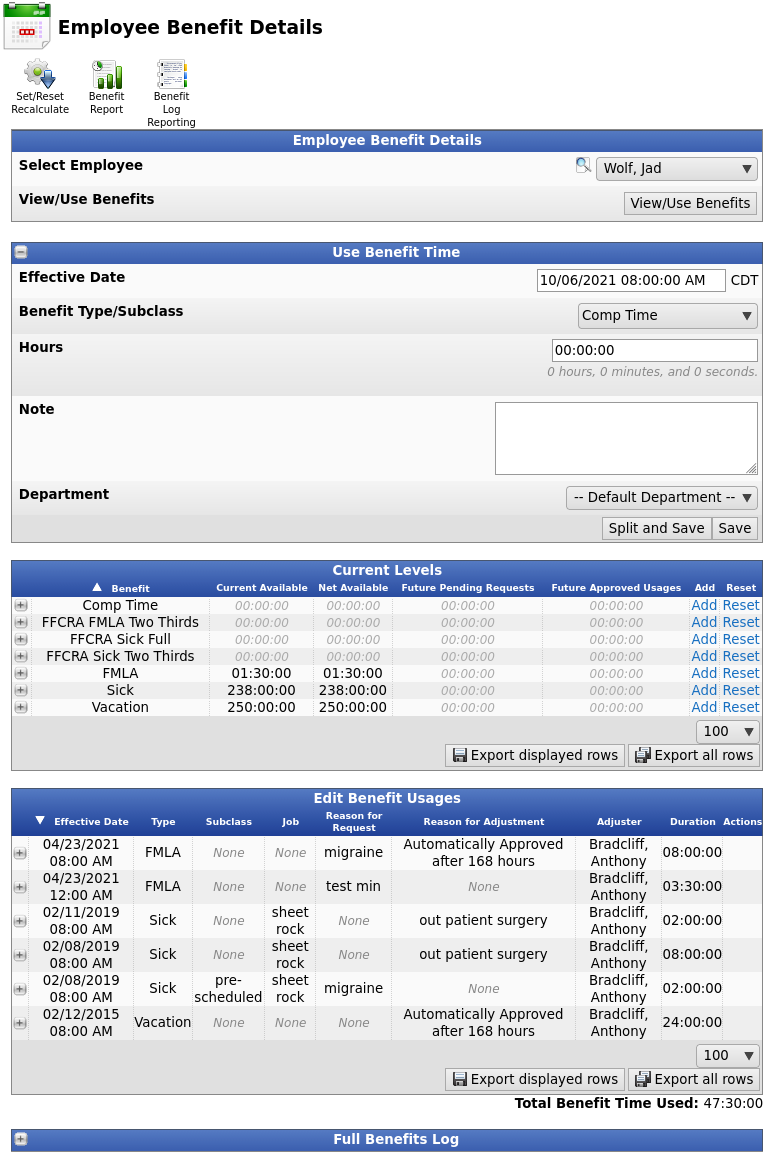 Once the screen is done loading, you will notice that Employee Benefit Details is still viewable, and more information is now being displayed on your screen.
Under Use Benefit Time 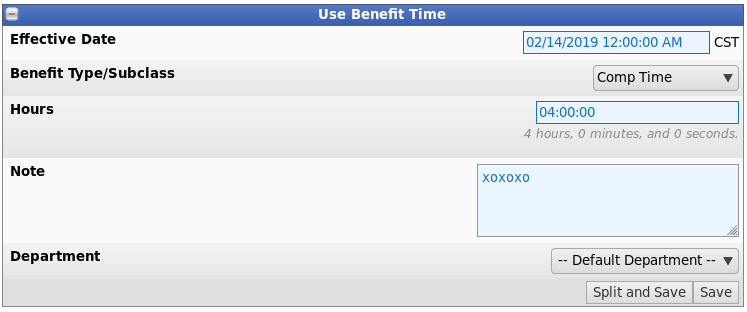 (See the Employee Benefit Details article for further instruction.)
Note: The TImeIPS IPSCOMP module adds functionality that facilitates compliance with FLSA 29 U.S.C. 207(o) but there are some aspects of the law that may need manual attention in special situations. For example, the unlikely event that an employee with unused comp time is terminated while being paid at a lower rate than their average over the last 3 years. When using the IPSCOMP module, please carefully read FLSA 29 U.S.C. 207(o) to ensure compliance. |