
|
|
Applies to versions: 3.2, 3.3
Security
The Enterprise Enhanced Security Module (IPSSEC) adds client data encryption, secure web pages, enhanced firewall protection, and custom or auto-generated SSL certificates for added network security.
Using the left pane Main Menu » Administration, click on: System » Security
Note: The Security link/page is not visible on ASP accounts because all ASP's automatically have security enabled and handled by TimeIPS.
Most modern web browsers now show a security warning for any site not using SSL (HTTPS) mode. To have TimeIPS operate in HTTPS mode, an SSL certificate is required.
TimeIPS can generate a self-signed certificate. This is a good way to test SSL/HTTPS without the cost/hassle of a signed certificate. For small installations where only a handful of employees access TimeIPS, this may be suitable for a permanent configuration. However, most production environments will prefer a signed certificate to avoid browser warnings and the need to manually accept the self-signed certificate on each browser.
There are two ways to install a signed certificate for TimeIPS.
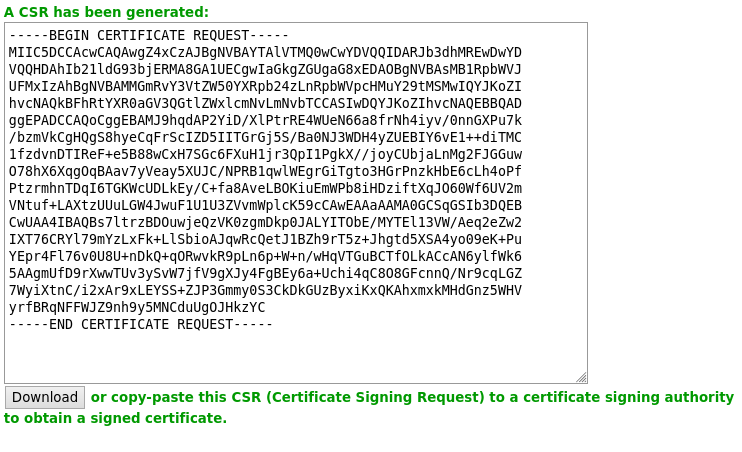
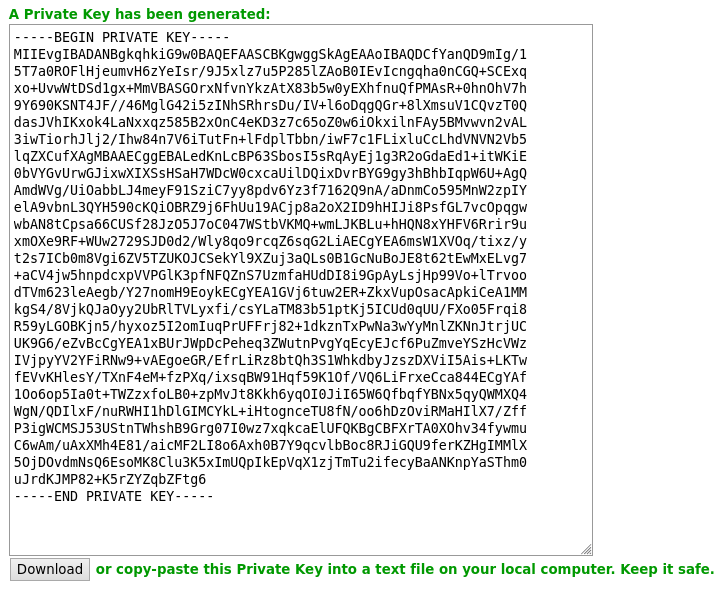
- Recommended: Create a private key and CSR by filling in the information below and clicking the Generate CSR and Private Key button. Save the Private key into a text file on your local computer and keep it safe. Provide the CSR to a third party and pay for a signed certificate. Upload the signed certificate, private key and chain file (if applicable) into TimeIPS under the Install Your Own Certificate section below.
- Alternatively: Use TimeIPS to create a self-signed certificate by filling in the information below and clicking Generate/Install Certificate. After TimeIPS is in self-signed certificate mode, download the generated CSR from TimeIPS. Provide the CSR to a third party and pay for a signed certificate. Upload the signed certificate and chain file (if applicable) into TimeIPS.
Further details on the two options follow:
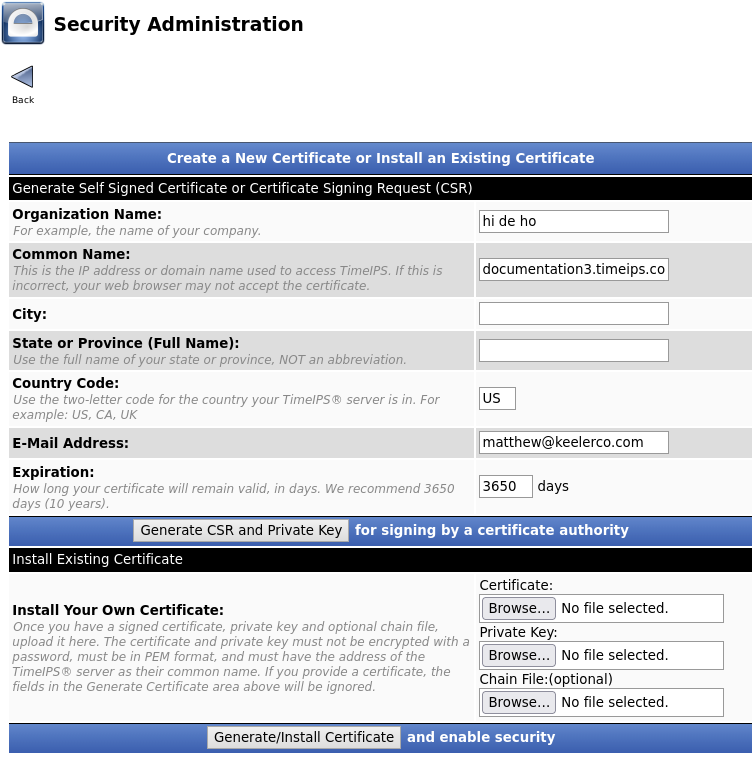
- If you already have a Private Key, Signed Certificate (and optional Chain File) click on the Browse buttons to select your Certificate, Private Key, and the optional Chain File and click Generate/Install Certificate. Wait about a minute for it to install and restart services. Then, access via https://your-timeips-domain. You may need to enter the https manually in your browser and reload the page.
- If you'd like to use TimeIPS to create a Private Key and Certificate Signing Request (CSR), enter your Organization's information at the top.
Click on the Generate CSR and Private Key button.
- If you are planning to continue to use the self-signed certificate, please see the section below about using a self signed certificate with examples of how to confirm the certificate in a web browser.
- NOTE: If using TimeIPS to generate a CSR prior to installing a signed certificate, and others may be trying to access the TimeIPS system, it may be advisable to perform these steps outside of business hours so that browser warnings about the self-signed certificate do not raise questions with users.
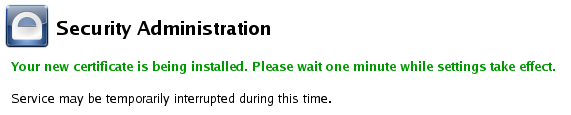
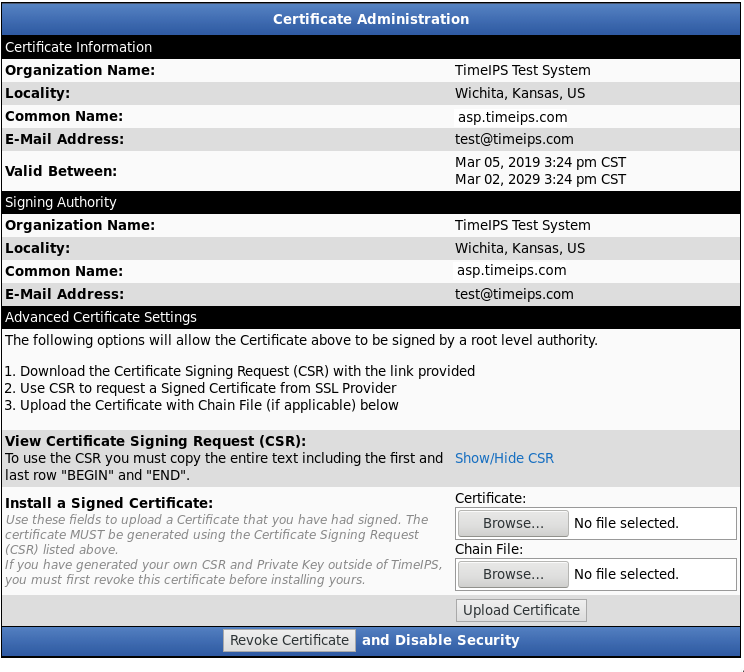
- If you chose to Install your own signed certificate, the page will reload and the Certificate Administration information will display on the Security page. All TimeIPS web pages are now secured, designated by the "s" in https://
-
Once you have a certificate installed, the option to view the Certificate Signing Requst (CSR) will appear. Click the link to expand the area and show the CSR so it can be copied and pasted to a signing authority.
-
The exact steps are a little different for each signing authority, but generally, you'll be presented with a web page were you can paste the CSR and submit it. The process of creating a signed certificate is usually just a few minutes. Some authorities will allow downloading the certificate immediately. Others will email the certifitcate. The signing authority may ask about the environment where the certficitcate will be used. If so, specify that you need to have the certificate in a format for use with the Apache 2 Web server.
-
If the signing authority provides the signed certificate by email, or on a web page, you'll need to copy-paste into a simpe text file, using a text editor such as notepad. Save the files so they can be selected by clicking the Browse... button in TimeIPS.
-
If the signing authority provides a Chain File, make sure it's also in a file. Click Browse... and select it as well.
-
Then, click "Upload Certificate." This will replace the self-signed certificate with the signed certificate. It may be necessary to close and reopen your web browser to have this take effect and show the site as secure.
Using a self-signed certificate:
-
If you chose to Generate a new certificate it will be "self-signed." This means that web browsers will not automatically know it's a valid certificate. To continue using this, you must manually acknowledge that you trust the certificate on any browser that will access TimeIPS.
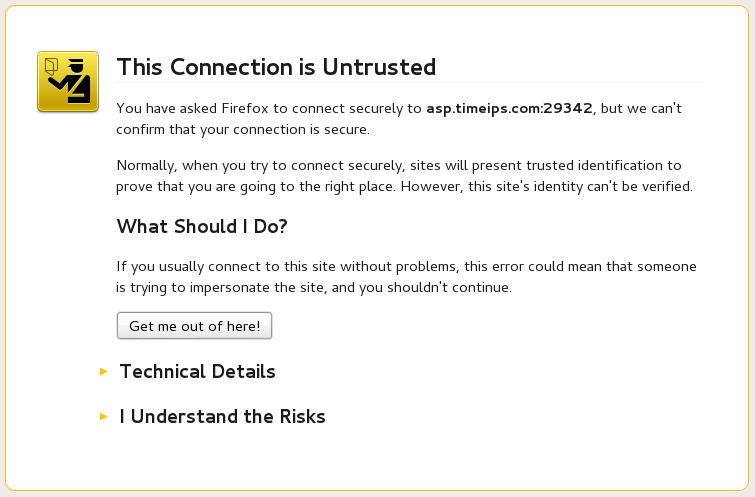
- In Firefox, click on "I Understand the Risks".
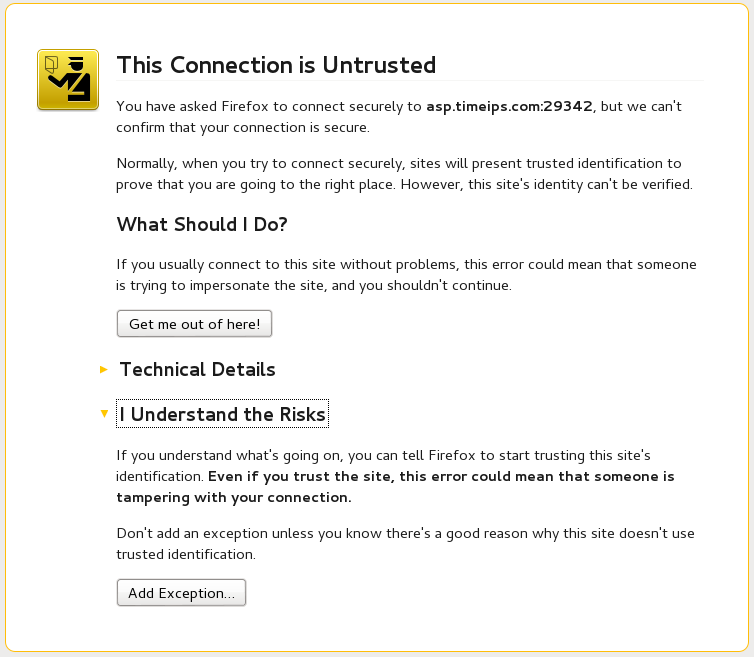
- Click the Add Exception button.
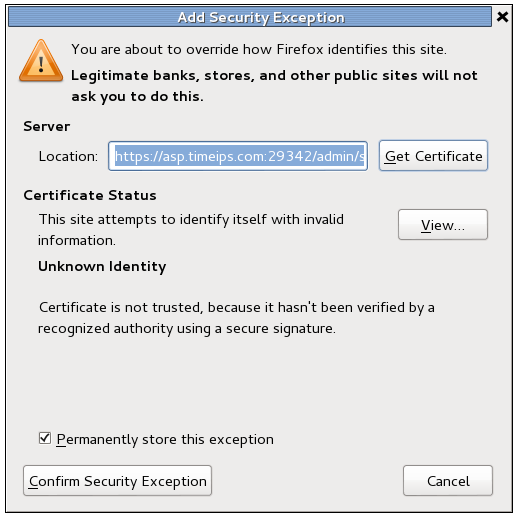
- Then click the Confirm Security Exception button.
- This will take you back to the Security page with the Certificate Administration information displayed. All TimeIPS web pages are now secured, designated by the "s" in https://
Firefox Warning about insecure password entry:
Starting with recent version of Firefox, password entry fields may show a warning if https mode is not used. To resolve this issue, either use IPSSEC and access TimeIPS via https, or disable the warning in Firefox.
To disable the warning, enter "about:config" in the url box for Firefox. A notice may appear, click to continue. Then, enter in the search box:
security.insecure_field_warning.contextual.enabled
Double-Click the "value" box and set it to "false"
|

 Information