Date printed: 05-08-2024 Last updated: 09-22-2005
To view our complete support knowledge base and most current version of this article visit support.timeips.com.
 Information Sales Support
Date printed: 05-08-2024 Last updated: 09-22-2005 To view our complete support knowledge base and most current version of this article visit support.timeips.com. |
316-264-1600 Information Sales Support |
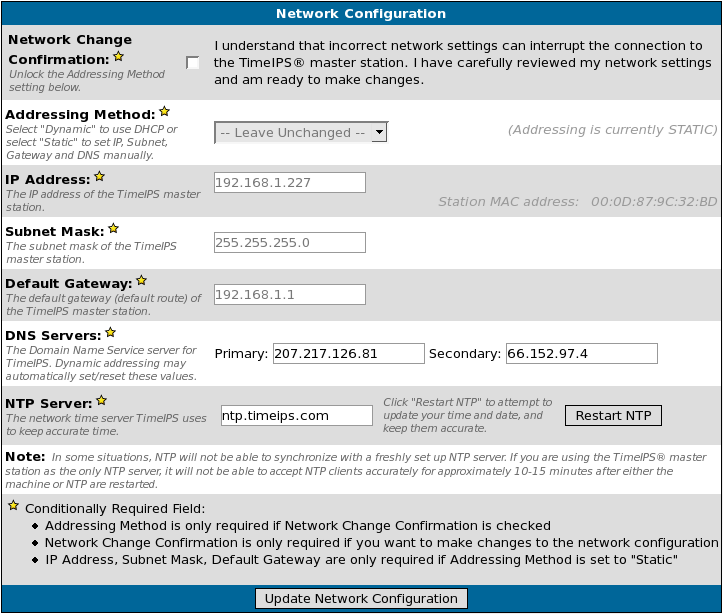
TimeIPS initially uses DHCP (Dynamic Host Configuration Protocol) to automatically gain an IP address from your network during setup. Once your TimeIPS system has been configured, you need to assign it a static, or never changing, IP address for easy access to your TimeIPS system.
Using the left pane Main Menu, click on: Administration » System Administration » System Settings
Setting Static Routes (Routing Table)
For advanced networks, TimeIPS can be configured with static routes. This can be done on TimeIPS master or client systems by browsing to
http://{ip address of TimeIPS}/staticRoutes.php
Walk up Client Service code for Versions 1.2, 1.3, 1.4
once you type in one of the below codes press enter.
| Restart LCD & Networking | +-+- |
| Revert to DHCP | +-10+- |
| View current IP | +-00+- |
| Restart NTP | +-11+- |
| Restart Client App | +-20+- |
| Turn on view as you type | +-34+- |
| Turn off view as you type | +-33+- |
| Relay on | +-32*[system admin id]+- |
| Relay off | +-31*[system admin id]+- |