|
|
Applies to versions: 1.11, 2.0, 2.1, 2.2, 2.3, 2.4, 2.5, 3.0
ADP Export Settings
TimeIPS Payroll Export can generate a file with your payroll data. The file can be opened in a spreadsheet application, such as Microsoft Excel or OpenOffice Calc. Using the Payroll Integration with Benefits Tracking (IPSQBI) optional module, the file can be imported in your ADP payroll application.
Using the left pane Main Menu » Administration, click on: Payroll » Payroll Export
Before you export:
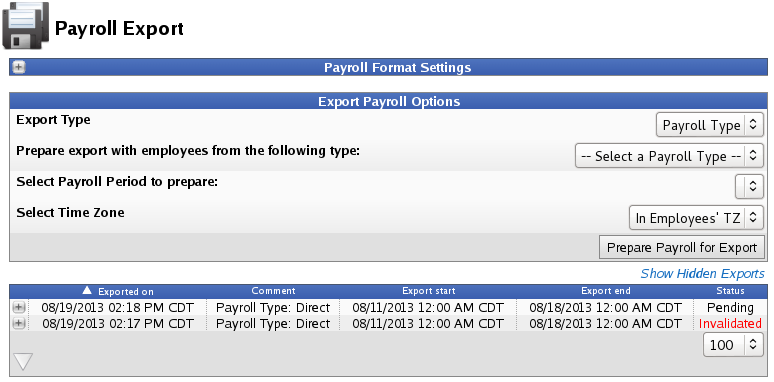
Prepare Payroll for Export
First, choose to generate the report by Payroll Type or Manually select employees and a range of time.
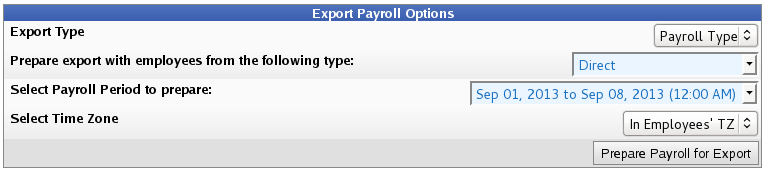
Payroll Type
- Under Export Type, select Payroll Type to generate the report. (See "Manual" below for specifics on that option.)
- Select a Payroll Type. All employees (including released employees) that are currently in the selected Payroll Type will be included in the prepared payroll data.
- Select the Payroll Period from the drop-down boxes.
- Select a Time Zone. The start and end time of the export can be interpreted in the company's timezone or separately for each employee.
- Click the Prepare Payroll for Export button.
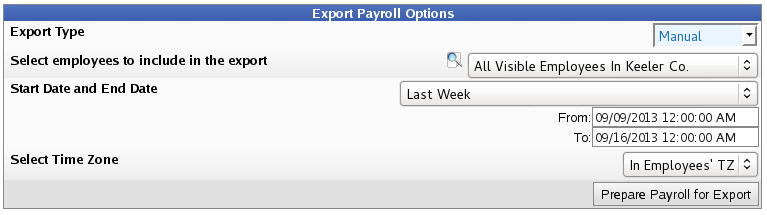
Manual
- Under Export Type, select Manual to generate the report. (See "Payroll Type" above for specifics on that option.)
- Select an employee or group of employees to include in the export.
- Manually select a range of time for this report, or use the quick selection drop down box.
- Select a Time Zone. The start and end time of the export can be interpreted in the company's timezone or separately for each employee.
- Click the Prepare Payroll for Export button.
Next you should see the payroll calculation being scheduled. 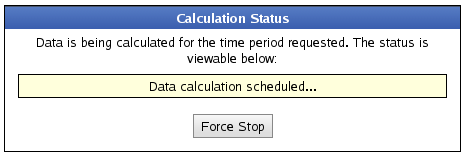
Export Payroll
After the payroll data is prepared for export, the Pending Export window will open. 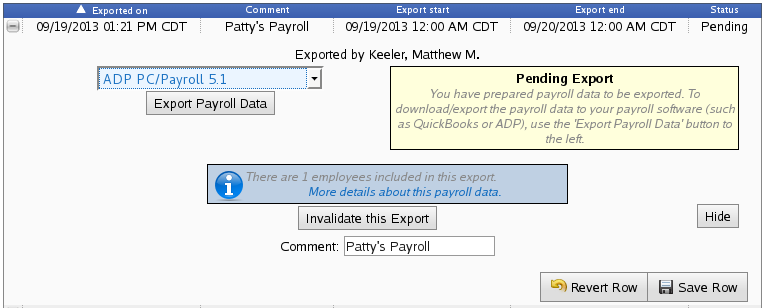
- Select either ADP PayExpert or ADP PC/Payroll 5.1 from the drop down menu.
- Next click on the button labelled Export Payroll Data.
NOTE:: Editing of time events is locked during payroll processing to avoid having another user make changes via the Time/Edit Report that would not be reflected properly in the current payroll run.
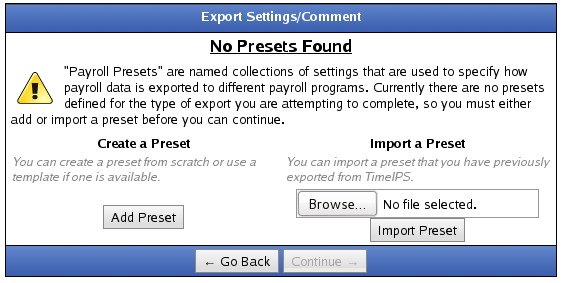
If you have not already created a ADP preset, you will see the following screen.
Click the Add Preset button to begin setup.
The preset window will appear.
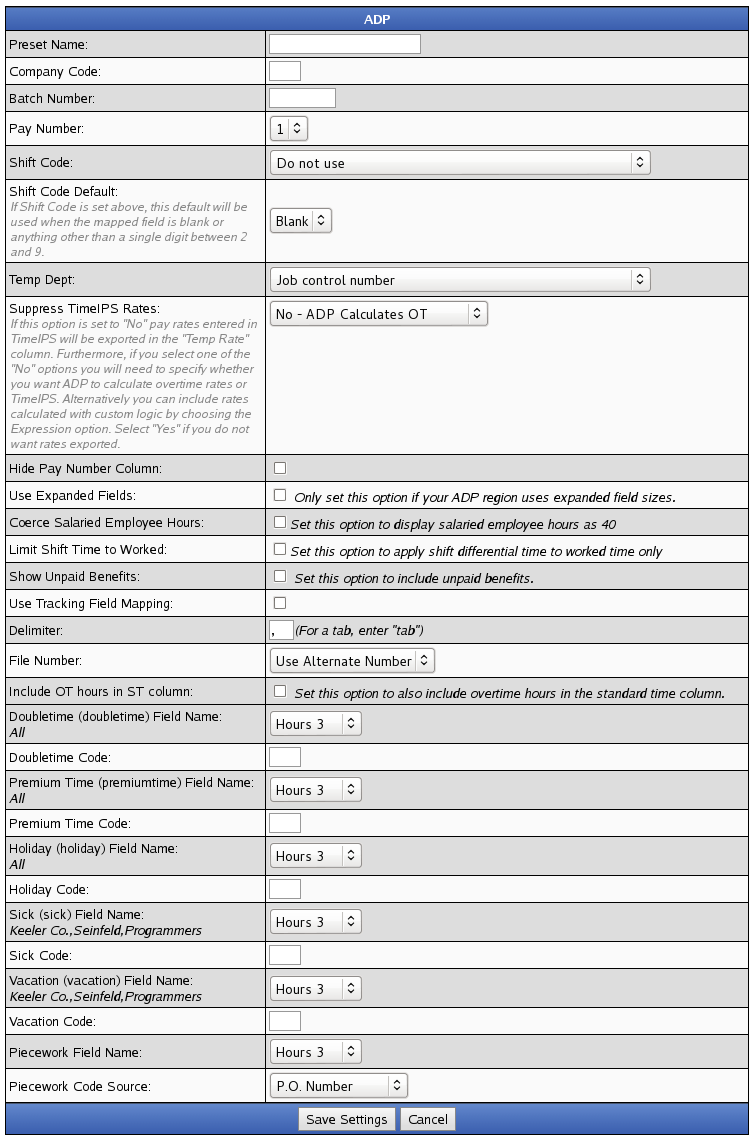
The following export settings should be defined prior to running your ADP export:
- Preset Name: Enter the name you wish to assign to the preset.
- Company Code: Your ADP assigned Company Code; column is included in the payroll export and used to name the exported file.
- Batch Number: Value used by ADP to represent a new batch of payroll data in order to prevent duplicate records on subsequent imports.
- Pay Number: The Pay Number code defined by ADP.
- Hide Pay Number Column: Select “Yes” to remove the Pay Number column in the export file; select “No” to include the column in the export file with the value defined in the “Pay Number” field above.
- Use Expanded Fields: Only set this option if your ADP region uses expanded field sizes.
- Use Custom Field Mapping: Contact TimeIPS Support for assistance in using this feature.
- Delimiter: A comma is the default setting. Enter "tab" to use a tab delimiter.
- File Number: Your options are "Alternate Number", "ID/Badge Number" and "Social Security Number (SSN)"
NOTE: Doubletime, holiday, sick, and vacation hours must be idenfied in ADP as "Hours 3" or "Hours 4" and given a unique identifying pay code. Those settings, as defined in your ADP application, will be identified in the Pay Code Name and Pay Code in TimeIPS.
- Doubletime Field Name: Define whether Doubletime hours are coded as “Hours 3” or “Hours 4” in ADP
- Doubletime Code: Enter the Code used to define Doubletime hours
- Deferred Holiday Field Name: Define whether Deferred Holiday hours are coded as “Hours 3” or “Hours 4” in ADP
- Deferred Holiday Code: Enter the Code used to identify Deferred Holiday hours
- Holiday Field Name: Define whether Holiday hours are coded as “Hours 3” or “Hours 4” in ADP
- Holiday Code: Enter the Code used to identify Holiday hours
- Sick Field Name: Define whether Sick hours are coded as “Hours 3” or “Hours 4” in ADP
- Sick Code: Enter the Code used to identify Sick hours
- Vacation Field Name: Define whether Vacation hours are coded as “Hours 3” or “Hours 4” in ADP
- Vacation Code: Enter the Code used to identify Vacation hours
Once your preset has been configured, click on Save Settings to save, or Cancel to exit without saving.
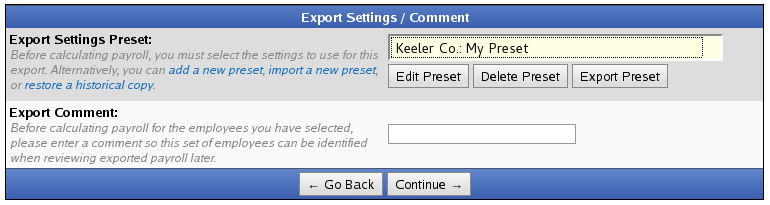
- On the next screen be sure that your new preset is the one selected in the Export Settings Preset drop down menu.
- Optionally, you can add a comment to the export making it unique and easily identifiable.
- Click Continue.
Next you should see the payroll calculation being scheduled.
Payroll Export Data - Final Step
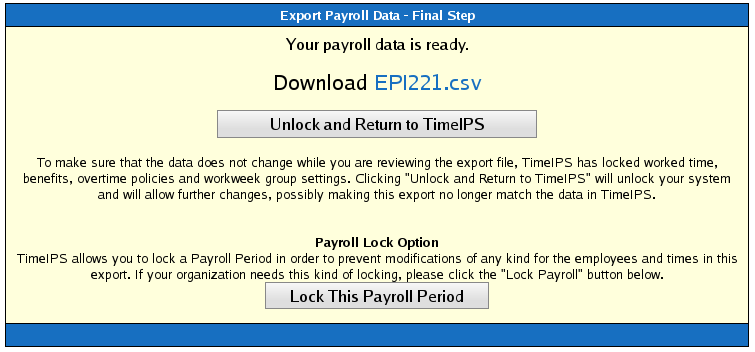
- Click the blue link to Download the data and open it in a spreadsheet program such as Open Office Calc or Microsoft Excel.
- If you have confirmed that the information contained in this export is correct and wish to permanently lock the payroll period, click the button labelled Lock This Payroll Period, otherwise choose Unlock and Return to TimeIPS. Locking the payroll period prevents future modifications of any kind.
NOTE: If you choose "Unlock and Return to TimeIPS.", the export will be listed as "Pending" and further changes can be made to the data. Pending exports can be exported again to other payroll output formats as often as you like until they have been accepted/locked.
If you choose "Lock This Payroll Period", the payroll status will show "Exported". Exported payroll runs are locked and time can no longer be edited in the system for that period of time.
|

 Information