
|
|
Applies to versions: 2.0, 2.1
Remote Clock Setup
Remote Clock Setup allows viewing and managing remote clocking configuration options.
Using the left pane Main Menu » Administration, click on: Clocking » Remote Clocking
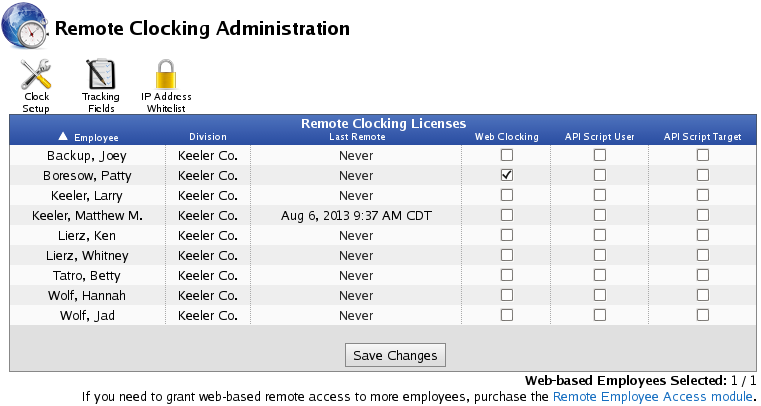
Click on the Clock Setup icon  at the top of the page. at the top of the page.
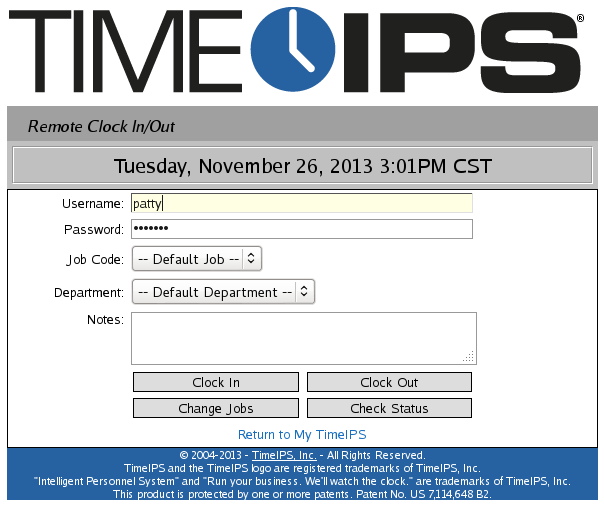
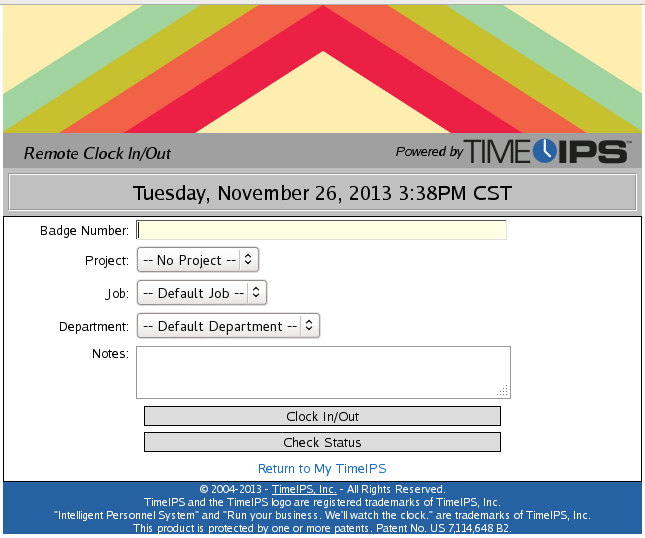
View Remote Clock
To view the current Remote Clock display, use the left pane Main Menu » My TimeIPS, click on: Remote Clocking
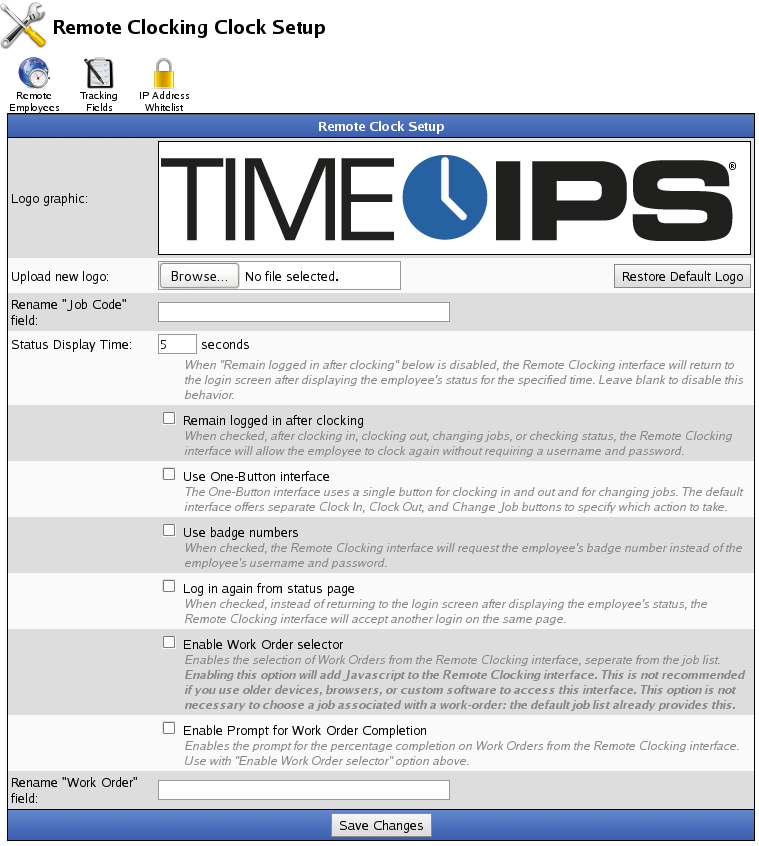
Remote Clock Setup
Back on the Remote Clocking Clock Setup page, make the changes you would like to see in the Remote Clock display.
- You can choose to leave the Logo Graphic as is, Upload a New Logo or Restore the Default Logo.
- If you would like to Rename the "Job Code" field, type it into the box.
- Status Display Time: When "Remain logged in after clocking" below is disabled, the Remote Clocking interface will return to the login screen after displaying the employee's status for the specified time. Leave blank to disable this behavior.
- Remain logged in after clocking: When checked, after clocking in, clocking out, changing jobs, or checking status, the Remote Clocking interface will allow the employee to clock again without requiring a username and password.
- The One-Button interface uses a single button for clocking in and out and for changing jobs. The default interface offers separate Clock In, Clock Out, and Change Job buttons to specify which action to take.
- When checked, the Remote Clocking interface will request the employee's Badge Number instead of the employee's username and password.
- When the Log in again from status page box is checked, instead of returning to the login screen after displaying the employee's status, the Remote Clocking interface will accept another login on the same page.
- When the Enable Work Order selector box is checked, the selection of Work Orders is available on the Remote Clocking interface, seperate from the job list. Enabling this option will add Javascript to the Remote Clocking interface. This is not recommended if you use older devices, browsers, or custom software to access this interface. This option is not necessary to choose a job associated with a work-order: the default job list already provides this.
- Checking the Enable Prompt for Work Order Completion box, enables the prompt for the percentage completion on Work Orders from the Remote Clocking interface. Use with "Enable Work Order selector" option above.
- If you would like to Rename the "Work Order" field, type it into the box.
- To implement the changes, click the Save Changes button.
|

 Information