
|
|
Applies to versions: 2.0, 2.1, 2.2, 2.3, 2.4, 2.5, 3.0, 3.1, 3.2
System Import/Export
TimeIPS can import Custom Data, Clocks and Divisions and can also update records using the Import/Export optional module.
The following import and export instructions are available for review.
Using the left pane Main Menu » Administration, click on: System » Import/Export
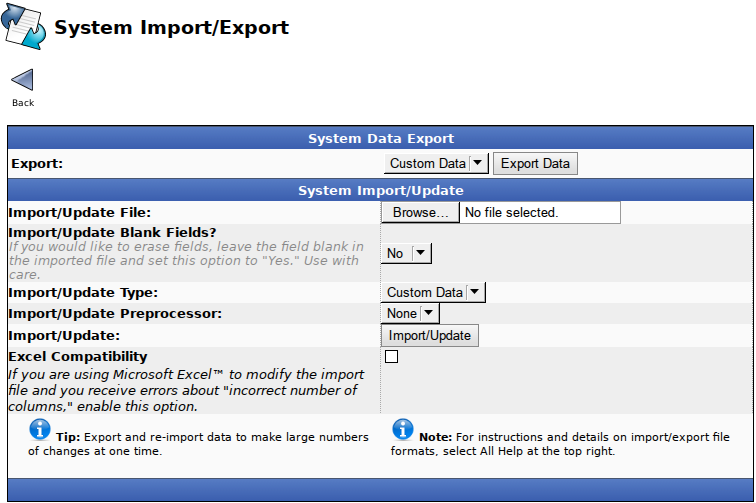
Export
By exporting Custom Data, Divisions, or Clocks, you create a template file to either fill in the necessary information or rename the field labels in your existing spreadsheet of information.

- Export the information to create a template.
- Select the type of data to Export: Custom Data, Divisions, or Clocks.
- Click on the Export Data button to generate a template file and either save the file on your desktop/home directory or open it directly in a spreadsheet program such as Excel™ or OpenOffice Calc.
- Adjust the spreadsheet as necessary.
- If you already have a spreadsheet of the information you wish to import, open your existing spreadsheet and manipulate the column headers to match the field labels in the template you created in step 1.
- If you do not already have a spreadsheet of the information you wish to import, enter the information into the template file you created in step 1.
- Save the spreadsheet file of the information you wish to import as a Comma Separated (CSV) file.
- Import the Information into TimeIPS.
- If you make changes to the .csv file and would like those changes to take effect in TimeIPS®, use the "System Import/Update" function below.
Import/Update
Use the Import/Update feature when there are a large number of changes that need to be made at one time. If you wish to create your own file instead of using an exported template, view the detailed Custom Data, Divisions or Clocks instructions page.
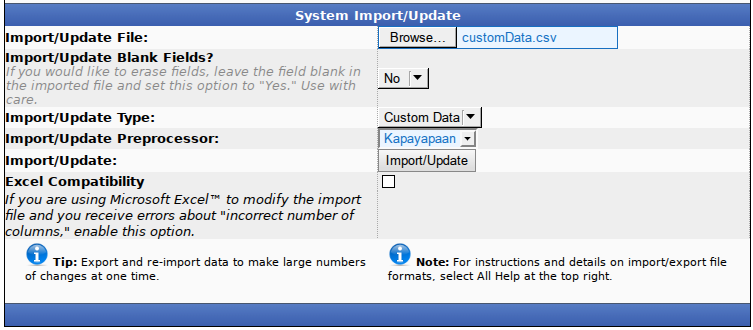
- Once the file is created, click on the Browse button and navigate to the CSV file to be imported.
- Decide whether or not you want to Import/Update Blank Fields. If you would like to erase fields, leave the field blank in the imported file and set this option to "Yes." Use with care.
- Choose which type of data to Import/Update from the drop down list: Custom Data, Divisions, or Clocks.
- Import/Update Preprocessors provide a way to modify files before they are imported into TimeIPS. If you wish to use a Preprocessor, select it from the drop down box. (See the Import Preprocessor article for more information.)
- Click on the Import/Update button.
- Check the Excel Compatibility box if you are using Microsoft Excel to modify the import file and you receive errors about "incorrect number of columns".

|

 Information