
316-264-1600 Information Sales Support Information Sales Support |
|
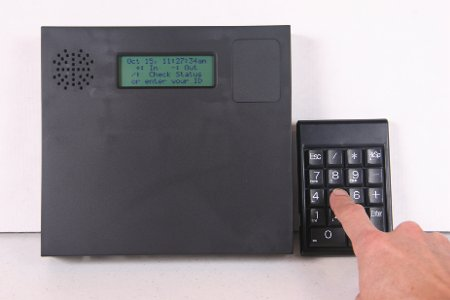
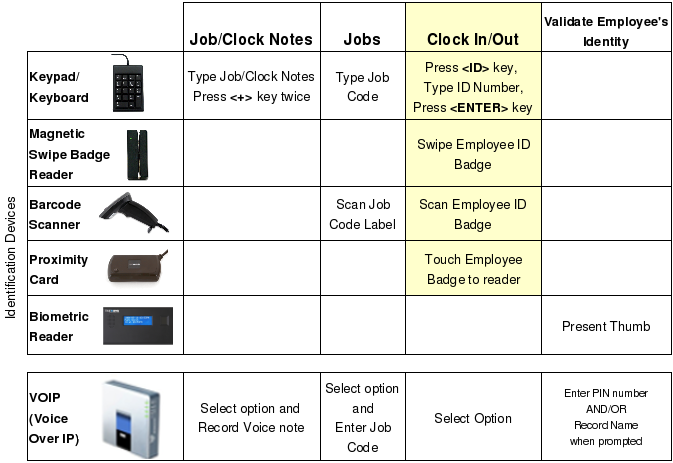
Applies to versions: 2.1, 2.2, 2.3, 2.4, 2.5, 3.0, 3.1, 3.2, 3.3Clock In and Out from the TimeIPS StationOnce employees have been entered into TimeIPS with an Employee ID/Badge Number, they can begin clocking in and out. Various employee identification devices are available. Any of the following employee identification devices can be used with any TimeIPS system, although not all are included with every system.
Clocking ModesTimeIPS clocks offer three operating modes:
If you have a keypad, you may wish to use "Explicit Clocking Only" to require employees to specify whether they are clocking in or clocking out. This behavior is recommended to help identify missed clocks and simplify those corrections. Configure clocking modes under Administration -> Clocking -> Clock Configuration on the Input tab. The clocking mode can be set per clock, so that clocks with automatic input devices can behave differently than clocks with keypads, if desired.
Numeric Keypad Overview
Clock Events Using Keypad in "Smart Clocking" Mode
If your system includes
| |||||||||||||||||||||||||||||||||||||||||||||||||||||||||||||||||||||||||||||||||||||||||||||||||||||||||||||||||||||||||||||||||||||||||||||||||||||||||||||||||||||||
Employee Enters at Keypad/Keyboard: * |
WORK STATUS | |
| OUT | IN | |
| ID/BADGE# [NOTE]++ ID/BADGE# |
Clocks employee IN (To default job, if set. Otherwise, no job) Clock In note, if set |
Clocks employee OUT Clock Out Note, if set |
| [JOB CODE] * ID/BADGE# [NOTE]++[JOB CODE] * ID/BADGE# |
Clocks employee IN to the specified job Clock In Note, if set |
Clocks employee OUT, then IN to the specified job Clock Note on previous Out and new In, if set |
| [DEPT CODE] ** ID/BADGE# [NOTE]++[DEPT CODE] ** ID/BADGE# |
Clocks employee IN to the specified department Clock In Note, if set |
Clocks employee OUT. Department is ignored. Clock Note on Out, if set |
| [WO CODE] * [JOB CODE] * ID/BADGE# [NOTE]++[WO CODE] * [JOB CODE] * ID/BADGE# |
Clocks employee IN to the specified work order and job Clock In Note, if set |
Clocks employee OUT, then IN to the specified work order and job Clock Note on previous Out and new In, if set |
| [WO CODE] * [JOB CODE] /[PHASE]* ID/BADGE# [NOTE]++[WO CODE] * [JOB CODE] /[PHASE]* ID/BADGE# |
Clocks employee IN to the specified work order and job on the specified phase Clock In Note, if set |
Clocks employee OUT, then IN to the specified work order and job on the specified phase Clock Note on previous Out and new In, if set |
| [DEPT CODE] ** [WO CODE] * [JOB CODE] /[PHASE]* ID/BADGE# [NOTE]++[DEPT CODE]**[WO CODE] * [JOB CODE] /[PHASE]* ID/BADGE# |
Clocks employee IN to the specified department, work order and job on the specified phase Clock In Note, if set |
Clocks employee OUT, then IN to the specified department, work order and job on the specified phase Clock Note on previous Out and new In, if set |
| 0 * ID/BADGE# [NOTE] ++0 * ID/BADGE# |
Clocks employee IN (to default job, if set, otherwise clocks into no job) Clock In Note, if set |
Clocks employee OUT, then IN (to default job, if set, otherwise clocks back into no job) Clock Note on previous Out and new In, if set |
| [DEPT CODE] ** 0 * ID/BADGE# [NOTE] ++ [DEPT CODE] ** 0 * ID/BADGE# |
Clocks employee IN (to default job, if set, otherwise clocks into no job) and the specified department. Clock In Note, if set |
Clocks employee OUT, then IN (to default job, if set, otherwise clocks back into no job) and the specified department. Clock Note on previous Out and new In, if set |
* The above commands are followed by pressing [ENTER] on the keypad/keyboard
Note: Job and Work Order functions require IPSJOB and or IPSJWO modules
Clock Events Using Keypad in "Explicit Clocking" Mode
| Key Label | Key Name | Description | |
|---|---|---|---|
| / [Info] | Information Code | Retrieves clock-in/out status and hourly time information for an employee | 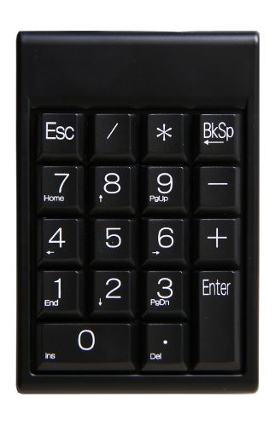 |
| * [ID] | Change Job | Denotes that the employee wants to change jobs | |
| + [Next] | Clock In | Denotes that the employee wants to clock in | |
| - [Prev] | Clock Out | Denotes that the employee wants to clock out | |
| ENTER | Enter Key | Submits job code and/or ID number combinations to the system | |
| Num Lock | Keypad Lock | Locks and unlocks the keypad | |
| Esc (if present) | Escape | Cancels the current input or exits the current menu | |
| 0-9 | Number Keys | Used to enter ID numbers and job codes | |
| BS | Backspace | Used to remove last typed character in case of incorrect entry | |
- A successful clock IN or OUT will generate the "In" or "Out" voice confirmation and the LCD will indicate the current date, time, employee name and time IN or OUT.
- If you mistype when entering any number, use the "BS" (Backspace) key on the keypad to clear incorrectly typed numbers.
- The NumLock key must be active for proper keypad function.
- Additional data may be gathered after entering the badge number, including department, work order, job and note. The prompt mode is set per clock, and can be code input, or selection from a list.
To Clock-In/Clock-Out Using the Numeric Keypad
- Type either + or -, then an Employee ID/Badge Number and press [Enter].
Example: +112233 [Enter]To Check Clocked In/Out Status and Hours Remaining
- Type forward slash on keypad followed by an Employee ID/Badge Number and press [Enter].
Example: /112233 [Enter]NOTE: Hours remaining only display for hourly employees.
If your system includes  Job Tracking
Clock-In to a Job
- Type + and an Employee ID/Badge Number and press [Enter]. Then, enter a job code and press [Enter].
Example: +112233 [Enter]
Example: 4567 [Enter]Change to a New Job
- Type * and an Employee ID/Badge Number and press [Enter]. Then, enter a job code and press [Enter].
Example: *112233 [Enter]
Example: 4567 [Enter]
If your system includes Work Orders
Clock-In to a Work Order and Job
- Type + and an Employee ID/Badge Number and press [Enter]. Enter a Work Order code and press [Enter]. Then, enter a job code and press [Enter].
Example: +112233 [Enter]
Example: 2000 [Enter]
Example: 4567 [Enter]
Change to a new Work Order and Job
- Type * and an employee ID/badge number and press [Enter]. Enter a Work Order code and press [Enter]. Then, enter a job code and press [Enter].
Example: *112233 [Enter]
Example: 2000 [Enter]
Example: 4567 [Enter]
"Explicit Clocking" Keypad Command Examples
Employee Enters at Keypad/Keyboard: * |
WORK STATUS | ||
| OUT | IN | IN JOB | |
| + ID/BADGE# | Clocks employee IN | Clocks employee OUT, then back IN | Clocks employee OUT, then back IN |
| - ID/BADGE# | Clocks employee IN, then back OUT | Clocks employee OUT | Clocks employee OUT |
| * ID/BADGE#, JOB# | Clocks employee IN to the specified job | Clocks employee OUT of the default job, then IN to the specified job | Clocks employee OUT of current job and IN to the specified job |
* The above commands are followed by pressing [ENTER] on the keypad/keyboard
Clocking Sequence and Prompts
| Step | Operation |
| 1 | To start the clock in/out process, a badge number must be provided. This can be with a badge scan or by entering a PIN on a keypad/keyboard. |
| 2 | If Relay Triggers are configured, and are configured to happen before biometrics, they will trigger. This is useful, for example, when a badge reader is on the outside of the door, but the clock, biometrics and keypad are inside the door. By presenting a badge, the door will open. The employee can then complete the clock process on the other side of the door. |
| 3 | If Biometrics are in use, the system will prompt for biometrics. If biometrics cannot be supplied, no other steps of the clocking process will be available. |
| 4 | If a Clock Message is configured for the employee, it will show. |
| 5 | If Departments are tracked at the clock and prompting is turned on, the department can be selected. |
| 6 | If Workorders are used, and prompting is turned on, the Workorder can be selected. |
| 7 | If Jobs are used, and prompting is turned on, the Job can be selected. If a workorder was selected, the list of jobs will be filtered to those appropriate for the workorder. |
| 8 | If workorder completion is being tracked, and clocking out of a workorder, the completion prompt will appear. |
| 9 | If using explicit clocking, and notes are configured, a note prompt will appear. |
| 10 | The clock event is complete and will be submitted to the TimeIPS server. The screen will say Please Wait for a few moments, followed by the employee's status. |
| 11 | If relay triggers are configured (and are not before bio, or no bio is used) they will trigger last. This will allow the door to open or buzzer to sound, etc. |
Biometric Reader Overview
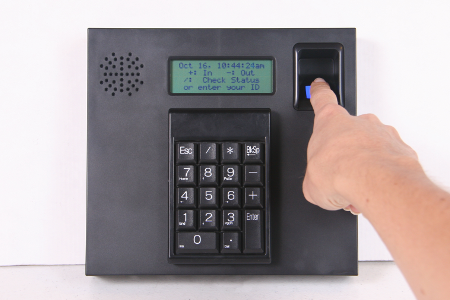 |
TimeIPS can validate employee identification using biometric fingerprint/thumbprint authentication. Employees clock in and out of TimeIPS and are asked to present their thumb for validation. |
TimeIPS offers multiple types of biometric readers, suited to the needs of different businesses. Please review the enrollment and training instructions that are included in the manual that accompanied your biometric device.
Configuration for biometrics are under Administration -> Clocking -> Biometric Validation
See the article on Biometric Validation (keyword "bio") for details.
Magnetic Swipe Badge Reader Overview
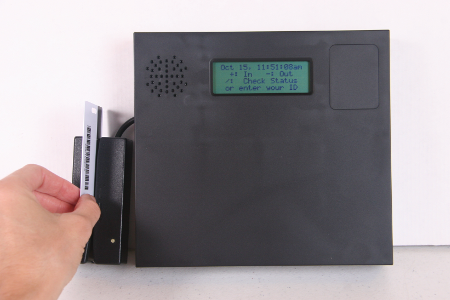 |
The magnetic swipe badge reader is an optional employee identification device for use with employee magnetic swipe badges. |
Swiping a Magnetic Swipe Badge
When preparing to swipe a badge, be sure that the front of the badge is facing away from the indicator light and the badge's magnetic strip is facing toward the light. Insert the badge starting at either end of the reader slot and swipe completely through it, exiting the other side. If swiped correctly, the reader will beep to indicate success. If there is no beep, you may have the card backward. Turn the badge so that the magnetic strip is facing the indicator light and try again.
If the clock event is successful, an audible tone will be heard for "In" or "Out" and the LCD display will indicate the current date and time, employee name and the time IN or OUT.
| INDICATOR | EVENT | DESCRIPTION | |
|---|---|---|---|
| Green Light | Ready to swipe | The reader is ready to read or has successfully read your badge |   |
| Audible Beep | Successful swipe | The reader has successfully read your badge | |
| Red Light | Incomplete Swipe | Swipe the badge again with a full swipe | |
| Does not blink or beep | Badge is backward | Reorient the badge so that the back is facing the indicator light and the magnetic strip is fully inserted into the reader | |
Setting Up Employee Badges
For information on how to set up employee badges, see the article on Setting Up Employee ID and Badge Numbers for Swipe Badge Systems (keyword "badge").
Barcode Reader Overview
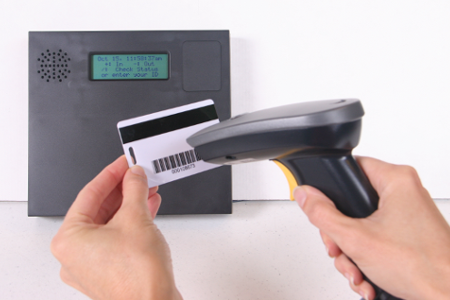 |
The barcode badge reader is an optional employee identification device for entering employee time and Job Tracking information. |
Typically, barcode readers are used in "Smart Clocking" mode. A Job or Work Order barcode is scanned first, then a badge with a barcode for the employee's ID.
Proximity Card Reader Overview
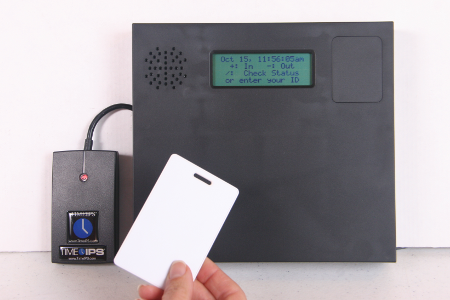 |
The proximity badge reader is an optional employee identification device for use with employee proximity badges that offers higher-security employee identification. |
Proximity readers make it fast and easy for employees to clock IN and OUT. In addition, there's no chance of entering an incorrect badge number, reducing errors and saving time for managers.
Web Browser Overview
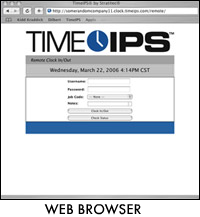 |
The Remote Clocking module allows employees to clock in/out, change jobs and check their status using a computer terminal and web browser. |
See the article on Remote Clocking (keyword "remote") for details.
Telephone Clocking Overview
 |
Employees can clock in/out, record a clock note, check current status, and listen to messages. |
See the article on Telephone Clocking (keyword "phone") for details.
Wireless Device Overview
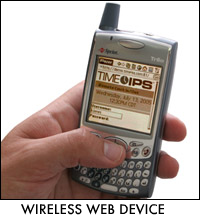 |
Wireless devices such as PDA's and web-enabled phones can be used to clock in/out and check status remotely. |
See the article on Remote Clocking (keyword "remote") for details.
General Clocking Overview
See Also:
TimeIPS Store (2.0, 2.1, 2.2, 2.3, 2.4, 2.5, 3.0, 3.1)
TimeIPS Clock Station Menu (2.1, 2.2, 2.3, 2.4, 2.5, 3.0, 3.1, 3.2, 3.3)
Clock Processing Order (2.2, 2.3, 2.4, 2.5, 3.0, 3.1, 3.2, 3.3)