
|
|
Applies to versions: 2.2, 2.3, 2.4, 2.5, 3.0, 3.1, 3.2, 3.3
Customize and Print Employee Barcode Badges
TimeIPS includes the ability to generate employee badges with barcodes. They can then be printed and laminated for employee identification and clocking purposes.
Customize Employee Badges
Using the left pane Main Menu, click on: Employees » Employees.
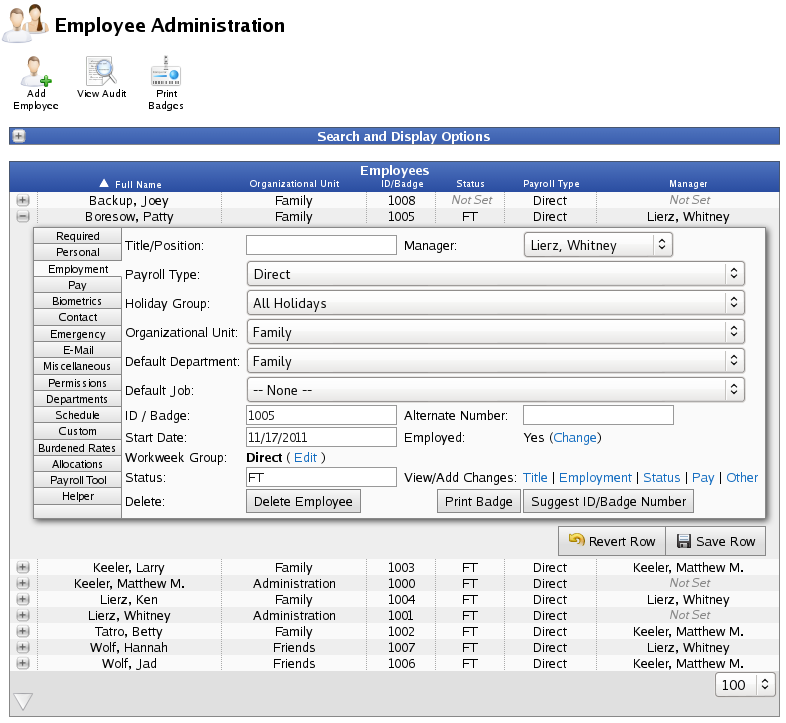
- Click on the + (plus) sign to the left of the employee's name. From the Employment Tab, click on Print Badge.
- OR...Click on the Print Badges Icon
 to open the Employee Custom Badge window. to open the Employee Custom Badge window.
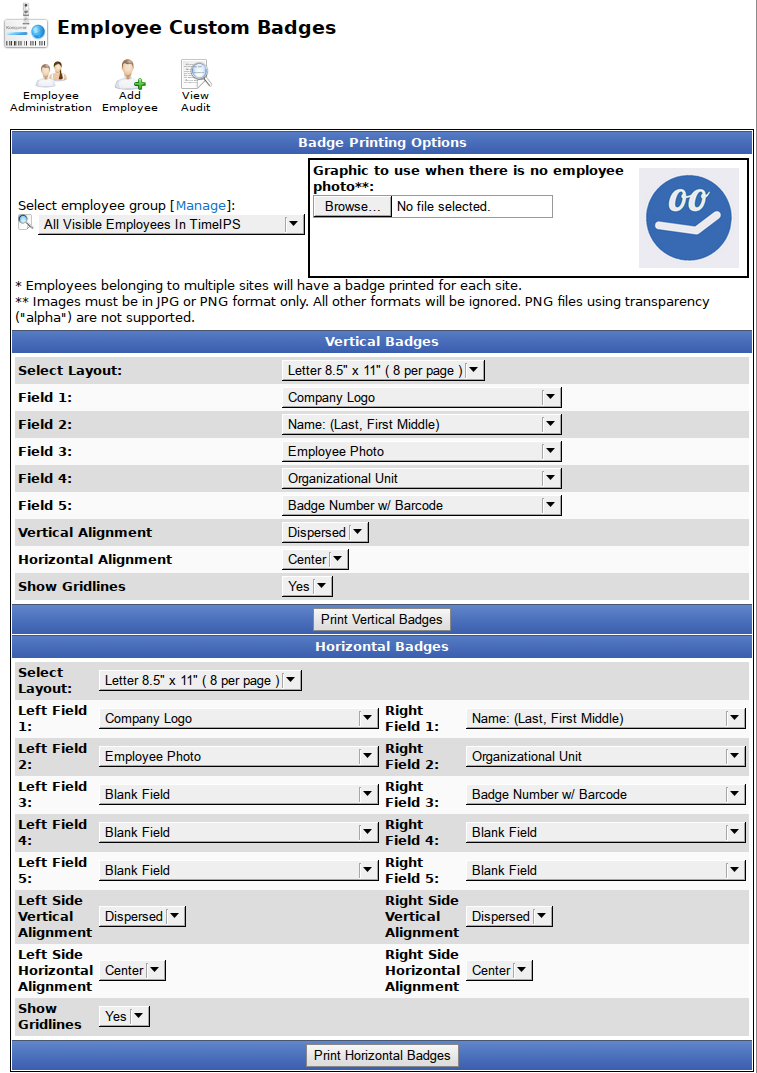
Custom badges can be created for individuals or groups of employees.
- Select the employee or group of employees from the drop down menu in the top left corner.
- Optional: Choose a default image to use if there is no Employee Photo on file.
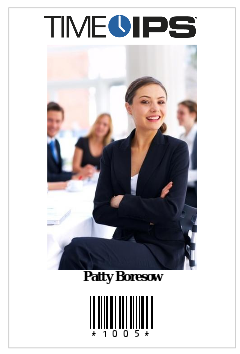
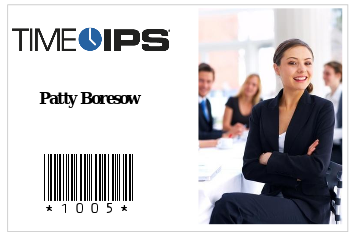
- Decide on either a Vertical (portrait) or Horizontal (landscape) format, then edit the fields on that section.
- Choose a paper size (and how many badges per page) under Select Layout.
- There can be up to five fields for a vertical badge and up to five fields per side of the horizongal badge.
- To use fewer fields, set the unused fields' value to "Blank Field".
- If the content is shorter than the height of the badge, then the Vertical Alignment can be specified.
- Content can be Horizontally Alligned to the left, center, or right side of the badge or column of the badge.
Add Company Logo
Your Company logo can be uploaded to TimeIPS then printed on employee badges.
Under the left pane Main Menu » Administration, click on: System » Company/Divisions
- Click on the + (plus) sign to the left of your Company's Division.

- From the Settings tab, click on the Browse button at the bottom of the page.
- Navigate to your company logo file and click on the Open button.
NOTE: Only JPG or PNG image files can be uploaded. Large images will be scaled to fit the employee's badge. The suggested size for a company logo on a badge is a 5 x 1 ratio. The actual size of the file used in the example is 567 X 90.

- Click on the Save Logo button. The company logo will upload and display.
NOTE: To remove the logo and use the default TimeIPS logo, click on the Remove Logo button.
Add Employee Photo
See the "To Add a Photo" section of the Employee Administration article.
Print Employee Badges
- When you are finished customizing, click the appropriate Print Vertical Badges or Print Horizontal Badges to generate a preview in Adobe Reader or other pdf reader.
- If everything is correct, select to print.
NOTE: Employee badges can be printed on plain paper or card stock and then laminated. No special paper or printer is required.
TIP: TimeIPS barcode scanners read the font "Barcode 39 (3 of 9)" for employee IDs. You can use a third-party application to create custom employee ID badges with the Barcode 39 font. TimeIPS only supports printing barcodes for employee badges that are completely numeric. Note that most scanners do not support barcodes shorter than 5 digits.
|

 Information