316-264-1600 Information Sales Support Information Sales Support |
|
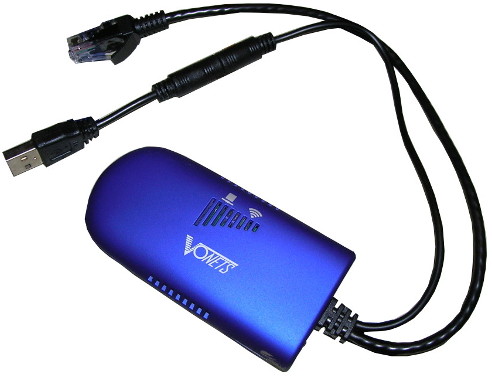
Applies to versions: 2.4, 2.5, 3.0, 3.1, 3.2, 3.3How to use the Vonets VAP11G-300 wireless bridge with the IPS125T.The Vonets VAP11G-300 is an example of a wireless bridge which can be used to provide wireless networking for an IPS125T network clock.
The VAP11G-300 is only compatible with wireless networks operating on the 2.4Ghz frequency. Initial configuration of the VAP11G-300 requires connecting it to a PC or laptop. If TimeIPS has not configured the bridge for you, please follow the steps below. If your computer has wireless networking functionality, make sure the wireless hardware is turned off before proceeding. 1. Be sure your computer is configured to obtain its IP address, Subnet Mask, Gateway and DNS addresses automatically. 2. Connect the Ethernet cable from the bridge to the network jack of your computer and then connect the USB cable from the bridge to an available USB port on your computer. 3. The bridge will draw its power from the USB port and does not require its own power source. 4. Within about 60 seconds, the bridge should complete its boot process. The blue LED on the bridge should be flashing rapidly. 5. Your computer should receive a 192.168.254.x IP address from the bridge. Use the appropriate method for your computer/operating system to verify the IP address of your computer. 6. Open a web browser on your computer and navigate to vonets.cfg or 192.168.254.254.
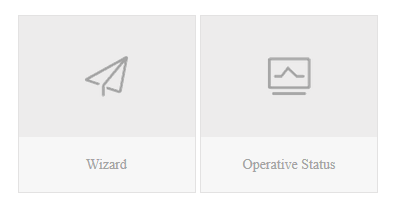
7. Enter the username and password for the bridge and click Login. The username and password are both admin. 8. The first screen you see should have two buttons. Click on the Wizard button.
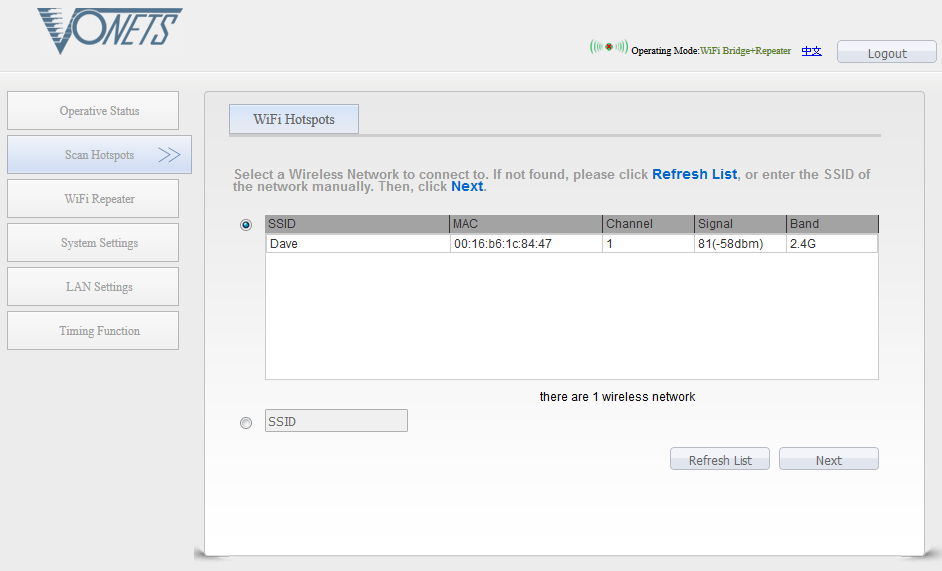
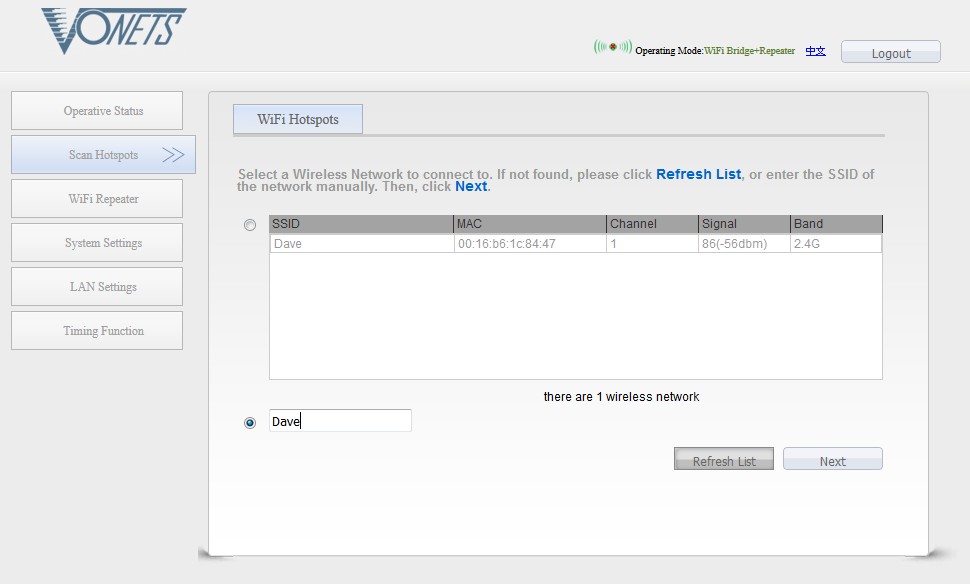
9. You should see a screen listing the available wireless networks.
10. Select the wireless network you wish to join and click Next. 11. If the SSID of your wireless network is listed in the SSID field on the next screen, skip ahead to step 13. However, if the SSID field reads undefined and is grayed out (unable to be edited) something went wrong.
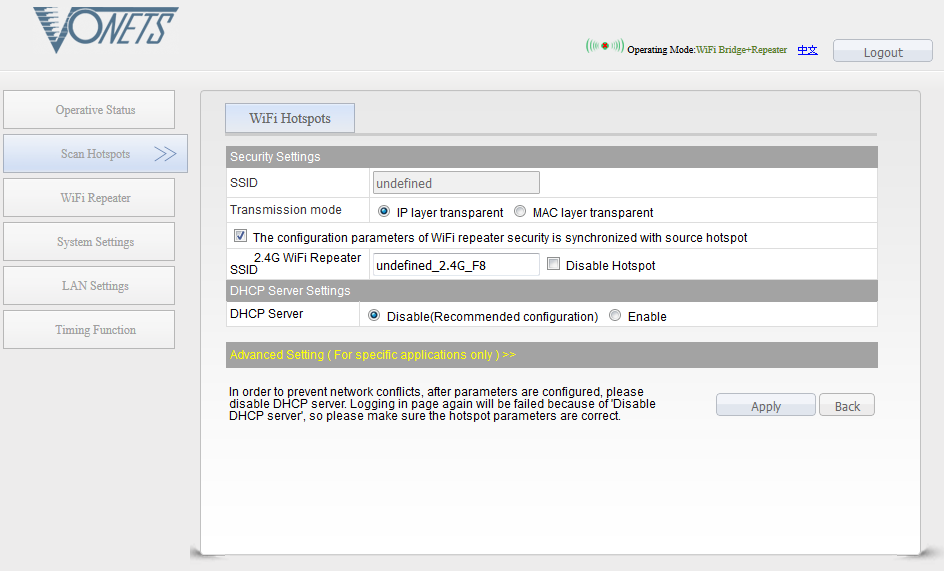
12. Click the Back button toward the bottom of the page. Use the option to manually specify the SSID of the wireless network. Click Next.
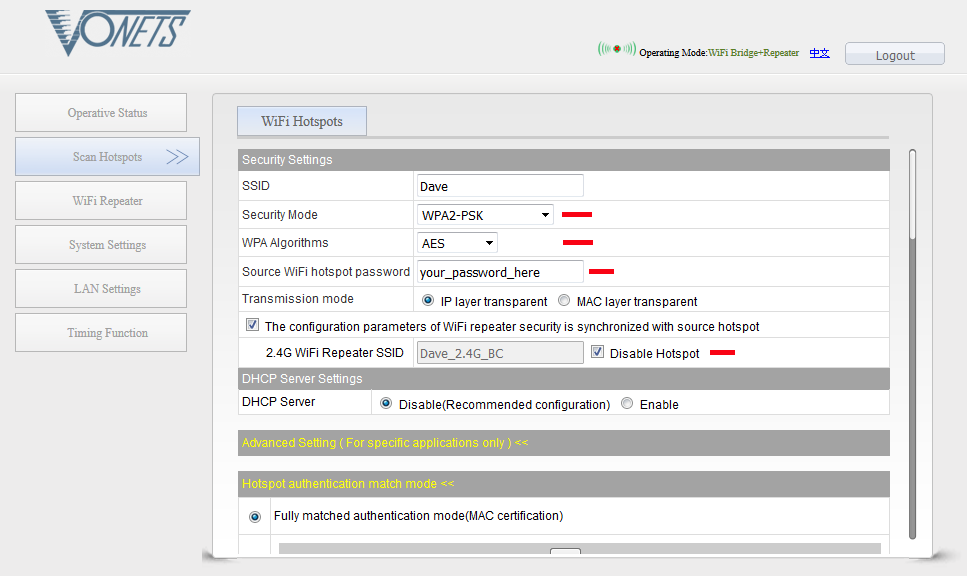
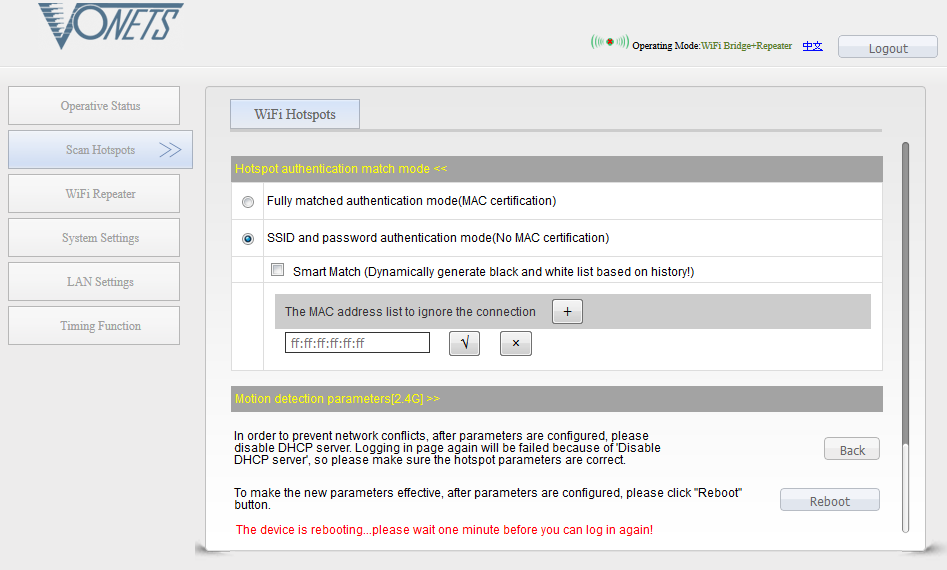
13. Enter the appropriate security settings for the wireless network. The bridge has an internal repeater function. We suggest disabling this feature.
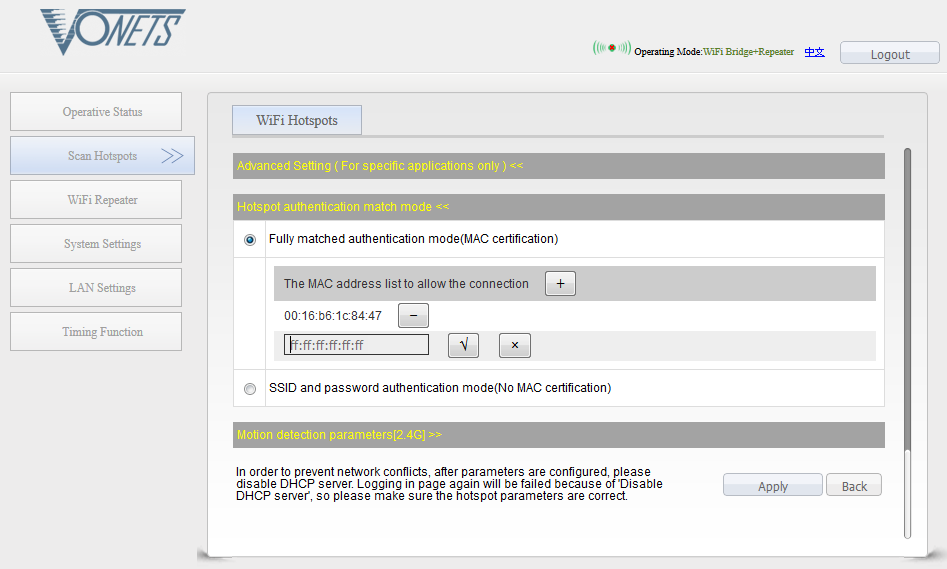
14. If the SSID of your wireless network is hidden, select Fully matched authentication mode. Enter the MAC address of your access point in the text box (be sure to type in the colons) and click the checkmark button.
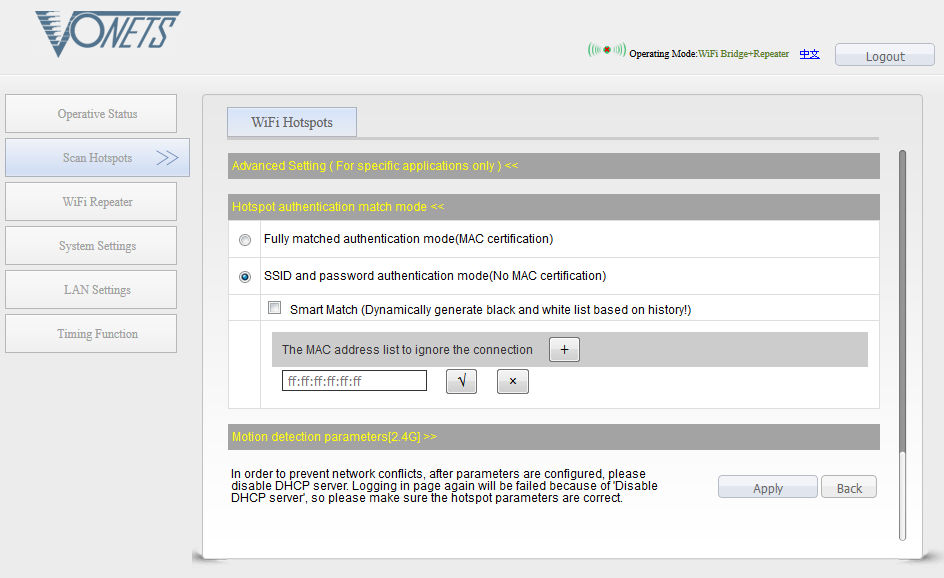
15. If the SSID of your wireless network is being broadcast, select SSID and password authentication mode.
16. Click on Apply. 17. When the screen refreshes, click on Reboot.
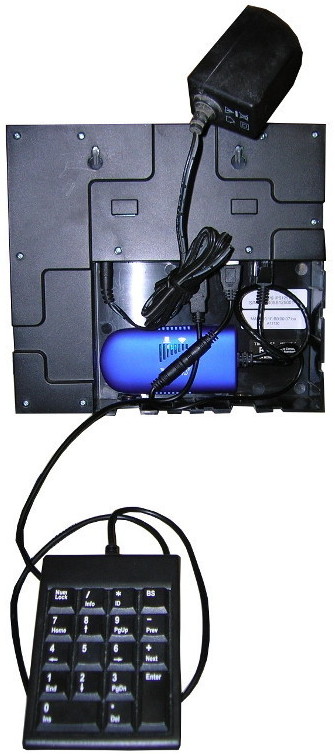
18. The bridge should reboot and complete its boot process within 60 to 90 seconds. Once again, the blue LED on the bridge should be flashing rapidly. 19. The screen in your web browser will not refresh. Your computer should now have an IP address on the wireless network (assuming the wireless network has an active DHCP server and an available address). 20. Use the appropriate method for your computer/operating system to verify the IP address of your computer. Test the connection to the wireless network by navigating to a website. If you are able to reach the website, the configuration of the bridge is complete. Please skip ahead to step 22. 21. If your computer has not received an IP address on the wireless network or is unable to reach a website, please go back to step 6 and try configuring the bridge again. If you continue to have trouble, verify the security settings you are applying and/or contact the administrator of the wireless network. 22. Disconnect the bridge from your computer. With AC power disconnected from the IPS125T, connect the bridge to your IPS125T. As with the computer, both the Ethernet cable and the USB cable must be connected. 23. Connect the AC power adapter to your 125T. 24. The IPS125T should obtain an IP address on the wireless network within about 90 seconds (again, assuming the wireless network has an active DHCP server and an available address). 25. Continue the configuration of the IPS125T if it is not already configured. If the network clock is already configured, check to see if the am/pm following the time on the LCD display is lowercase or capitalized. 26. If the am/pm is capitalized, the IPS125T has established a connection with your TImeIPS maser system. Test the connection by attempting to clock in/out. 27. If the am/pm is lowercase, the IPS125T has not established a connection with your TimeIPS master system. Verify the master system IP address or URL you are using to configure the IPS125T. 28. If the master system IP address or URL is correct, verify whether the network clock has received an IP address on the wireless network. Do this by pressing Enter twice on the keypad, selecting Configure Network and pressing Enter, selecting Show Network Info and pressing Enter again. The screen shown will time out in 5 seconds. If the IP address listed is 127.0.0.1, select Revert to DHCP and press Enter. Be sure to scroll down to Apply Settings and press Enter again. Navigate back to Show Network Info and press Enter to see if the IPS125T has obtained an IP address on the wireless network. Depending on how many peripherals (and therefore cables) are connected to your IPS125T, the bridge may be able to be tucked away inside the cable well on the back of the network clock.
Additional considerations: The configuration interface for the bridge is not accessible once the bridge has been connected to the IPS125T. If you need to change the configuration of the bridge, you will need to connect the bridge to a PC or laptop again. To reset the bridge to factory default settings, press and hold the reset button for 5 to 10 seconds and release. This will erase the configuration on the bridge and cause it to reboot. Once the bridge has been restored to factory default settings, it will need to be connected to a PC or laptop again for configuration. The reset button is located on the rear of the bridge next to the cables. |