316-264-1600 Information Sales Support Information Sales Support |
|
Applies to versions: 3.0Enterprise PermissionsThe TimeIPS Enterprise Permission module is designed for companies that need to delegate responsibility and carefully control access within TimeIPS. The TimeIPS Enterprise Permissions module (IPSPRM) provides the following features:
Note: Without IPSPRM, the basic groups still exist but cannot be customized.
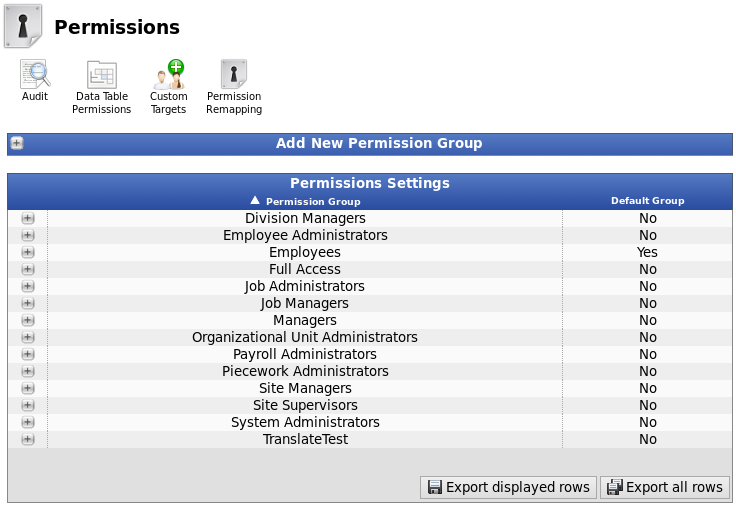
Using the left pane Main Menu » Administration, click on: Employees » Permissions
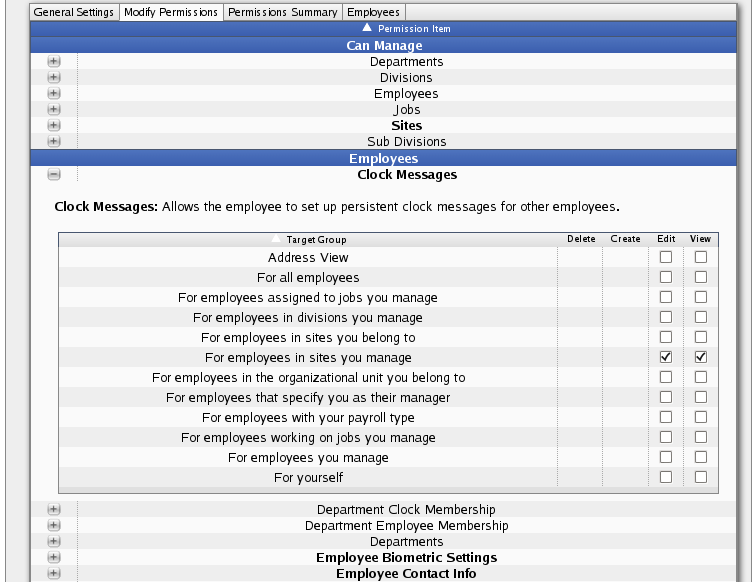
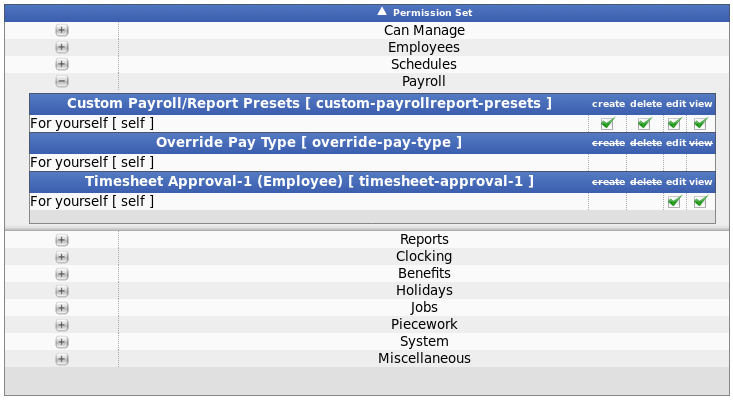
Each Permission Group includes a set of permission options. These options can be viewed by clicking the + next to the names and viewing the entries within them. Some areas have several levels of options, indicated by additional + signs when you open the first level.
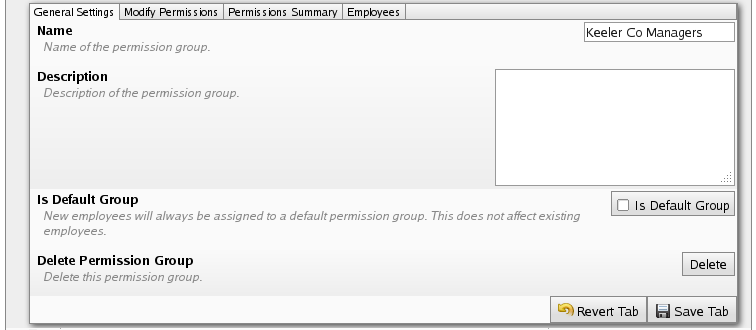
General Settings
On the General Settings tab, you can
Modify PermissionsOn the Modify Permissions tab, the actions and information this group has access to and control over can be changed.
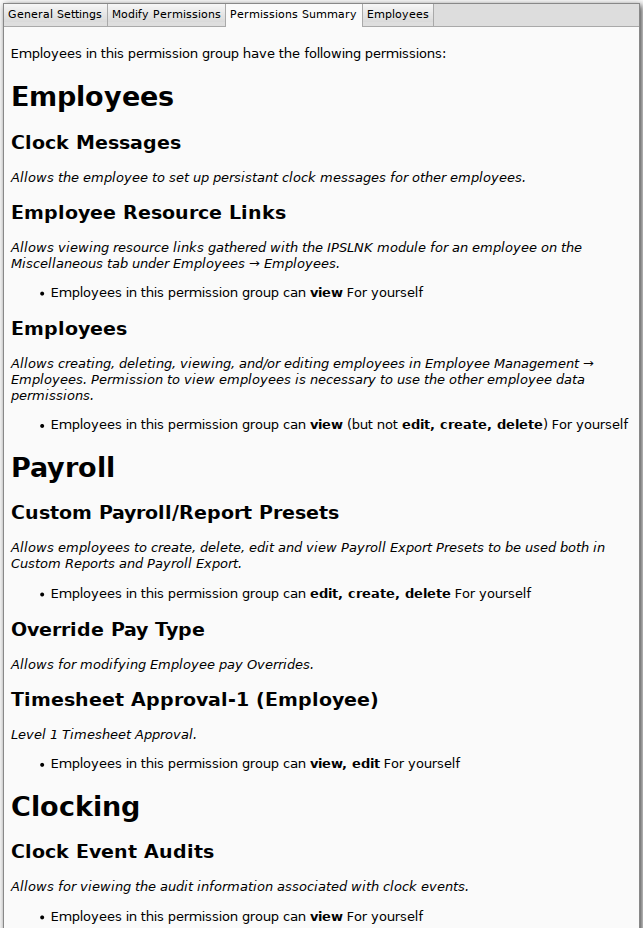
Permissions SummaryThe Permissions Summary tab contains an overview of all the actions and information this group has access to and control over.
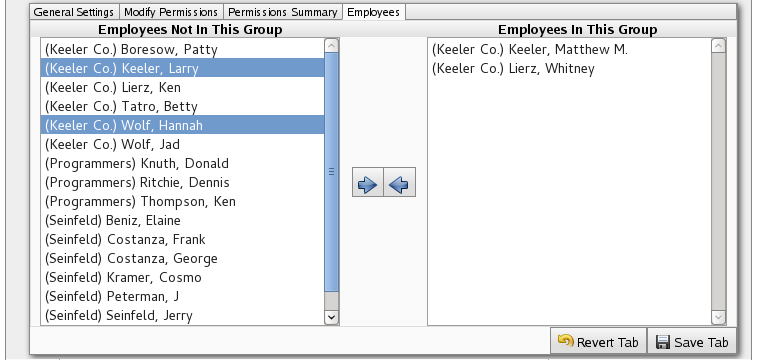
EmployeesEmployees can belong to zero or many groups. Each group is allowed access to various actions and information. An employee who belongs to a group assumes all those permissions, and an employee who belongs to multiple groups will collect permissions from all the groups to which he belongs. Employees can belong to as many permission groups as needed to give them all the permissions necessary.
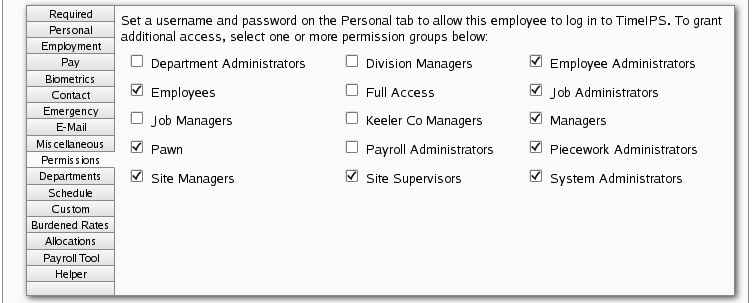
To give employees additional permissions
TIP: Permission Group membership can also be managed on the Permissions tab of the Employee Adminstration page.
Using the left pane Main Menu » Administration, click on: Employees » Employee Administration » Permissions
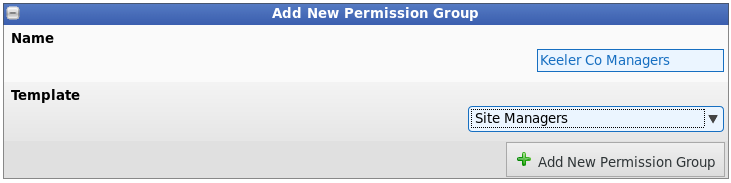
Add New Permission Group
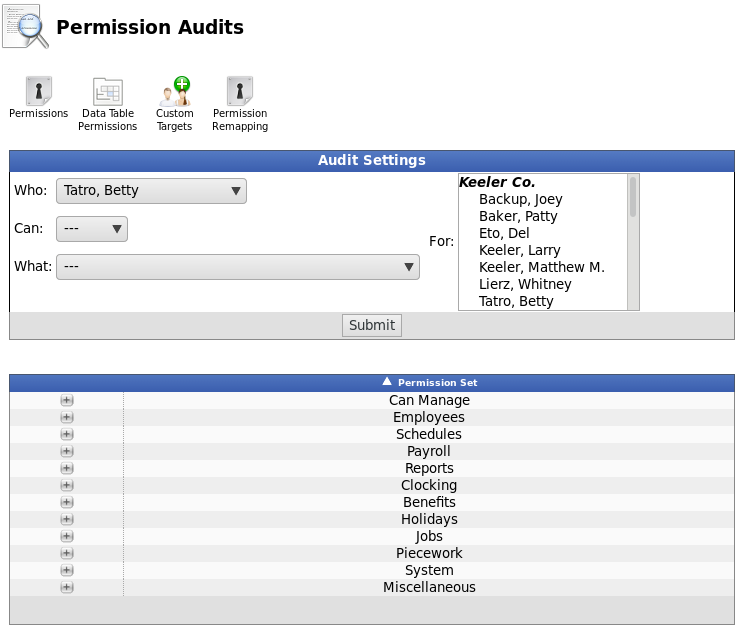
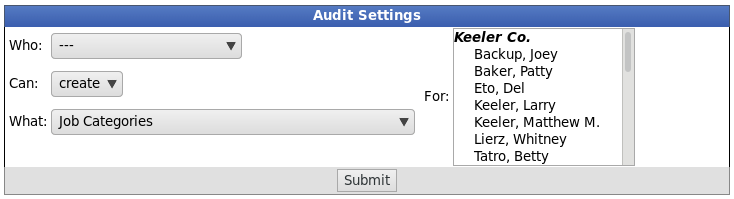
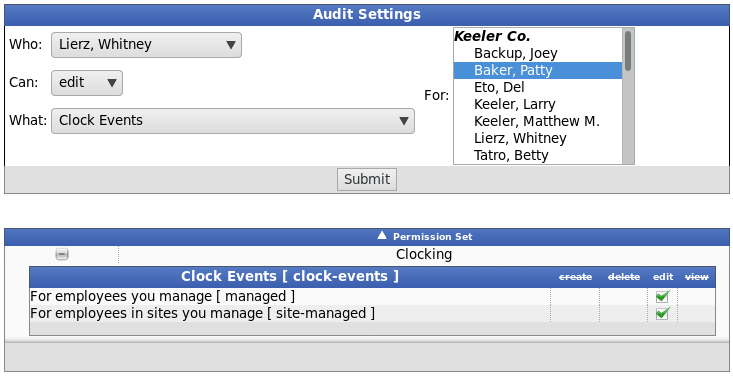
AuditThe Permission Audit provides a quick way to check who can do what based on the current permission groups and employee membership.
Example 1: See everything that a certain employee can do.
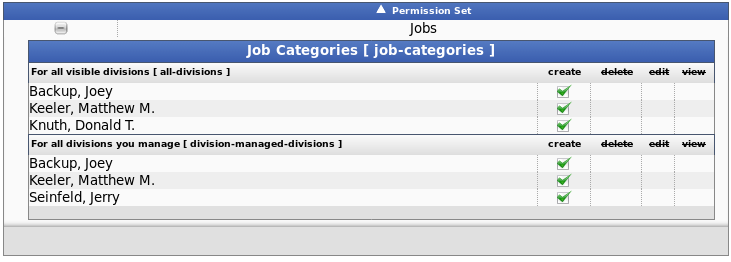
Example 2: See everyone who can create Job Categories.
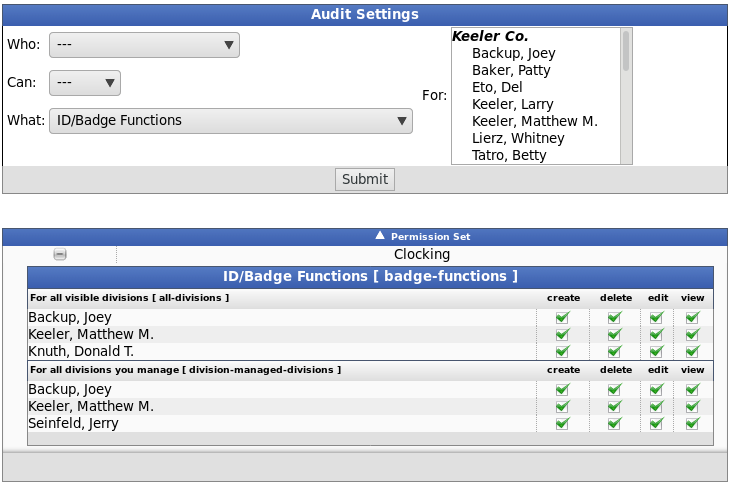
Example 3: See everyone who can work with badges.
Example 4: See who can do what For selected employees.
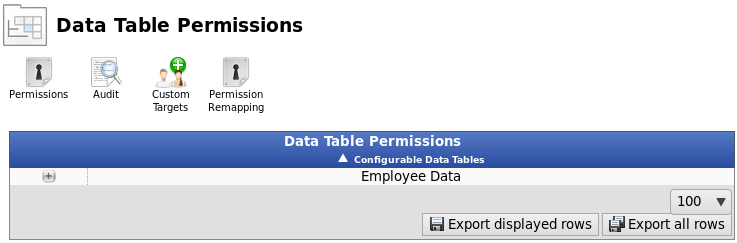
Data Table PermissionsData Table Permissions can be used to accommodate special situations where access to or restriction of specific fields in a data table is needed.
Click the + (plus) sign next to Employee Data to expand the table.
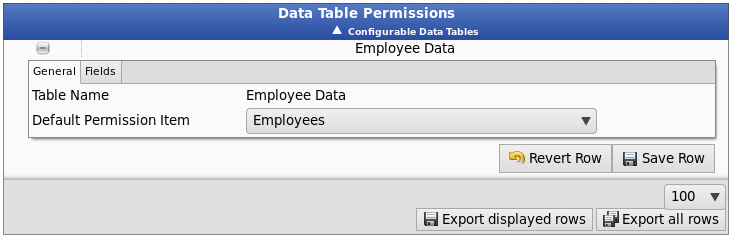
From the General tab, you can change the Default Permission Item. This is a catch-all permission level for any employee data that is not listed on the Fields tab. In most cases, this is best left at "Employees".
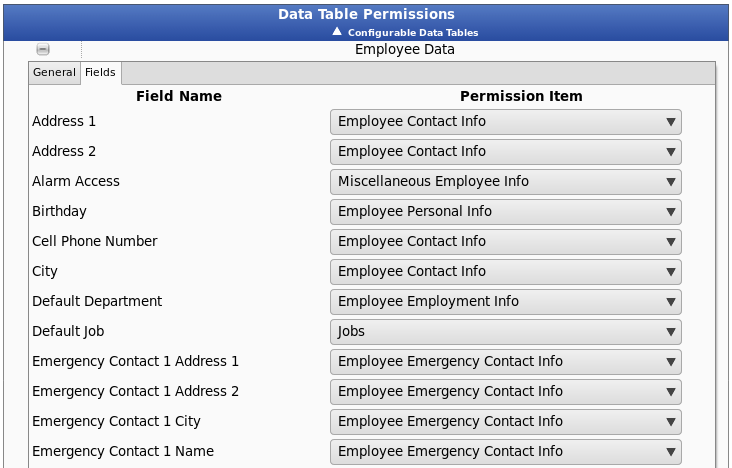
Field Permissions Field Permissions provides a way to control which permission option is used for specific fields, primarily in the employee database tables. Under the "Fields" tab, each data Field is connected to a default Permission Item. Selecting a different Permission Item allows giving or restricting access to the field as needed.
In most cases, no changes will be needed to these permissions. In some cases, however, it may be beneficial to include specific employee fields in different permission options. For example, an employee's birthday is normally assigned to the employee-personal-info permission option. If you needed to keep birthdays more confidential, you might change it to the employee-pay-rate option. This way, only employees with pay-rate viewing ability could see an employee's birthday.
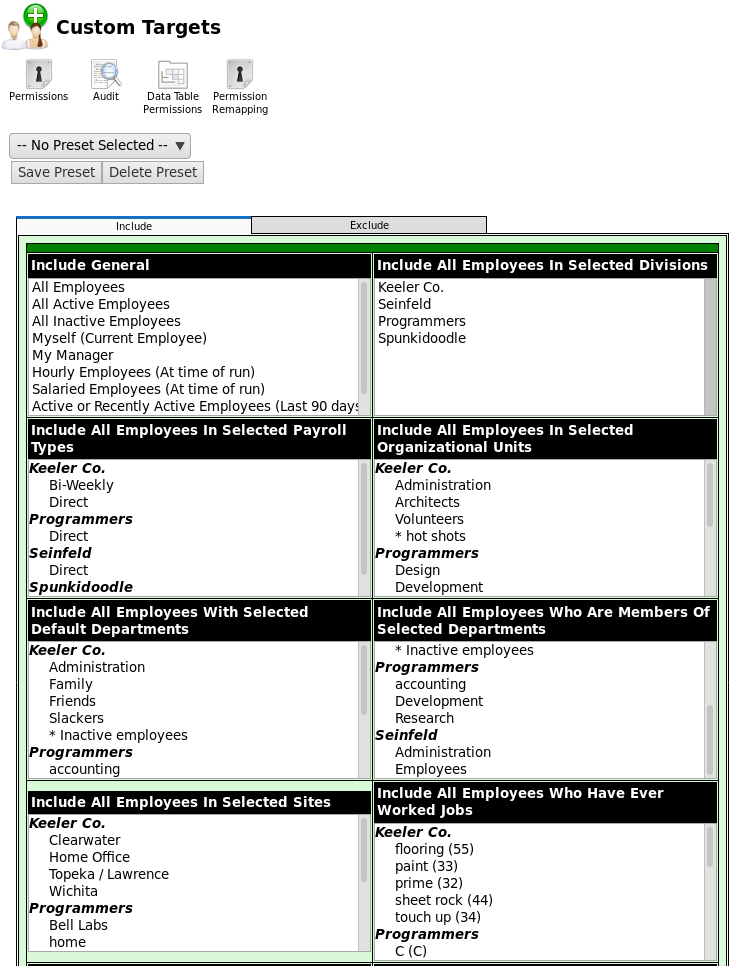
Custom TargetsThe Custom Targets Icon links to a special version of the Selection Groups page. Here you can create pre-set groups of employees that will be used as custom targets for permission groups. Using pre-set selections of employees allows convenient access to commonly used groups of employees without needing to select each one every time. These presets will be global across all divisions.
Check out the Selection Groups article for detailed instructions. |