Time clock systems by TimeIPS
Call Now! 316-264-1600
Information
Sales
Support
Knowledge Base Search:  
Main Menu
· Home

· Table of Contents
· Article Index

· Downloads
· New Features
· FAQ
· News
· Web Links

  
TimeIPS Knowledge Base

Table of Contents: Article IndexPrintable Version

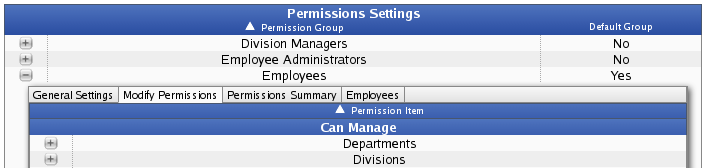
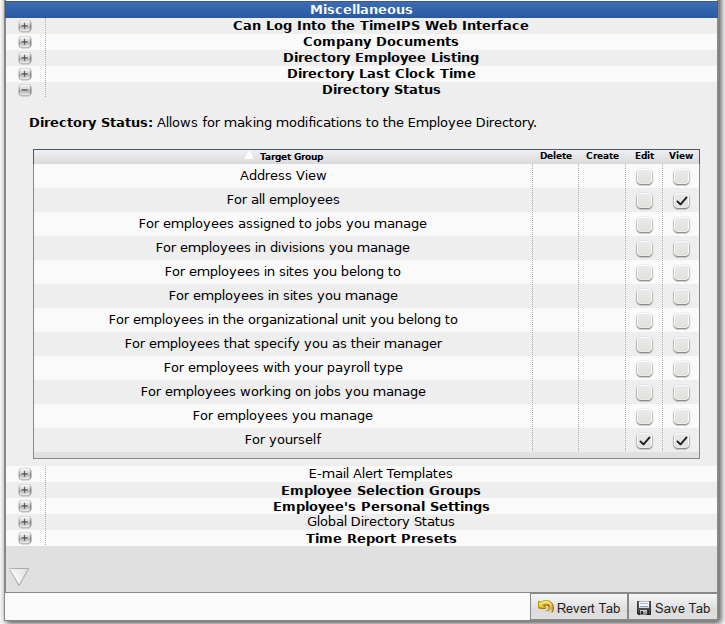
Applies to versions: 2.2, 2.3, 2.4, 2.5, 3.0, 3.1, 3.2


Adding/Removing a Status Message


By default, employees are able to view and edit their own Status message, as well as view other's status message. In order for employees to set the status message for other employees, Directory Status permissions must be set by a System Administrator.


Using the left pane Main Menu » Administration, click on: Employees » Permissions


  • Under Permission Settings, click the + (plus) sign to the far left of Employees. Click on the Modify Permissions tab.
  •  

  • Then under Miscellaneous, click on the + (plus) sign to the far left of Directory Status to expand that section. Check the Edit box next to For all employees to allow all employees to edit all statuses.

  • Once your changes are made, be sure to click on Save Tab.
  • Now head over to the Directory to view and edit status messages.


Using the left pane Main Menu under Tools, click on: Directory


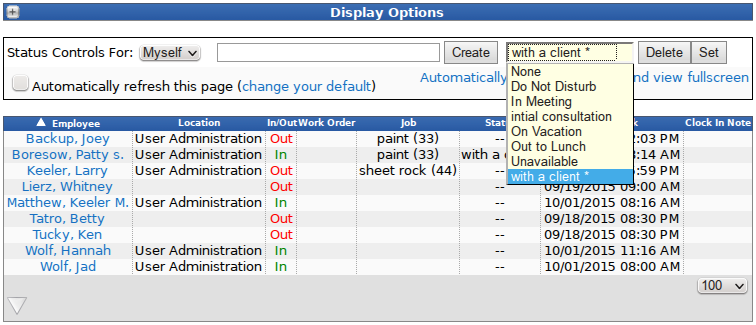
Using a Default Status Message:


  1. Click on the drop-down button next to (or under) Set Controls For to choose the employee name.

  2. Click on the far right drop down menu to choose from the default status messages.
  • Do Not Disturb
  • In Meeting
  • On Vacation
  • Out to Lunch
  • Unavailable


Adding a Custom Status Message:


  • Select an employee from the drop down list next to (or under) Set Controls For.
    NOTE: Employees without admin permissions will only have the option to select "Myself".
  • Type in your custom status message, then click the Create button.

  • NOTE: Custom status messages are saved for each employee and can be re-used at any time.
  • To use a previsously created custom message, find it in the far right hand drop down menu and click the Set button.

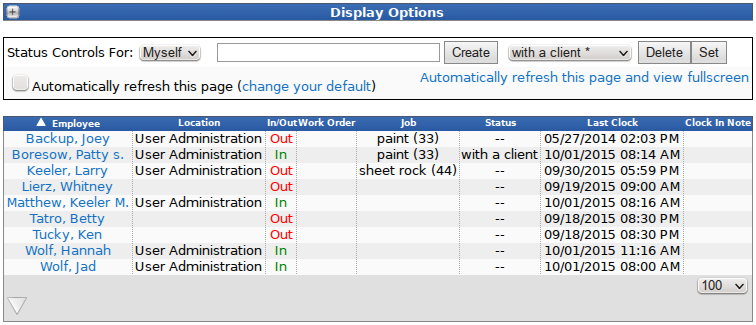
  • NOTE: In the image shown above, employee Patty created and set her message status to read "with a client". This message will remain on the Directory/Employee Status screen unless or until Patty, her manager, or someone else with permission to, changes it.


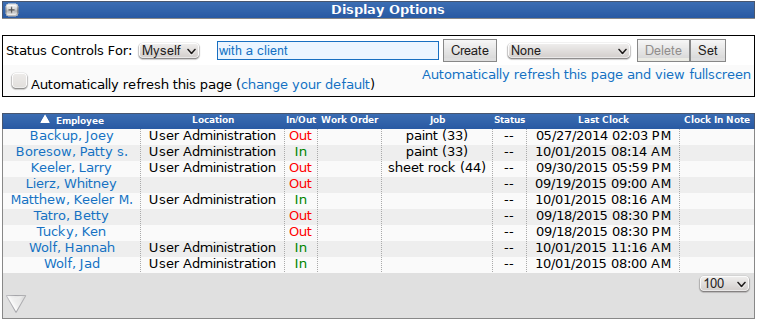
Removing a Custom Status Message:


  • To delete a custom status message from the list, first select that status message from the drop down menu.
  • Then click the Delete button.
TIP: If you were wanting to keep the status as a future option, but clear it from the employees current status... Select "None" from the drop down list and click the "Set" button.
NOTE: Payroll Administrators can also add, change or remove status messages from the default list by using Global Status Controls  since they have Global Directory Status permissions. Those with these permissions can also apply them to other employees/admins.


See Also:
Directory - Employee Status (2.2, 2.3, 2.4, 2.5, 3.0, 3.1, 3.2)
Directory (2.2, 2.3, 2.4, 2.5, 3.0, 3.1, 3.2)
Using Global Status Messages (2.2, 2.3, 2.4, 2.5, 3.0, 3.1, 3.2)

©2004-2023 TimeIPS, Inc. All Rights Reserved - TimeIPS and the TimeIPS logo are registered trademarks of TimeIPS, Inc.
"Intelligent Personnel System" "Run your Business. We'll watch the clock." are trademarks of TimeIPS, Inc.
TimeIPS is protected by one or more patents. Patent No. US 7,114.684 B2.